Silhouette Tutorial by Brigit: Polygon Tool

Hi everyone, Brigit here, Today I have a tutorial using the polygon tool to create cutouts from the acorn box to make this luminary.  It’s a fun and easy project that looks so pretty when done!

Import the acorn and resize it to 15.5″w with aspect ratio checked. Now ungroup, you can move the other pieces off the mat, (the hole on the lid ungroups also so make sure you group it together again with the lid before you move.)

On the first panel zoom in close, select the Polygon tool, click in one corner then the second, third, forth and back to the first to form your shape like I did here in blue, don’t worry about being precise.

If you double click on the shape you will see 4 dots in the corners, click on them and you can easily adjust the lines if need be.

Now select the shape you just created, go to the offset window and select internal offset, I used a .250 offset distance.  Delete your original shape, you just want the internal one.

Continue and repeat the same steps with the next 5 panels.  After you finish the last one, select the whole acorn including the shapes you just made, go to the modify window and select Make, you can do this after each one if you don’t want to worry about moving it but I just use the undo if that happens.  This is how it looks filled.

With the knife tool I cut leaving just enough to folder over at the top and some off the side flap, you don’t have to be exact, leave more you can trim with a scissor if you have too.  Tip, when I was cutting the flaps after the third one from the left I lost one of the bottom lines, so I ctrl z (undo) selected the whole shape again, and used make a compound path.  I could continue cutting the other flaps without losing the cut line.

The last thing you need to do is make the vellum pieces so use the polygon tool again and draw inside the score marks on one of the panels, you’ll need 6 of them.

Here’s how the body of the luminary looks with the vellum pieces.  Make sure you glue the vellum on first and then fold over the top flaps before you assemble.  Follow Lori’s video here for the instructions on putting the rest of the acorn together.

To decorate I used the flowers from the 3D Flower Set 5 and the leaf that came with the acorn.  I embossed the vellum and rubbed a little distress ink over. Paper is from Echo Park’s Reflections Fall Collection designed by Lori, it’s so beautiful, love the stickers and chipboard pieces too!  Finished with some Thanksgiving Orange Truffle Trendy Twine, a cute little button and sentiment from the paper collection.

Hope you enjoyed this tutorial, you can visit me at http://www.brigitsscraps.com

Project Life Storage Box by Brigit and Mini Album by Christine

Imagine my surprise when I opened my email to find both designers for today used not only the same paper collection, but the same paper. Both of these stunning projects use Lori’s newest paper line Reflections by Echo Park. Great job ladies. First up is Brigit.

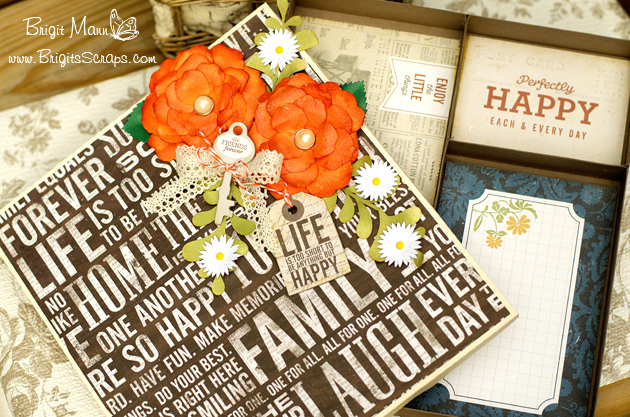
Hi everyone, I have a wonderful project life box from Lori’s shop that stores 4 x 6 photos and 3 x 4 life cards.  This box would make a wonderful gift or use it yourself to keep your project life cards nicely organized.

The pretty paper is from Echo Park’s Reflections designed by Lori.  This is such a gorgeous collection with rich beautiful colors, it’s perfect for Project Life layouts.

The inside of the box has divider sections, I used two 4 x 6 and two 3 x 4 but it fits three 3 x 4 and one 4 x 6 also, I can’t wait to fill this up.

These roses, also from Lori’s shop go together so beautifully, they are all individual petals, I colored mine with distress ink and some glimmer mist.  For the little white flowers I used one from the 5 layering flowers set, duplicating one layer.  The lighter green leaves you can find at the Silhouette online Store and the darker green come with the roses.  The key and tag are from the Reflections 6 x 12  chipboard accents and the pearls are in the decorative brads set that match.  I also used some crochet ribbon and Orangesicle Trendy Twine.

Thanks for stopping by, I hope you’ve enjoyed my project, you can visit me at http://www.brigitsscraps.com.

Thanks Brigit, next we have this adorable mini album by Christine.

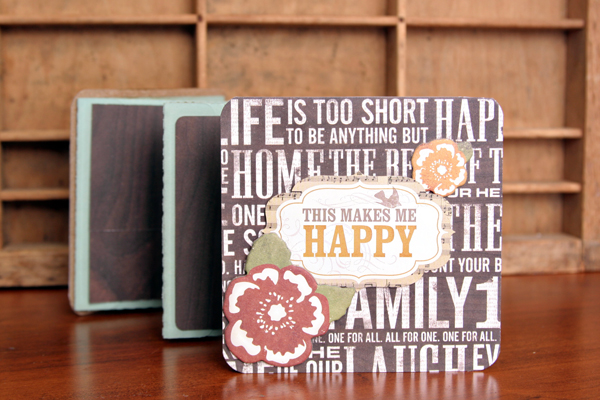
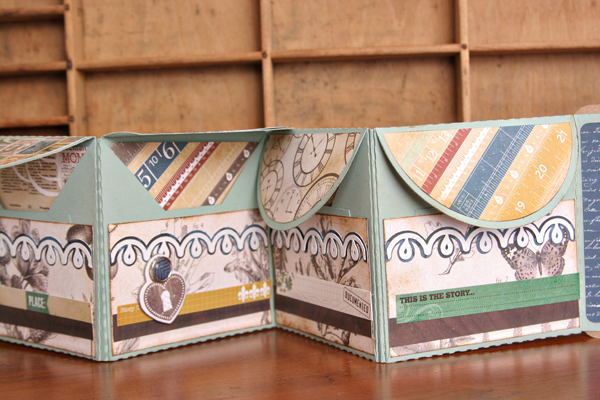
One of the first classes I ever taught in scrapbooking was a mini album class. We used paper bags.  Remember those?  Well, whatever materials I use, mini books always hold a special place in my heart.  They’re just so little and cute.  So I am always thrilled when Lori puts another mini album file in the store. The mini album I am showing you today is called the 4×4 Accordion Envelope Mini Album.

Everything you need is right there in the file.  She has even duplicated some of the pieces so you don’t have to.  I got a little stumped on how to put it together, but no worries there.  I knew that I just had to go to her YouTube channel and watch her assembly video.  I love that she makes videos for all of her files that are “some assembly required”!

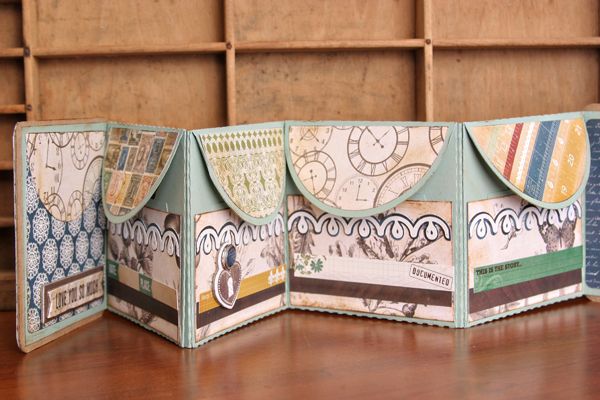
Here is the inside of the mini album.  I love the many places to insert pictures or notes.  I decorate some of the envelopes with patterned paper from Lori’s new Reflections paper collection and added a fun die cut border as well, called 2 borders.

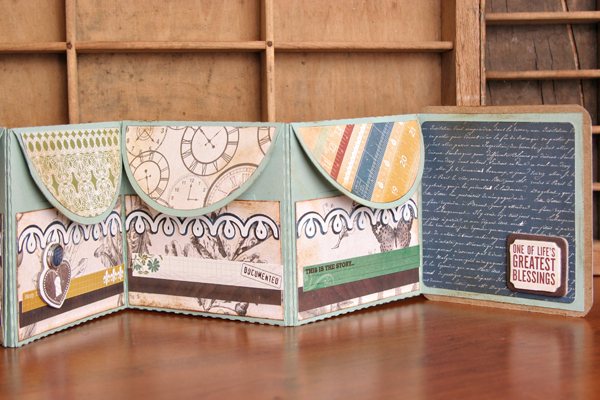
Another shot of the last couple of envelopes and the end page.  The outside cover, both front and back are attached to the front and end page and are made up of chipboard and patterned paper.  It really gives the mini book a sturdy base and feel.

A closeup of an envelope open revealing a journaling or photo card.
There are so many ways to complete this album.  If you think that this is too short in pages, just remember, all you need to do is cut more pages and you can make it as long as you like.
Lori Whitlock Supplies:
3 borders Silhouette store Id# 11978
Reflections Paper and Embellishment Collection by Lori Whitlock for Echo Park

Back To School Gifts by Brigit and Corri

Check out these beauties by Brigit and Corri. They have both shared some great back to school gifts with us. I was in love and kind of wished my kids were still in Elementary.
Hi everyone!  School is right around the corner, so I thought I’d make a cute back to school gift set.


Just a little something to brighten a child’s first day of school or maybe some treats for the teacher.

I used Lori’s A2 Tab Card and decorated it with the books from the Back to School Icons set.  For the September, which is one of Lori’s files too from the September Art set in the Silhouette Online Store, I did a print n cut.  I used a couple of digital elements from Echo Park’s School Days Mini Theme collection.

The cute bag comes as a set of two that fits on a 12 x 12 piece of paper.  You can fill it with some treats or smaller school supplies like paper clips, some post-it notes, etc.  I also used some files from the Back to School Icons and September Art sets.

Check out this beautiful set by Corri.

 Hi everyone!  I have an adorable gift for the teacher that I made using Lori Whitlock’s Stationary Box.  This would be perfect  on the first day of school.  It’s full of tags and note cards…great for labeling items in the classroom and communicating with parents.

I decorated the outside of the box with Lori’s Graduation Owl (without the cap).

Here a picture of the box open.  I included a few tags, note cards and envelopes. I added some buttons and wooden veneer speech bubbles.

Last but not least we would like to share with you our Cameo winner.  Congrats goes out to Kris S who has won herself my favorite tool of all time, a Silhouette Cameo. Please contact Lori at lori@loriwhitlock.com with your snail mail address so we can send this out to you! Thank you to ALL of you that entered! We wish we had one for each of you as we love ALL of our dedicated readers.  

~ Lori and Lisa 

Silhouette Tutorial Filling Shapes with Digital Prints by Brigit

Hi everyone Brigit here with another SSDE Tutorial.  I love to fill my shapes with digital paper and then do a print n cut with my Silhouette Cameo.  It does such an awesome job cutting out the pattern filled shapes as you can see in the card below.

For this project I used one of the cards from the Christmas Card Set 2 and Lori’s digital paper collection Sweet Life.  I only used the card and the two front layers, you can delete the other pieces.

If you need help with ungrouping and making compound paths check out my tutorial here.

I do not import my digital paper into SSDE, I have it all organized by designer in a folder on my computer.  You can see in the photo how I have the folder opened onthe right-hand side next to my program.

I just dragged the pattern paper from the folder and dropped it into the shape.

Notice on the card the owl design is to the left and cutoff.

Select the card, go to the Fill Pattern and Advanced Options, click on the Pan Pattern, a circle with crosshairs will appear in the middle of the card, click on it and move the paper around.

I wanted my owl on the opposite side with the white swirls to the right so I clicked on the Horizontally under the Mirror Pattern.

I line up the card fronts so when panning I can see exactly where I’d like the owl to be.  I used the Scale Pattern and enlarged the paper to 110% so the edge of the paper wouldn’t show.  The scale pattern is great to make your pattern paper designs larger or smaller I use it all the time.

Lori has a cute owl and tree cut file that matches this collection in the owls set, I used the eyedropper under the Fill Color and selected colors from the collection so everything would match or you can fill them also with the digital paper.  The sentiment is an element from the Sweet Life collection, to cut that out you need to first do a trace, that will be covered in another tutorial.

All my pieces fit on one 12″ x 12″ piece of cardstock, registration is checked under the Registration Marks and I make sure all my cuts are selected under the Cut Style.  Now I’m ready to do a print n cut.

Other Supplies Used: AC White Textured Cardstock, In the Navy Trendy Twine, Brads

Thanks for stopping by, I hope this tutorial has helped!!  You can visit me at http://www.brigitsscraps.com.

Cookie Box by Christine and Card/Bag Set by Brigit

Happy Monday! Are you ready for some beautiful projects? First we have Christine sharing the Cookie Stacker Box.

Today I have a cute little treat box to share with you.  This is a new file in Lori’s store this month, called the Cookie Stacker box, and I can see this filled with cookies, candies, or even a small toy.  I love the “see through window” in the front of the box.  I put some thin clear plastic over the opening but you could also delete that part and have a box that you can’t see into for those surprise packages!
I added a little tag onto my gift box.  I just cut a tag shape from this file, resized it, and added a few sticker embellishment from the Here & Now paper collection by Lori Whitlock for Echo Park.

The top has premade mats for the for the scalloped edges and the upper portion so everything you need to cut is included in the file.  I love the precut holes for a fancy ribbon to top your package.
I can see using this precious box for giving gifts to neighbors, birthday gifts, holiday treats and everything in between!
Lori Whitlock Supplies:
Here & Now paper and cardstock sticker collection by Lori Whitlock for Echo Park
Brigit has this adorable grouping to share with us today.
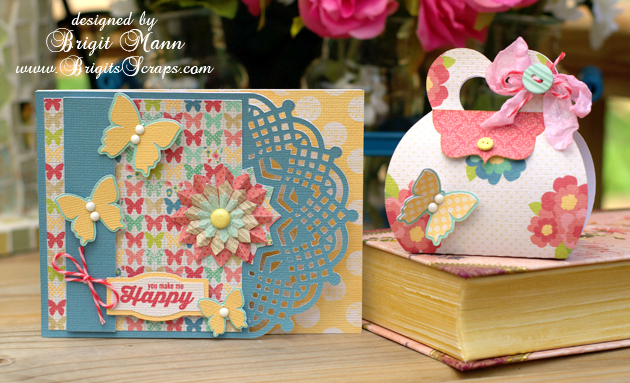
Lori has so many beautiful cards in her store and I love pairing them with one of the 3d bags or boxes to create a wonderful gift set.

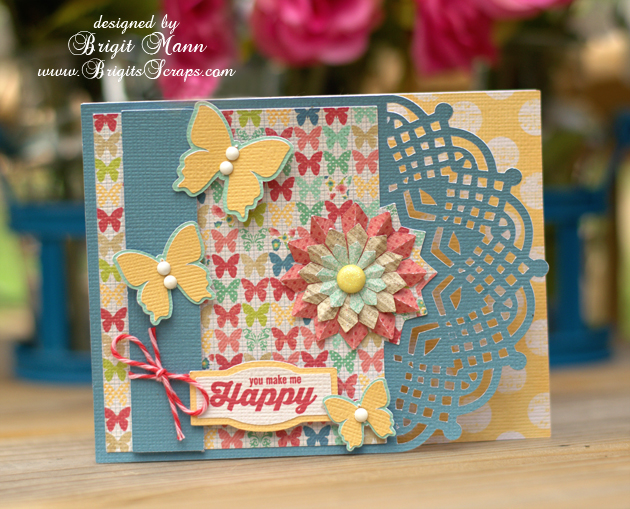
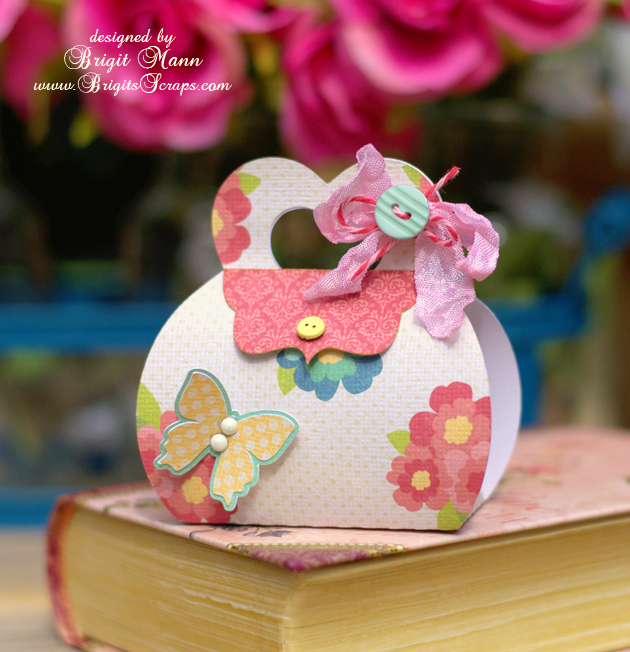
The card is from the A2 Card Base Set 2 which has 4 beautiful card designs included.  Fill the cute little purse with some candies or resize it to fit some makeup or a gift card, so many possibilities.

The design of this card is so beautiful, I love that lace edge.  Definitely want to use it for a Christmas card.

All the embellishments are from Lori’s store, except for the label which is from the Silhouette Online Store.  The flower is the 3D Flower 5, the butterflies are from the Layered Shapes set and the sentiment comes in the You Make Me Laugh set.

For the flap of the purse I used one of the labels that came in the same set I used on the card, just cut it in half and added the cute little button brad.  The beautiful digital paper I used on both projects is from Echo Park’s Beautiful Life collection.

Thanks for stopping by, hope you enjoyed my project,  you can visit me at http://www.brigitsscraps.com