
The flag on the box is from the patriotic icon set, I resized both of these to make a smaller treat box. The ungrouped box measures 10.170w x 5.840h and the flag pieces ungrouped measures, stars – 1.580w x 1.060, stripes – 3.015w x 1.905h and the flag box – 3.015w x 1.905h.
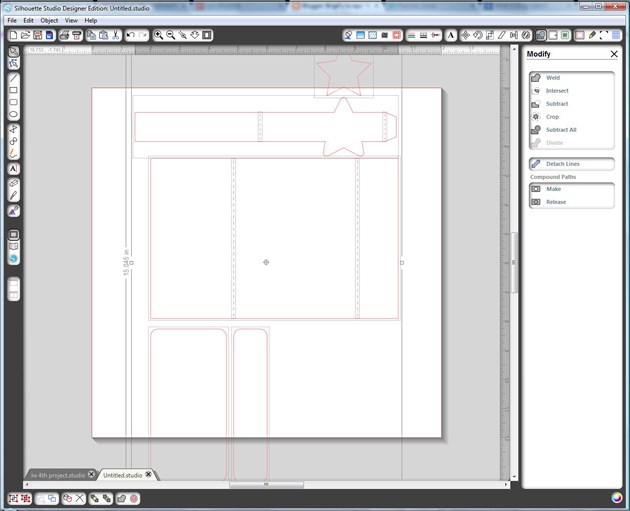
When I added the card the pieces are bigger than the mat, so I select all and ungroup. Notice the score lines, they are ungrouped also, so I click and drag around the card and score lines to select, go to the modify window and select make compound path (or group), you can also right click and select make compound path. You are going to do the same thing to the belly band so it’s easier to have the modify window open so you can select make compound path or group again.
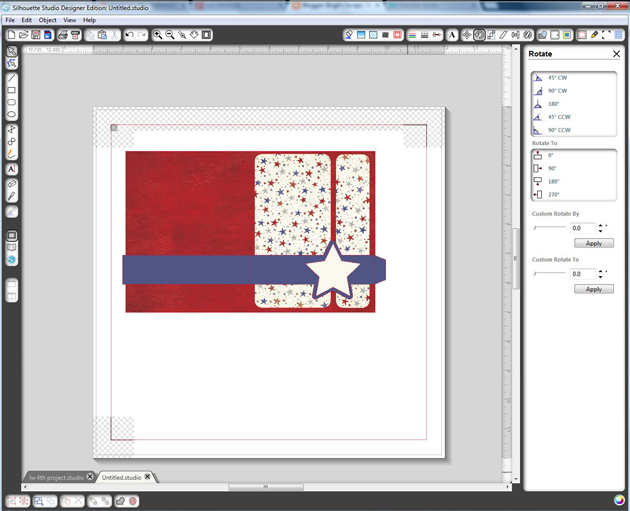
I like to fill with the color or pattern paper I’m going to use and arrange my project to see how it will look.

Here is a picture of the flag, I ungrouped but it also ungrouped the stars. If you go to move it and this happens just go to edit and undo move, then click and drag and select over the stars and box and make a compound path.
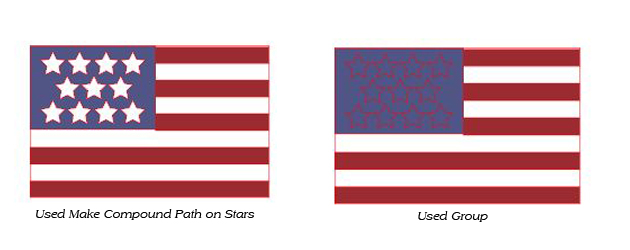
Here’s a picture of the make compound path and group, they both will cut the stars out, but I like to see exactly how it will look with the make compound path.
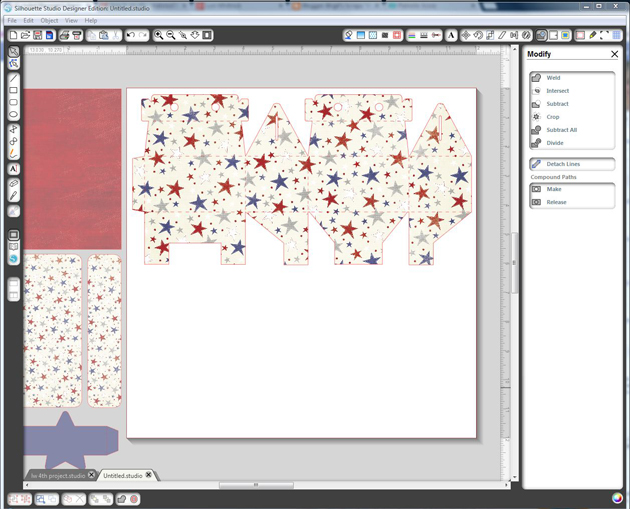
There are two boxes with this file, so I ungrouped and deleted the other box then resized, (I also did another ungroup and make compound path on this box so I would see the lines when resized and fit the flag.)
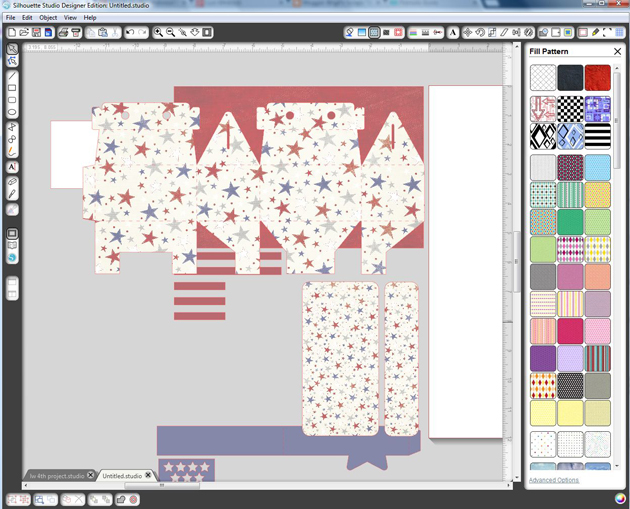
I group my pieces together by color or pattern paper. Keeping your groups to the left side, moving to the mat to cut, then to the right side helps you keep track of what’s been cut.

For this project though I did a print-n- cut on two 12 x 12 pieces of white textured cardstock, (American Crafts 80lb), I arranged and grouped the pieces together. I then selected my group and go to the line color window and select none. Now print-n- cut. Next, move those shapes to the right and place the next group on your mat and finish cutting those out.
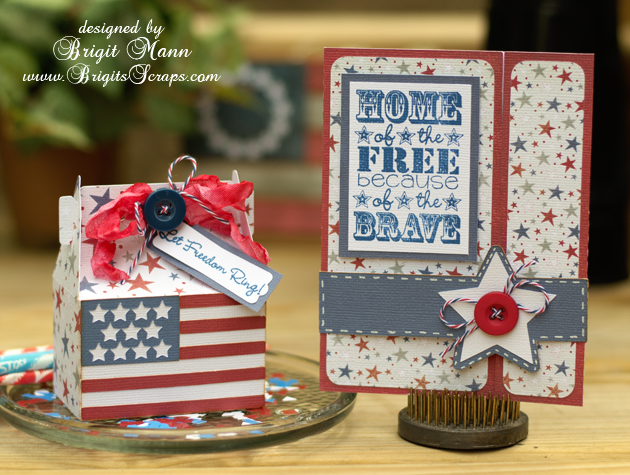
I used Echo Park’s 4th of July Mini Theme digital paper, Stars & Stripes Trendy Twine and Jaded Blossom’s Celebrate America stamp set.
Thanks for stopping by, I hope these tips help, I have a couple more project photos on my blog.
Hopefully this is a helpful tutorial. Thank you for dropping by!
Thank you for the tutorial. When you print and cut, are you printing with a large format printer or did you print on 8.5″x11″? I have had trouble in the past when I change my paper size for printing but try to go back to cutting the 12×12.
Thank you!
Super cute projects Brigit. I just recently taught myself to use the compound path feature and I love it! I love how you sized the flag to fit on the side of the box so perfectly! I’ve pinned ya! 🙂
Lisa, I did the same thing until I learned you can NOT change anything, including page size between the printing & cutting phases, or else it will mess up the cut lines.
Tricky projects, I use three documents,
1 – I design the card layout (like Brigit) before I copy the pieces to one of other two pages to cut
2 – Print & Cut (only) pieces using registration marks, sized for my printer,
3- pieces to be cut from patterned paper, grouped for cutting on the 12×12 mat.
Overkill, perhaps, but I get beautiful hybrid cards now! Hope that helps!
Thanks, Brigit, for a great tutorial!
this is so cute I have to make one. where can I find the svg file for the card itself? when I click on the belly band set all I get is the svg for the 2 12×12 boxes.
I just fixed the link for the Belly Band cards, try again. Thanks for letting me know
Thanks everyone and thanks Lisa for fixing the link, sorry about that.
I have a wide format printer but I print both paper sizes out. I have 12 x 12 and a 8.5 x 11 custom settings setup in my printer preferences so I will select my page size and then go to print, preferences and select whichever size I am printing too. I usually do my print n cuts first then unselect the registration marks and do my regular cuts, but you can do what Mizdenise does also.
love this 4th stuff i will pining it and shareing in my 4th july board so other s can see it ty so very i always looking for great things to share with others happy tgif may god blessu all every where love darla
Never used a Silhoutte before – would love to win one so I can say I have used one!
Never used a silhoutte before, hope to win!
Thanks for the tutorial – I am going to try this out because I am always losing the score lines when I ungroup – I am new to Silhouette and doing my best to LEARN! Thank you