
Hi everyone! Corri today with a quick assembly tutorial for the center box in the Valentine Explosion Box (SVG, Silhouette).
The box of the explosion box is pretty straight forward.
Start by adding the covering panels to the inside and outside of the box.
Fold the pockets into shape and glue to the inside of the box bottom. Same for the little envelopes.
The cover is one piece, add the panels and fold into shape and glue.
The trickiest part is assembling the little heart box that glues to the middle. Here are the pieces that form the center heart-shaped box.

Fold along the perforations and glue the two narrow strips together end to end. Follow the same steps and glue the wide strips end to end.

After the glue has dried, apply glue to the tab at the end of each strip and from a loop. The wide loop is for the box bottom and the narrow loop is the box lid.

Next, form the heart shape, apply glue to the inside tabs. Insert one and glue one of the die cut hearts on the interior of the lid and box. I find it easier to start in the “dip” of the heart. The second heart shape is then glued on top to cover the tabs. It also helps to allow some time for the glue to dry as you move around the curves. Note, the two hearts for the lid are slightly larger than the hearts for the bottom.

Finally, glue the heart box into the center of the explosion box.
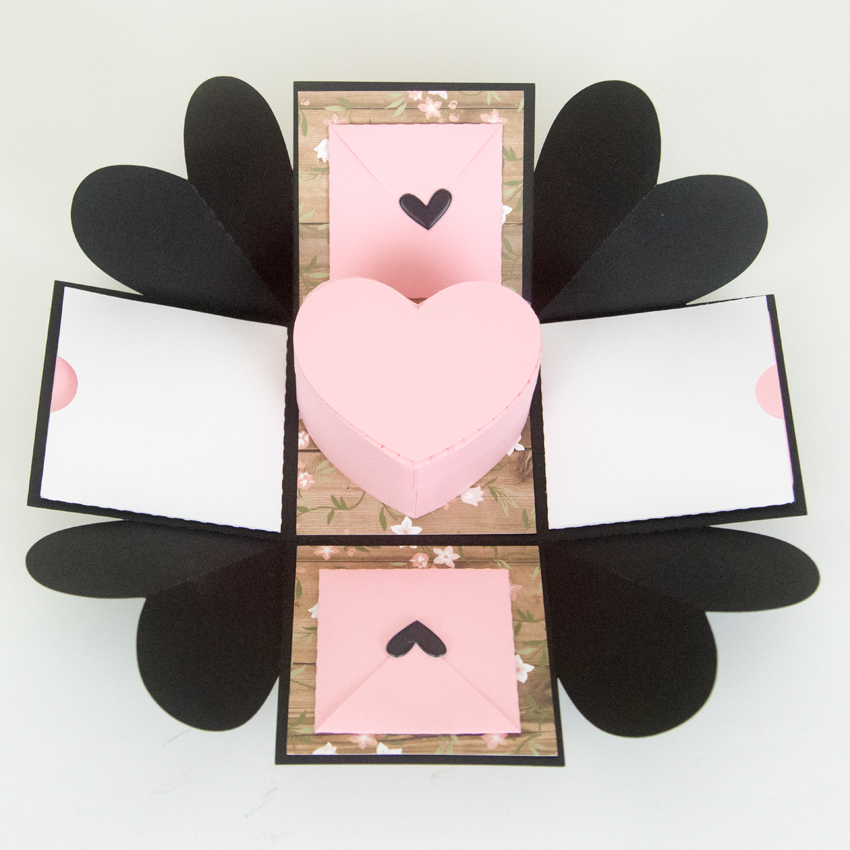
This little box is perfect for Valentine’s Day. You can write little notes in the pockets and add a treat to the center box! I used paper from the Our Wedding Collection from Echo Park. I love the soft pink mixed with the woodgrain. And don’t forget, all SVGs, Fonts, Pattern Fills and Commercial Licenses are 30% off through Saturday when you use code FEB2021 at checkout!

Thanks so much for stopping by!
Corri