
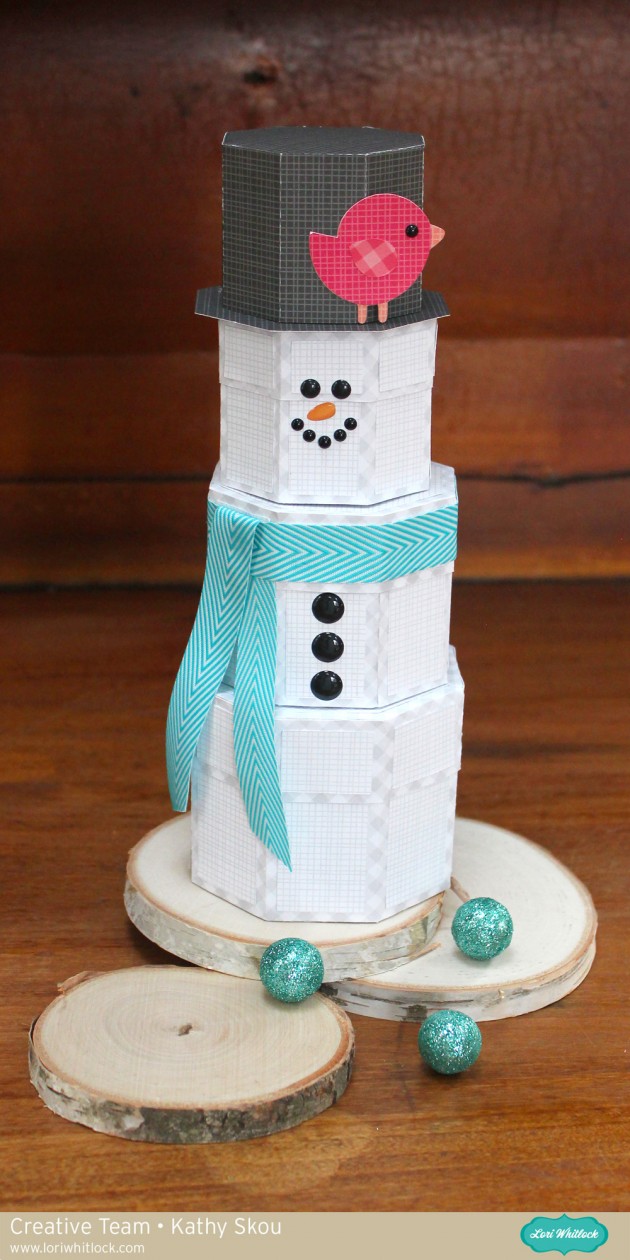
Hi Everyone, and Happy New Year! I don’t know about where you are but we are covered with snow here in the Boston Area! I’m not a fan of the cold, but I do love snowmen! I decided to make my own little snowman gift box using Lori’s new Polygon Box – 8 Sides. (here in the Silhouette store).

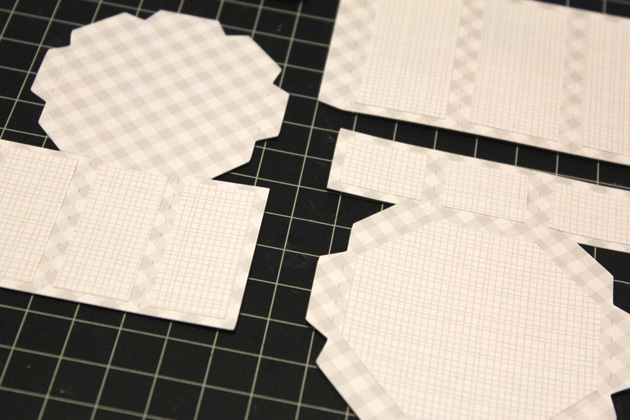
This little collection of boxes is the perfect way to package up a treat or small gifts! It was really easy to put together. I started by loading the box into Silhouette. I then copied the box two more times to make up the 3 segments of the snowman’s body. I resized each box so that they were graduated in size. Widths are 11.75, 10.25 and 8.75. Be sure to resize proportionately.

I cut the boxes, and glued the decorative panels to each piece before I set to assembling them.

These boxes are very easy to assemble. To start, I folded the score lines on the tabs and then along the side panel. Then you simply glue each section of the side to it’s corresponding tab to form the base.

To finish, just glue the remaining side section to both the tab on the side and the tab on the bottom piece.
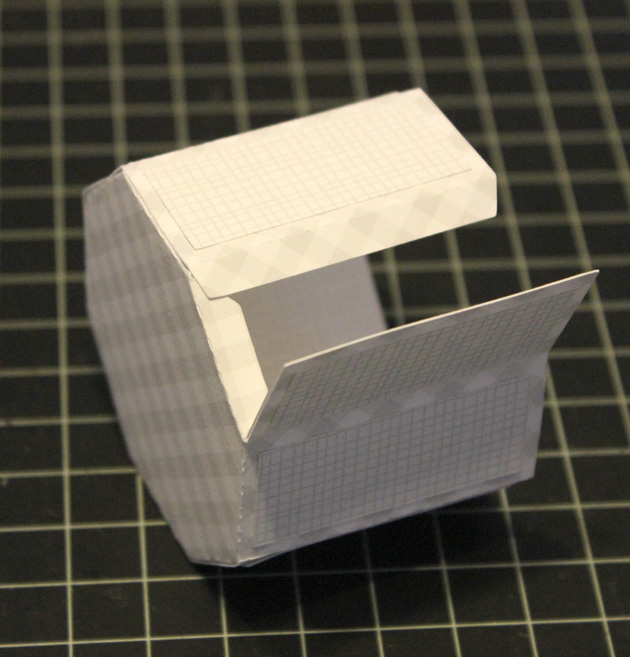
The top and the bottom of the box are assembled in the same manner. Once I had all three boxes assembled, I decided to make a hat for the snowman. I sized the bottom half of the box as shown below and then made a “brim” for the hat by re-sizing one of the decorative cover panels.

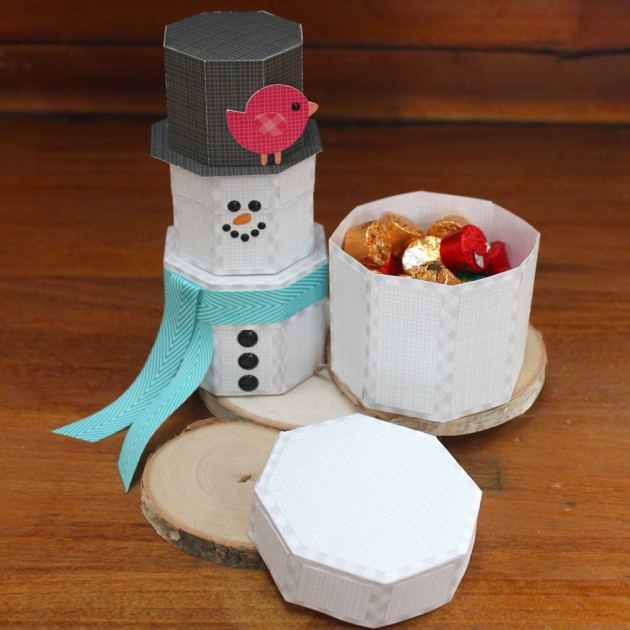
The rest is as easy as building a snowman! I stacked the boxes and added a face & buttons using enamel dots. The scarf is a piece of ribbon glued to the sides of the cover on the middle box. I used a removable glue dot to hold the pieces together. And of course I had to add the cute little birdie, (SVG here in Lori’s Shop) which is this week’s free file in the Lori Whitlock SVG Shop!
And each box opens to reveal a treat inside!
That’s it for me today, thanks for stopping by to peek!

Love this! Thanks for the inspiration!