
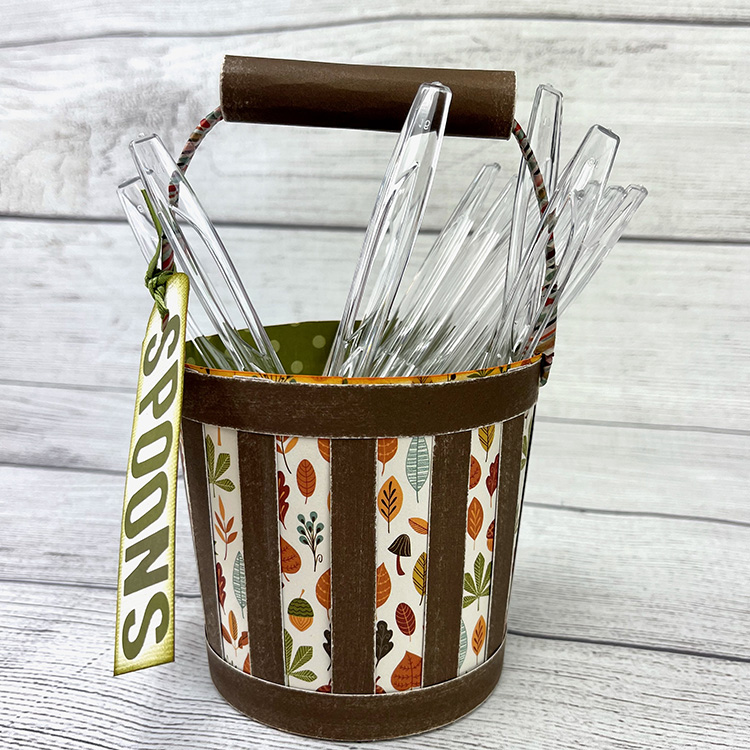
Hi there paper crafting friends! It’s Michelle Starcher, aka the Bookish Designer, hopping onto the blog to walk you through the steps to create Lori’s Vintage Bucket (SVG, Silhouette). I was looking for something festive that I could use to hold utensils for Thanksgiving dinner, and I came across the Vintage Bucket. This file is the perfect way to set out plastic utensils for any party or event.

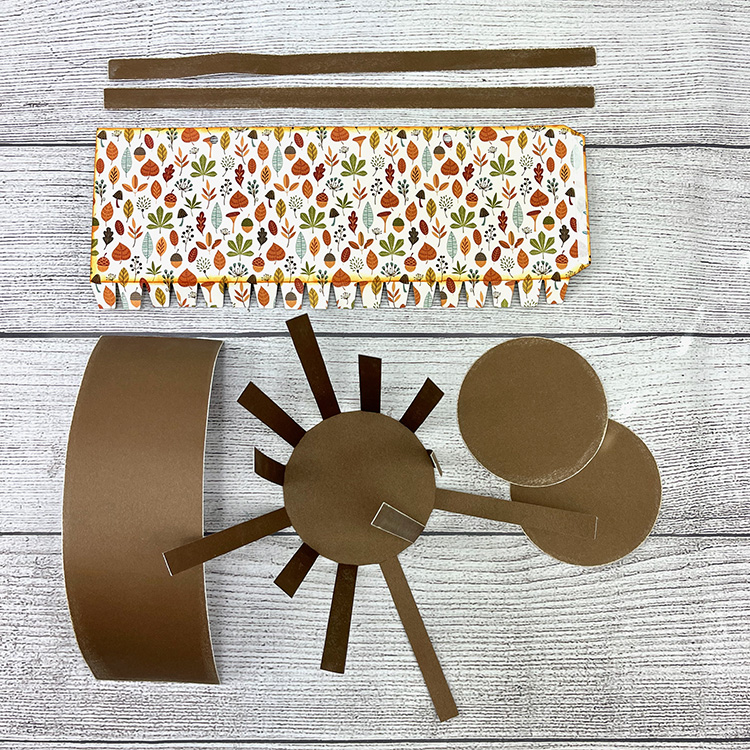
In this photo tutorial, I will break down the steps to create the Vintage Bucket. In the cut files, you will find everything you need to complete the Vintage Bucket, expect for the floral wire or pipe cleaner used for the handle. After cutting all of the pieces, I sanded the edges of my dark brown cardstock and inked the edges of my pattern paper to create a more vintage look. In addition, I folded down the tabs on pattern paper and rolled it along the edge of my desk to give a little bit of curve to my paper. I did the same thing to the long brown rectangle that will become the bucket handle.
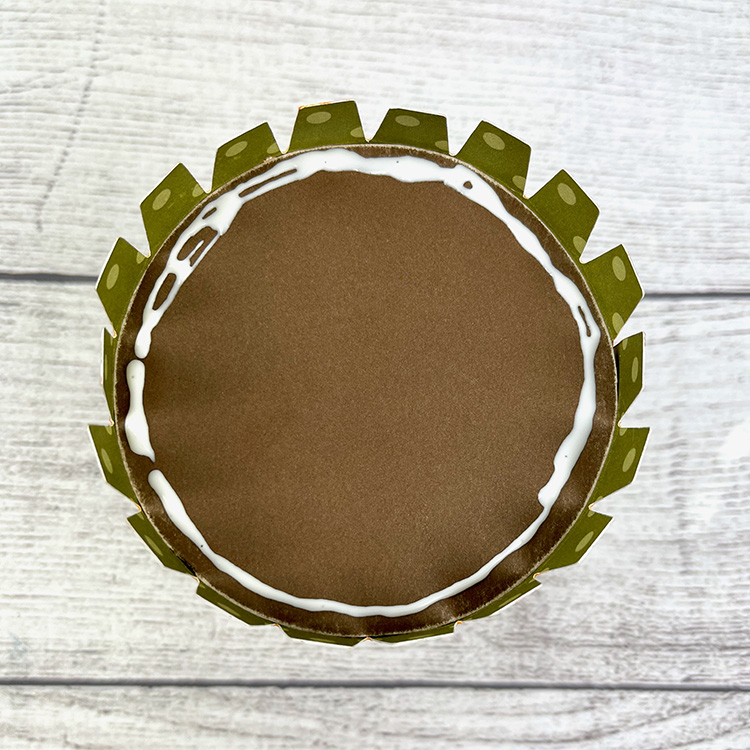
Next, I added adhesive to the tab of the “bucket” and attached it to the other side. Be careful to line up the two sides as perfectly as you can to create the cylinder shape. Then, place one of the circles inside the bottom of the cylinder. Flip the bucket over, add glue along the edge of the dark circle, and fold down the little tabs. Once you have done that, add more glue and place the second brown circle on top to cover the little tabs.
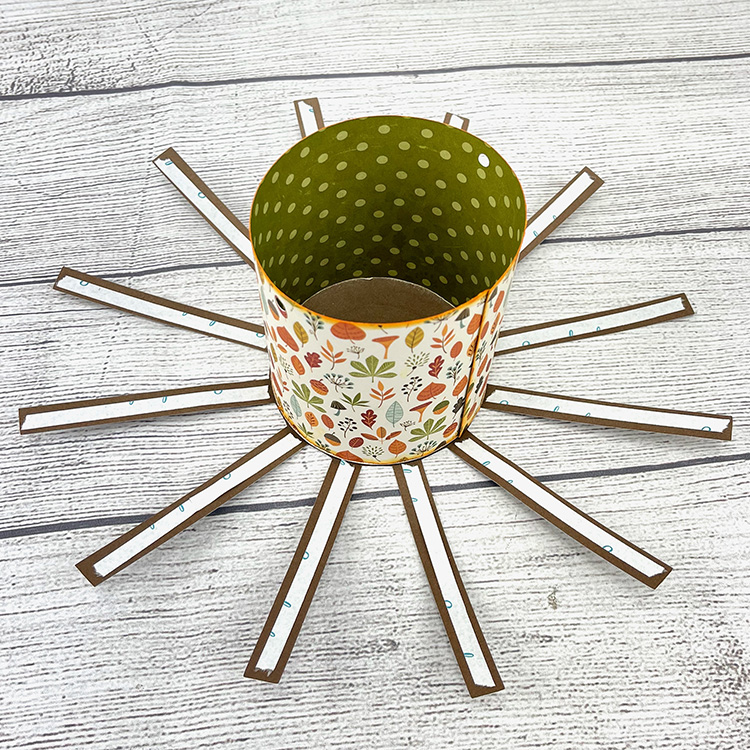
Once you have assembled your bucket, you will adhere it to the “sun” shape. I used glue to adhere the bucket to the “sun” shape and adhesive tape to adhere the “sun’s rays” to the bucket. I lined up one of the “sun’s rays” to cover the seam in the bucket. This caused the holes for my handle to be covered up, but I was able to use a hole punch to create new ones when I was ready to add the handle.
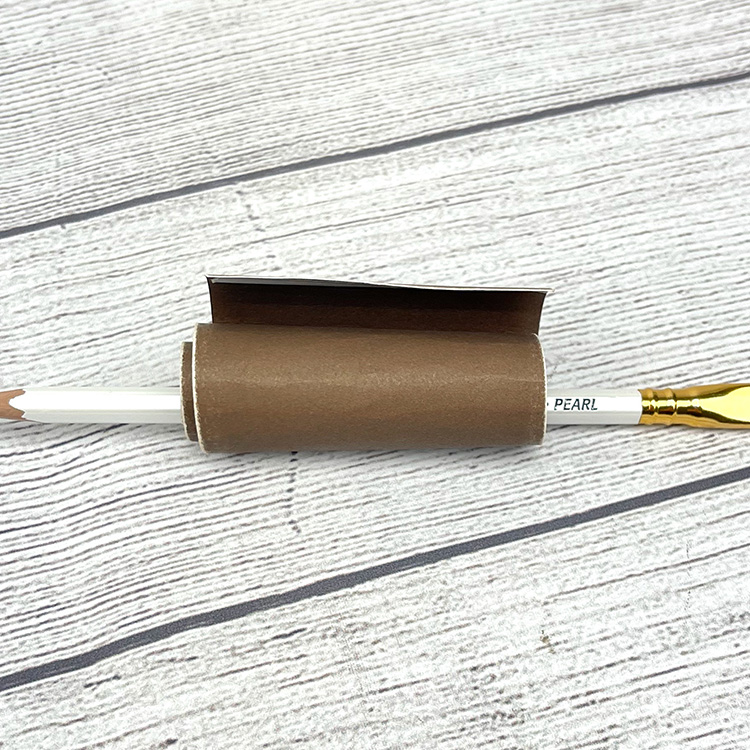
Next, I added the rectangle strips to the top and bottom of my bucket. I added adhesive tape to both ends of the rectangle and used a pencil to help me role the rectangle piece into a tube shape. To finish the tube shape, I took the pencil out and held it in between my thumb and index finger to tighten the tube. I used adhesive tape to close the tube. For the handle, I used washi tape to cover the floral wire and added add the paper tube to the top to form the handle for the bucket. Insert one end of the floral wire into one of the holes in the bucket and pinch to close. Repeat on the other side as well.
Once my bucket was finished, I made a quick tag and used alphabet stickers to spell out “Spoons”. I inked the edges and attached the tag to the bucket using ribbon. I am planning to make two more Vintage Buckets to hold my forks and knives as well.
If you are interested in a more detailed video tutorial on how to put together the Vintage Bucket, Lori has one available on YouTube.
Until next time,
Michelle
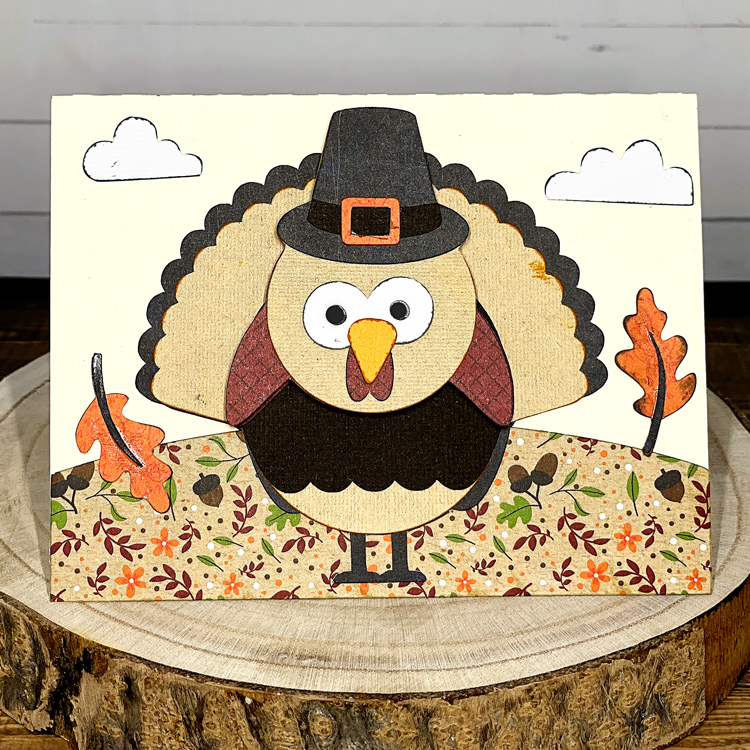

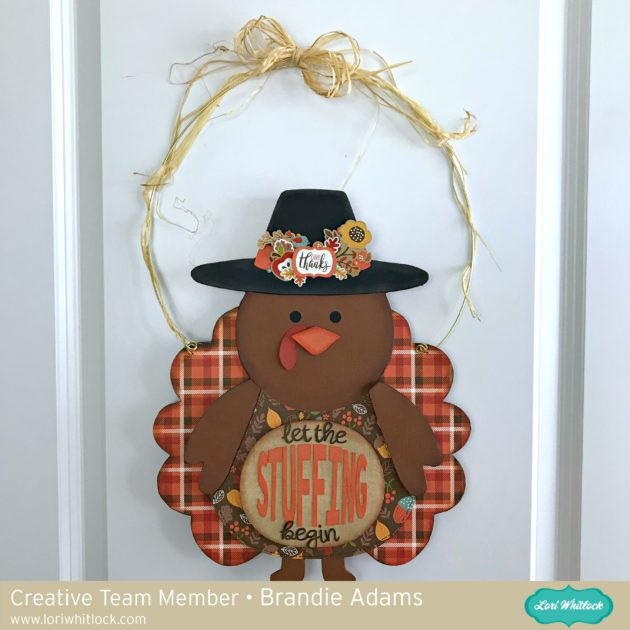
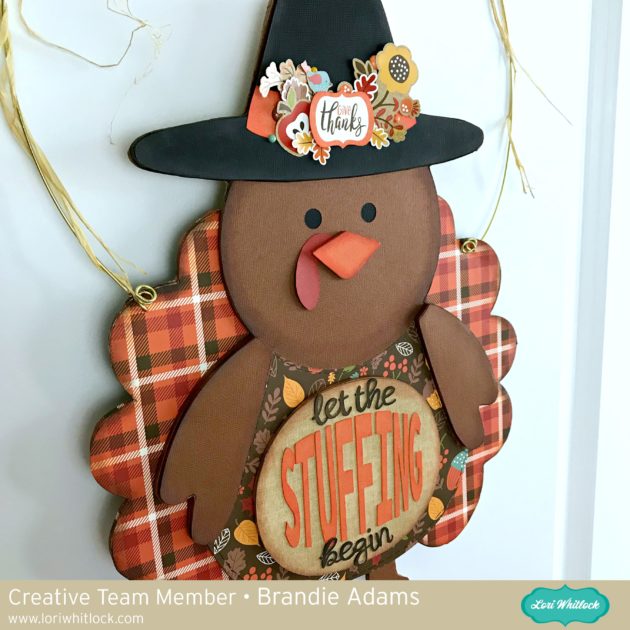 For the dimension I cut the main body shape, hat, beak, arms, and oval by hand out of cardboard and covered with paper.
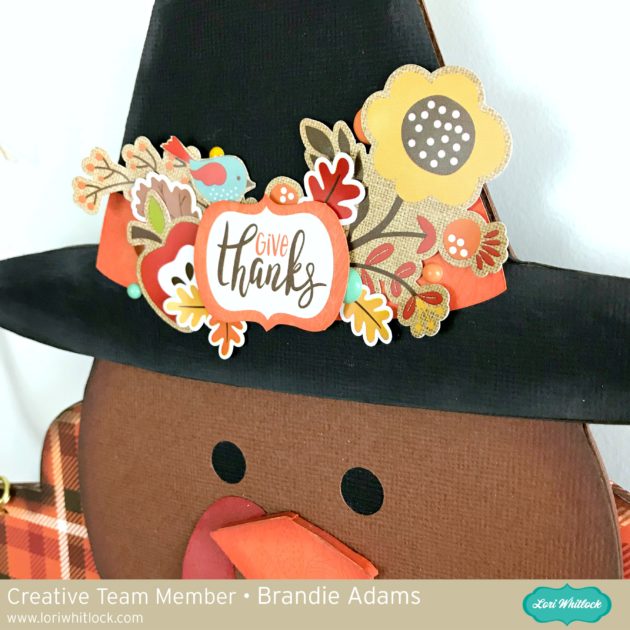 I cut the saying three times out of cardstock then glued them together.
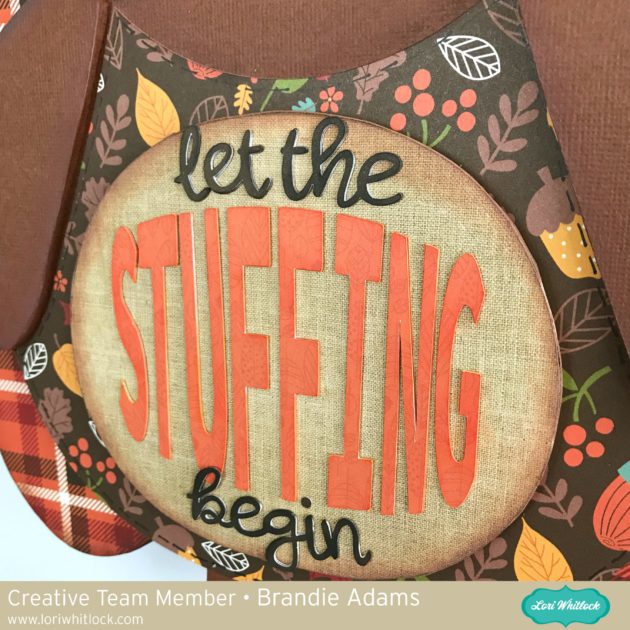
 That’s it for me today. I hope you all have a safe and Happy Thanksgiving!