K-Cup Carrier Assembly Tutorial with Kathy

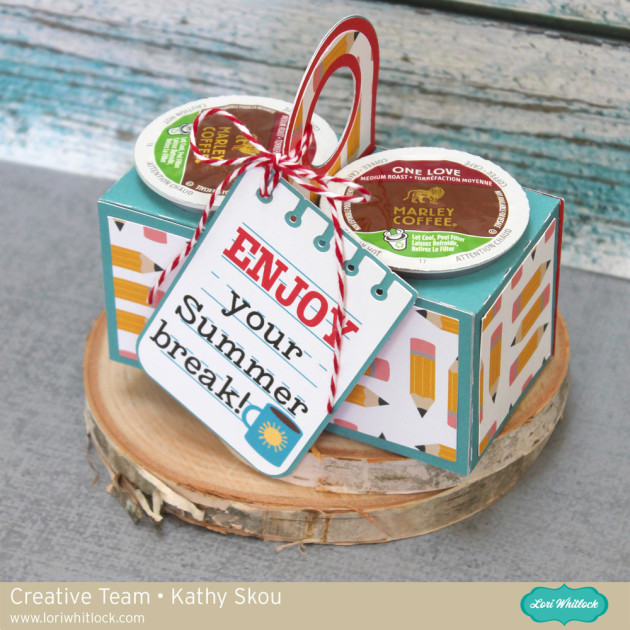
Hi Everyone! It’s Kathy today with an assembly tutorial for Lori’s new K-Cup Carriers.  It’s that time of year again when you need lots of little thank you gifts for teachers, baby sitters, coaches, dance teachers… the list almost seems endless!  Lori’s new K-Cup Carriers make a cute little gift that’s easy to make!  There are two new versions,  The K-Cup Carrier 2 Cups (SVG, Silhouette)  and the K-Cup Carrier 4 Cups (SVG, Silhouette).   I worked with the 2 cup version for the tutorial, but the 4 cup version is assembled in exactly the same manner.

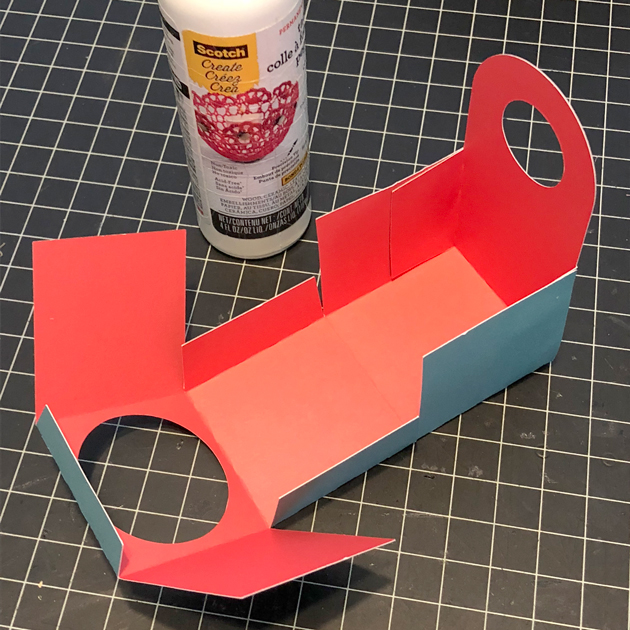
When you upload the file to your cutting software, you will see that there is a note to cut two of each piece in the file.  The pieces I used to assemble can be seen below.  I used papers from Lori’s new Back To School Collection for Echo Park Paper.

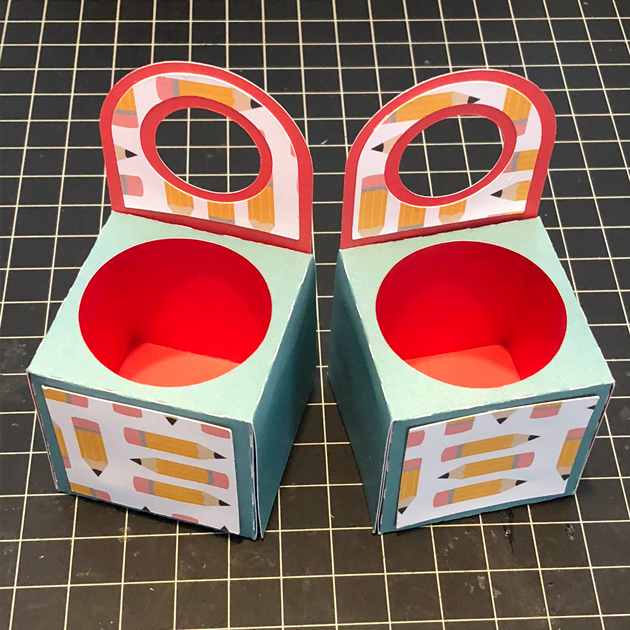
First you need to glue together the two carrier pieces.  Start by folding along the score lines.  Fold up the handle portion of the piece and glue in place, smaller tabs on the inside.  Next bring up the other side, and glue, also with the tabs inside.

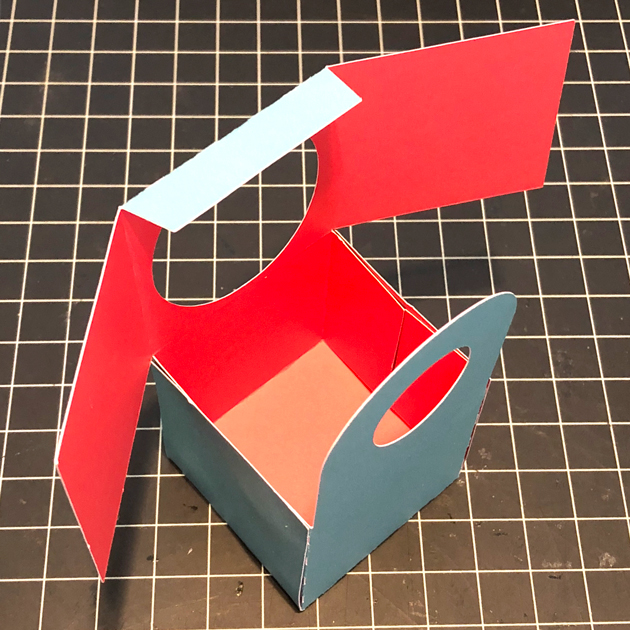
Fold down the remaining piece (the one with the hole) tucking the tab into the box.    Glue the big flaps down to the sides of the box.   Once the two sides are assembled, add the decorative pieces to the “fronts” and handles.

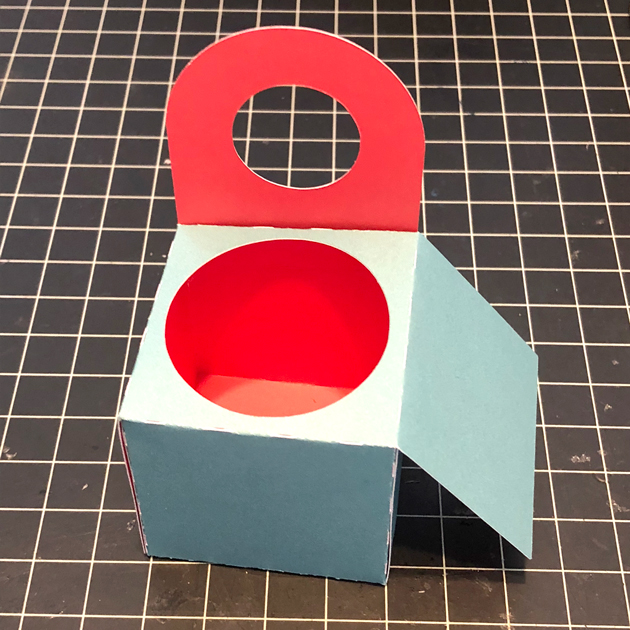
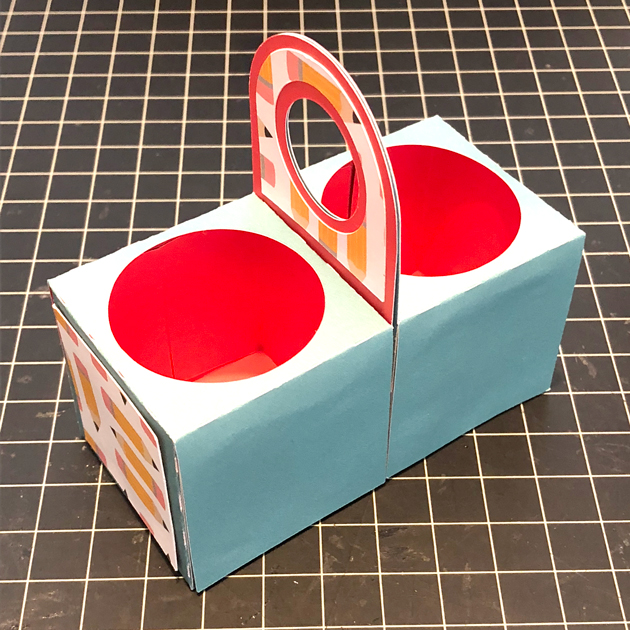
To complete the assembly, glue the two completed holder pieces back to back (or handle to handle).   Glue the remaining decorative panels to the remaining side pieces, then adhere to both sides of the carrier to cover the seams.  Your holder is complete!

I packaged my K-Cups along with a  little print and cut tag I made using the following files:  LW Block Font (SVG, Silhouette); LW Perfect Type Font (SVG, Silhouette); Pop Up Box Card Coffee (for the mug) (SVG, Silhouette); Sun (SVG, Silhouette); Thank You Teacher Tags (for the paper) (SVG, Silhouette)

That’s it for me today, thanks for stopping by to peek!


Digital Inspiration with Ashley

Today at Snap Click Supply I have two items featured for $1 on Wednesday!. That means you can pick up 2 of my digital scrapbooking products at a steal. TODAY ONLY!

My Girl Papers


My Girl Elements


Be sure to go grab these great deals while you can. These offers will end at midnight!  And check out Ashley’s project below, she used on of these papers along with elements from last week’s One Buck Wednesday to create these fabulous hybrid tags!

Happy One Buck Wednesday.  I am popping in to share a project using a One Buck Wednesday file. Bath and Body Works is currently holding their semi-annual sale.  Pair a hand soap or lotion with a cute tag, and you have a great thank you gift.

I used My Girl Paper, and Sweet Life Elements (last week’s One Buck Wednesday Special).  These would be a great gift to have on “hand.”

Thank you Gifts by Natalie and Christine

Hello – man is it cold outside.  I am such hermit when it is cold outside, it’s got to be important for me to head out in the cold.
I also am also always looking for gift to say thanks, so when I saw this cute snowman file at Lori’s shop, I just had to make one.  I used Lori’s Winter Park collection from Echo Park, which is a great collection for those frosty projects.  I also used her Snowman tote file, found here, to make this cute little bag, just perfect filled with some warm hot chocolate and homemade marshmallows.  Then I added a quick tag with ribbon and twine.  This would warm up anyones day! Check out her blog here.


After the excitement of the holidays dies down, it’s time to start thinking about thank you cards.  My family received so many wonderful things from our extended family, I wanted to make a special thank you card for each of them.

Please stop by my blog to get all of the details on exactly how I made each card and envelope.  You will be making up a batch of your own in no time.
Lori Whitlock supplies used: