Butterfly Mini Album Tutorial

Hey friends! Traci here and today, I have a new project for spring. Last Thursday was National Butterfly Day and I realized … I’ve never made a mini album in the shape of a butterfly! So, with the help of two amazing Lori Whitlock cutting files, I created a super cute little butterfly scrapbook. Take a look …


Butterfly Shaped Scrapbook Mini Album Tutorial


I chose the first cut file titled Butterfly Set (Silhouette) because it had the perfect wings, however it didn’t have the separate body piece that I needed. So I found a second file called Shaped Card Butterfly (Silhouette) & used them both!


Butterfly Shaped Scrapbook Mini Album with cut-outs


I loved the delicate patterned cut-outs in the wings and thought it would be pretty backed with some colorful papers. I also added a few gems for sparkle. 

Let’s take a quick look inside, then I’ll walk you through the steps of how I made it …


Butterfly shaped scrapbook album page with hearts, flowers, and a bird


I used the file to cut white card stock pages, then covered them in a mix of 12×12 pattern papers from Bella Blvd’s Birthday Bash and Bella Besties Hearts and Ombre. 


Butterfly shaped scrapbook album page with stripes, flowers, a cake, and cupcakes


I created photo mats for each page in varying shapes and sizes, then decorated with lots of cute die cuts.


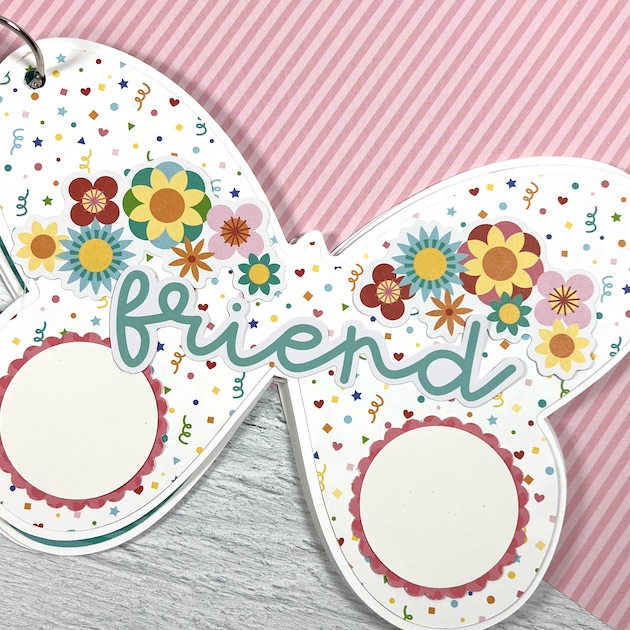
Butterfly shaped scrapbook album page with flowers and confetti


On this page, I made two round photo mats by punching a 2.5″ scalloped circle out of a pattern paper, then a 1 3/4″ circle out of white card stock.


Butterfly shaped scrapbook album page with lots of pretty flowers


Ok, time for the tutorial. Here’s how I made the album with Lori’s awesome cut file …


Butterfly Shaped Scrapbook Album Tutorial


1. I duplicated the shape first so that I would have a front cover, back cover, and pages.


Butterfly Shaped Scrapbook Album Tutorial


2.  I wanted the pages and back cover to be a solid shape so next I highlighted my second butterfly and clicked release compound path — this separates all of the little inside shapes.


Butterfly Shaped Scrapbook Album Tutorial


3. I moved the base butterfly shape off the the left, and deleted the little bits and pieces that were left behind.


Butterfly Shaped Scrapbook Album Tutorial


4.  Next, I created an internal offset of the solid butterfly so that I would have a smaller shape to cut pattern paper layers. 

I cut the cover pieces once, and then cut 5 solid pieces to use as pages.  Finally, I cut various pattern papers out of the smaller butterfly. 


Butterfly Shaped Scrapbook Album Tutorial


I hope this helps you to create your own shaped mini album with Lori’s butterfly cut files. She has so many great ones to choose from! Hop on over to her shop today and have fun exploring. Happy crafting!


Blog * Shop * Facebook * Instagram * Pinterest

Shaped Card Lemon

Hi there crafty friends! Today I am sharing the Shaped Card Lemon (SVGSilhouette). I like making cards like this in batches. They are quick and easy to assemble and are great for when I need some craft therapy! Cards like this also come in handy when I need to send a quick note to someone. I pulled out all my summer papers and embellishment. Most of the stickers came from the A Slice of Summer sticker book by Echo Park Paper Co. and a few from the Here Comes the Sun sticker book.

I love how bright and cheerful they turned out. Thanks for stopping by today!

Brandie Adams


Summer Fruit Shaped Cards

Some of my favorite cards to create with Lori’s files are her shape cards, especially for my granddaughter.  She loves to receive mail and I try to send a card to her every couple of weeks with a bit of spending cash.  These are two cards that will be coming her way, bright and fun for summertime.  Both have just a couple of stickers from Lori’s Echo Park collection A Slice of Summer.  It’s one of my all-time favorite collections and I am always reaching for little bits and pieces of it to create with….it’s a must-have.

First, I have one of her new cherry cards. How cute is this?!  It is the Cherry Carton A2 Shaped Card  or you can find it here in the Silhouette Design Store.  I just love this little card, it’s so bright and cheery!  I used sketch pens to outline the basket, kind of hard to see here, and little hearts onto a couple of the cherries!

My next card continues with the fruit theme… this fun A2 Shaped Strawberry Card in Lori’s shop or here in the Silhouette Design Store.  Love the little hearts in the design of this file, so cute.  I added some stitch lines with a sketch pen to the top of the strawberry and a couple of stickers from the Slice of Summer collection. The perfect summer cards.

There are several strawberry and cherry card designs to choose from, go check them out!


Thanks for stopping by!
Cathy

Box Card Cherry Carton Tutorial

Hi there friends! Have you seen all the new cherry themed projects in Loris’s store yet? So darling! Let’s make the new Box Card Cherry Carton (SVG, Silhouette-soon to be in the store!).

I used papers from the Down on the Farm Collection by Echo Park Paper Co. Once I had everything cut out, I inked the edge of the cherries, flower, and decorative panels. I then glued the all the panels and cherries in place. The first insert has four cherries, and the second insert has three. The two tabs on the ends of the box pieces are mountain folds and then glued together creating the box.

Now to add the inserts. The tabs are valley folds, and the glue is applied to the outside of the tab (the side that is going against the inside of the box card). I lined up the front of the tabs with the front of the inside of the box and the top of the tabs with the top of the box card.

Before the glue is dry, I fold the box card flat making sure it will fold flat all the way.

I use the same process for the second insert except I line the tabs up to the back of the first insert and the top of the box card.

Lastly, I glued the sentiment and the flower to the front of the card.

Now the card is ready to send! Thanks for stopping by today, I hope you have a cherry good day!
Brandie

New Style Card Released Recently

In the last few weeks, we’ve released this new style, the A2 Curved Pop-Up Card. Have you seen them? They’re super easy to assemble and lay flat for mailing. I’ve also made a tutorial video for them. They come in several styles including Father’s Day, graduation, birthday, summer, and even a simple everyday style. They come individually and in the A2 Curved Pop Up Bundle. Here is the link for the tutorial


Thanks for stopping by! Happy crafting!

Lori