St. Patrick’s Day Cards

 Spring is almost here and Saint Patrick’s Day is just around the corner too. Lori designed the cutest collection for Echo Park Happy Saint Patrick’s Day.  Just so fun and filled with the sweetest prints and little leprechauns!  I used this collection to make both of the cards that I am sharing with you today.

First is Lori’s French Door Easel Card – St Patrick or here in the Silhouette Online Design Store.  I had never tried one of these French door cards before, super fun and lots of files to choose from.  I, of course, swapped out the leprechaun for a sticker in the collection that I loved.  These cards are fast and easy to put together. Just another fun way to display a handmade card.

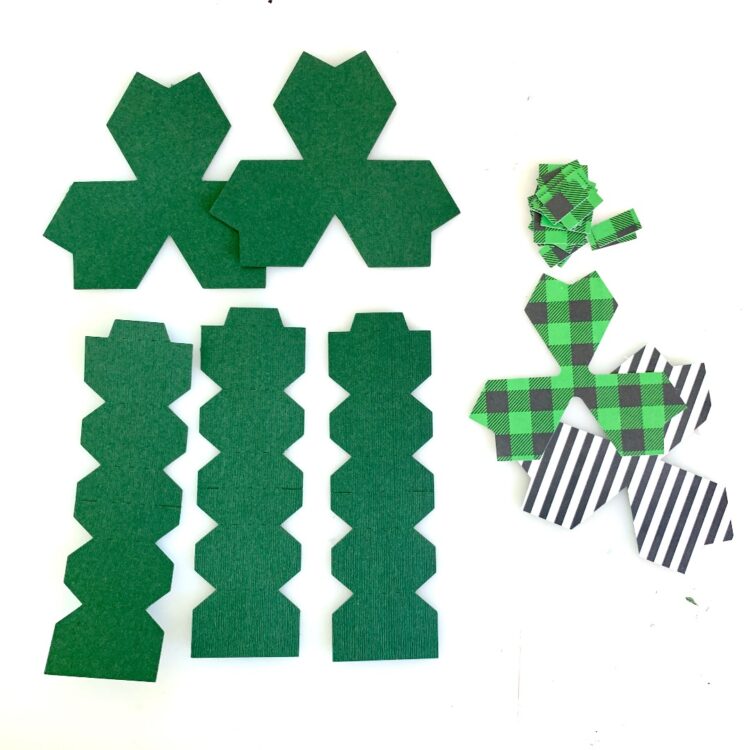
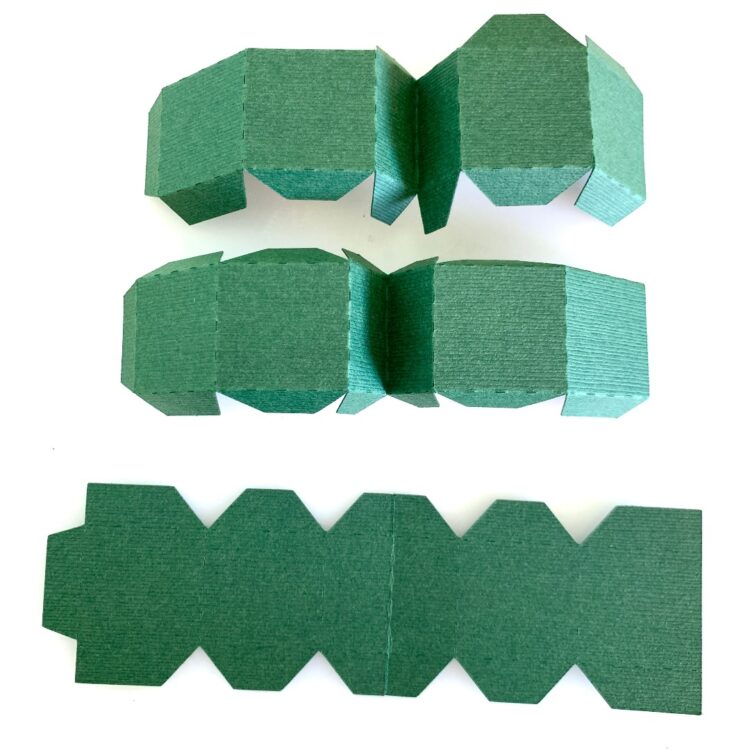
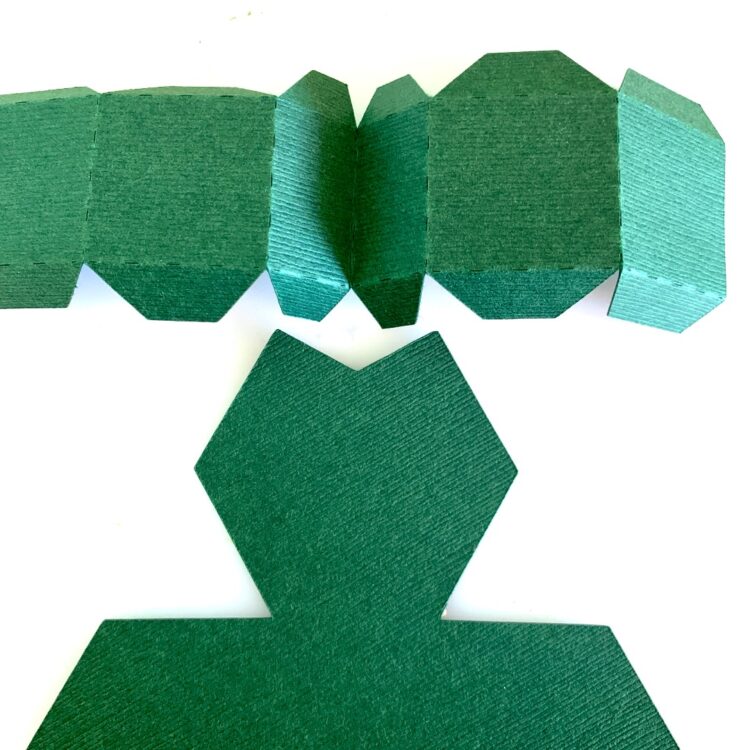
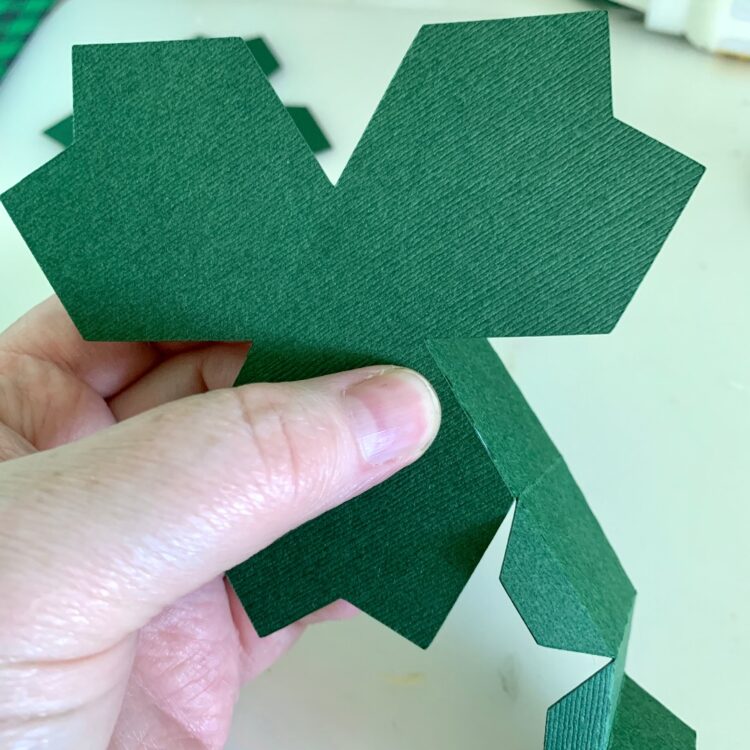
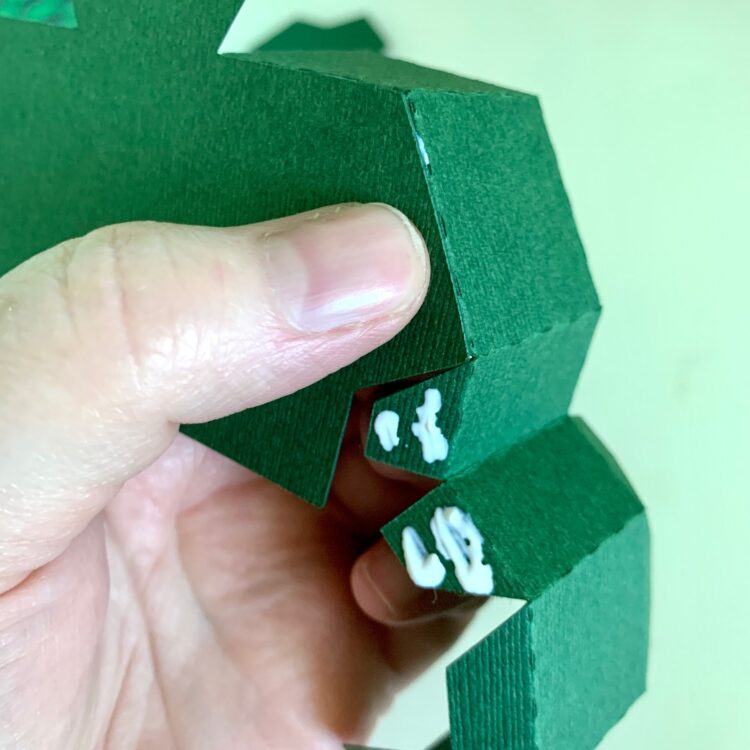
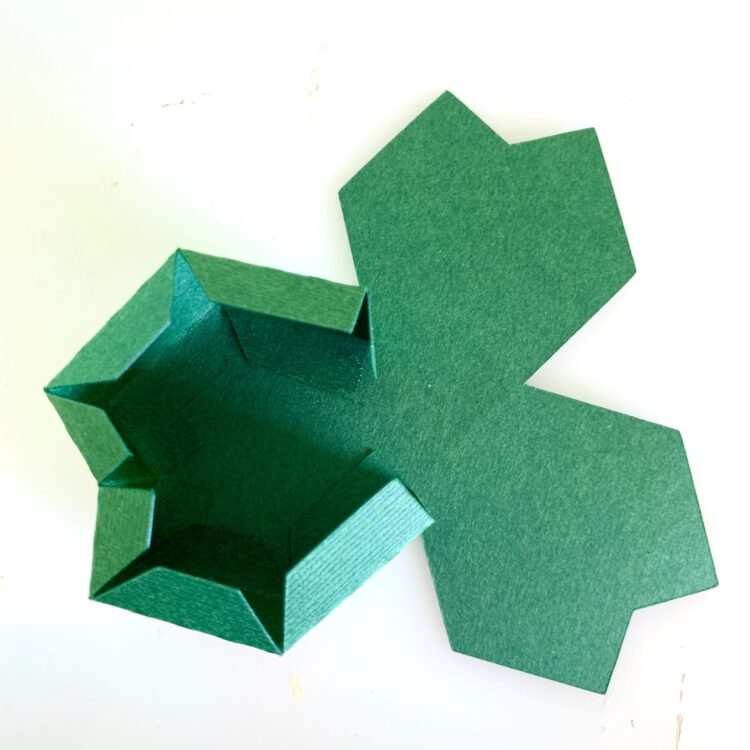
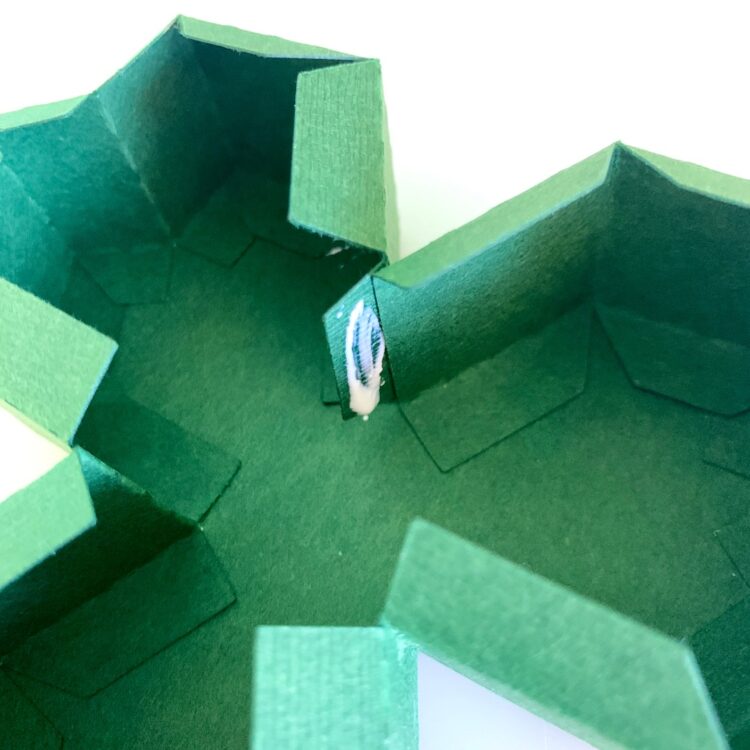
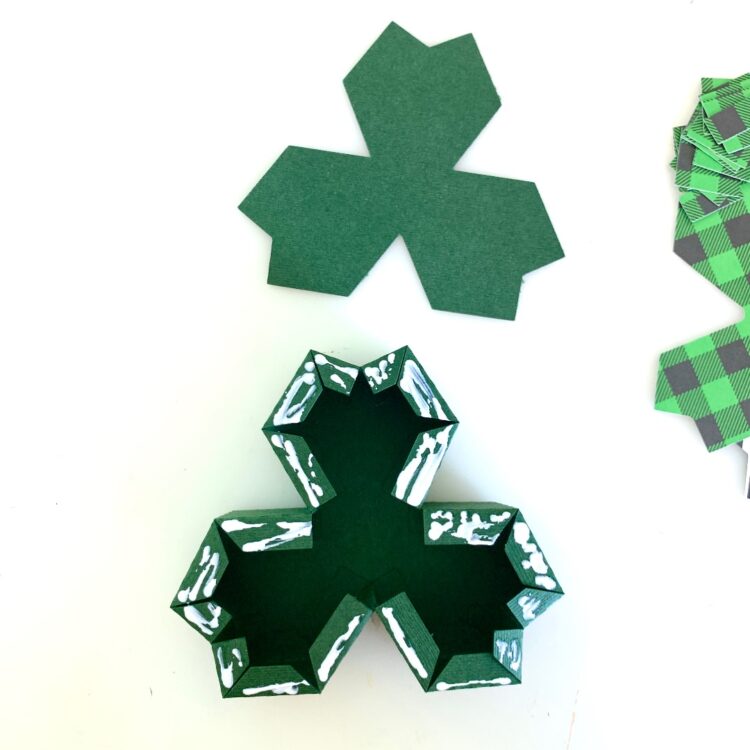
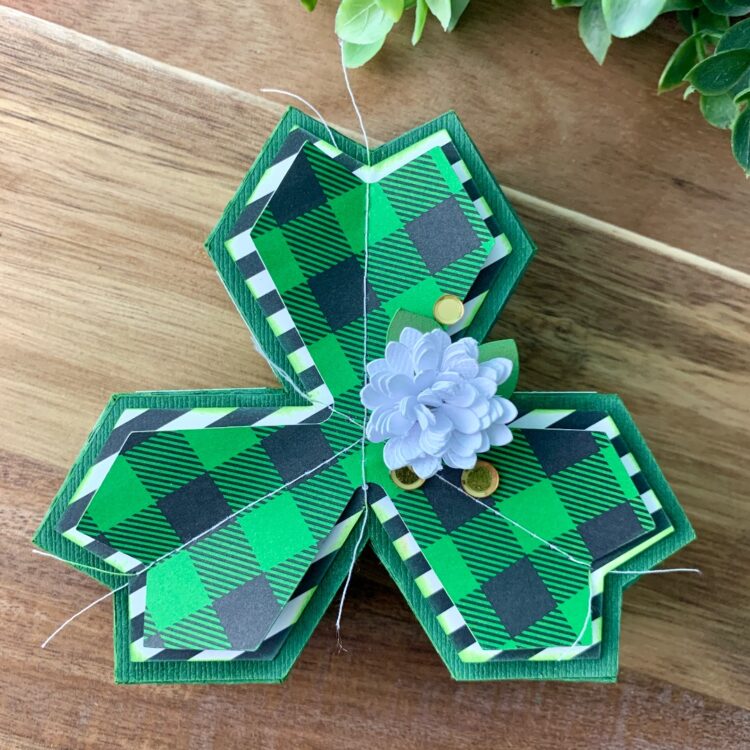
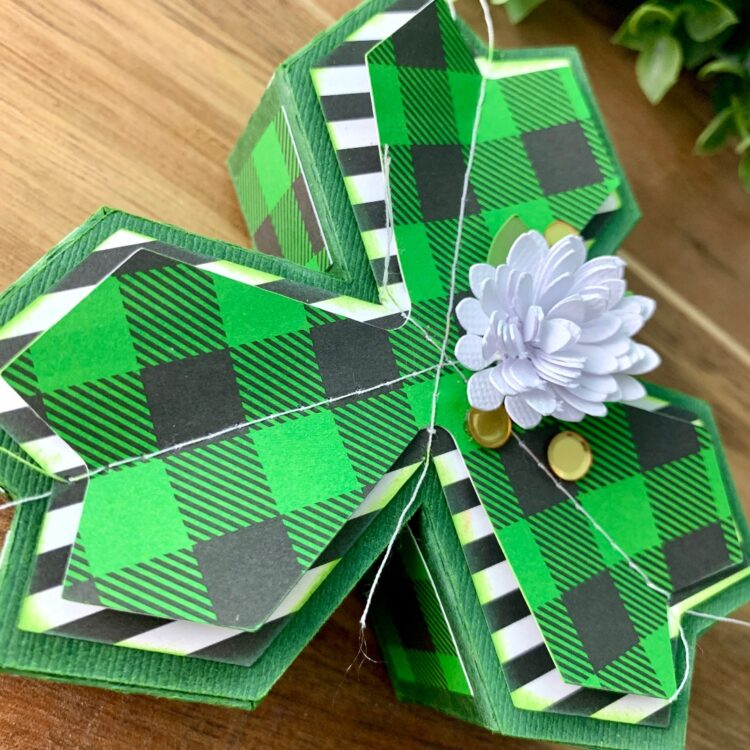
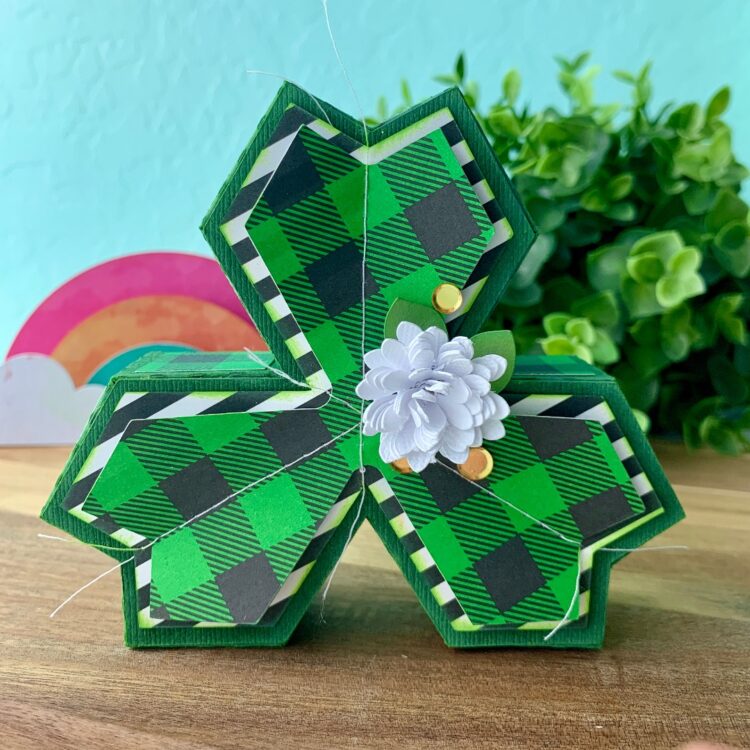
And next, a box card, which is my favorite along with the envelope cards.  This is Lori’s Box Card Gnome Shamrock or here in the Silhouette Online Design Store.  Again, I removed the gnome and replaced it with the cute little leprechaun sticker and some other fun bits from the Echo Park collection.  He’s just so cute standing in his field of shamrocks.


Wishing you all a very lucky day!

~Cathy

Wrap St. Patrick Cookie Topper

Hi all!

I work in a small office and I try to do some kind of cute little treat for all the ladies in the office on holidays. When I saw this cute little wrap I knew it would be the perfect office treat.

I started with my supplies. Because I would be making a few of these I decided to use the sticker sheet that matches the Echo Park Happy St. Patrick’s Day paper line by Lori instead of the little pot of gold that comes with the file. I used the cut file called Wrap St. Patrick (SVGSilhouette).
First, I scored the long sheet.
Added a few pop dots (dimensionals) to the back of my sticker.
Then I added my sticker to the little black cut-out (pointy tweezers are a great helper here).
 I used a cello bag and put some sugar cookies in it (They kind of look like golden coins).
Here is the tricky part, put the top of your bag through the round hole.
Fold up the side with the 2 slits and run your ribbon or bakers twine through a slit, around your cookies, and back through the 2nd slit and tie in a cute bow.
Add your little black cutout and sticker accent piece to the front and you have a darling little treat.
Happy Crafting!
Chelsea

St. Patrick’s Day Tees

Happy Monday from Las Vegas!! While I’m enjoying some (hopefully) sunshine on vacation, I’m leaving you with these little shirts I made for my grandbabies for St. Patrick’s day.

Baby J (who is actually 2 1/2) will get the little No Pinching shirt and Miss Mary will get the Lucky Little Lady tee.
I used the No Pinching image (SVG, Silhouette) for Baby J’s shirt. I used green and gold glitter iron on for this shirt (which I’ve learned is really hard to photograph).
For Miss Mary’s tee I used the Lucky Little Lady image (SVGSilhouette). I did move the large shamrock on this tee because the only little girls tee I could find had some embroidery on it, so I used the large shamrock to cover that up.
Again, I used some pink and green glitter iron on to make this shirt sparkle.

I hope you enjoy these little tees. Wishing you all the luck o’ the Irish and happy crafting!

Chelsea

Bobble Card Pot of Gold

Anita here with a fun St. Patrick’s Day card called Bobble Card Pot of Gold (SVGSilhouette).  I used Mini Action Wobbles Springs to pop up the pot of gold and it wiggles when you pick it up or shake it.  Lori has a tutorial on her site for this type of card and links to get the wobbles.  I used some of her Echo Park paper collections including Day in the Life No. 2, Pets, and Our Little Princess. Thanks for looking and have a great day.

Hugs,

Anita

3D Clover Décor Tutorial

Hi there! Have you jumped on tiered tray bandwagon yet? I have! And have had a lot of fun making décor items for it. Lori has a new group of files for St. Patrick’s Day home décor that are perfect for a tiered tray. You can find it in her shop here. Today I’m going to show you how to assemble the 3D Clover (SVG, Silhouette).

I started by cutting all of the pieces. In the file there is only one side of the clover, but you will need to cut two. I also wanted two layers of the front decorative panel, so I customized a piece by making an internal offset and cutting that out as well.

I folded all of the tabs. Most of the folds are mountain folds. The very middle score line is a valley fold as well as the tab on the end.

The middle valley fold will be in the middle of each of the clover petals.

With some liquid glue I secured the first tab. I like to get a good anchor established before moving around the rest of the petal.

Then added glue to the next few tabs and secured them to the clover petals.

I repeated the process for the other two petals.

Once I had the other two petal edges complete, I glued the end tabs in place. It would also work really well to glue all of the edge strips together then glue them to the front of the clover. Rather than doing each petal separately.

For the back piece I just went for it and added glue to all of tabs and laid the cover on top while I adjusted and lined up all the edges. It would probably be easier to anchor one tab then add the glue to the rest of the tabs and adjust/line up as needed.

The last bit is the best part. I inked the all the edges. I glued all the decorative panels on the outside edges. I used my sewing machine to stich the two front decorative panels together. I added a rolled flower (SVG, Silhouette) and a few gold sequins.

And don’t forget, there’s a sale happening now in Lori’s SVG Shop!  Get 30% off all SVGs, Fonts, Pattern Fills & Commercial Licenses when you use code MAR2022 at checkout.  Don’t miss out, sale ends Saturday!

That’s it for me today. I hope you have a great weekend and thanks for stopping by!

Brandie