Mickey Mouse 3D First Birthday Blocks Tutorial

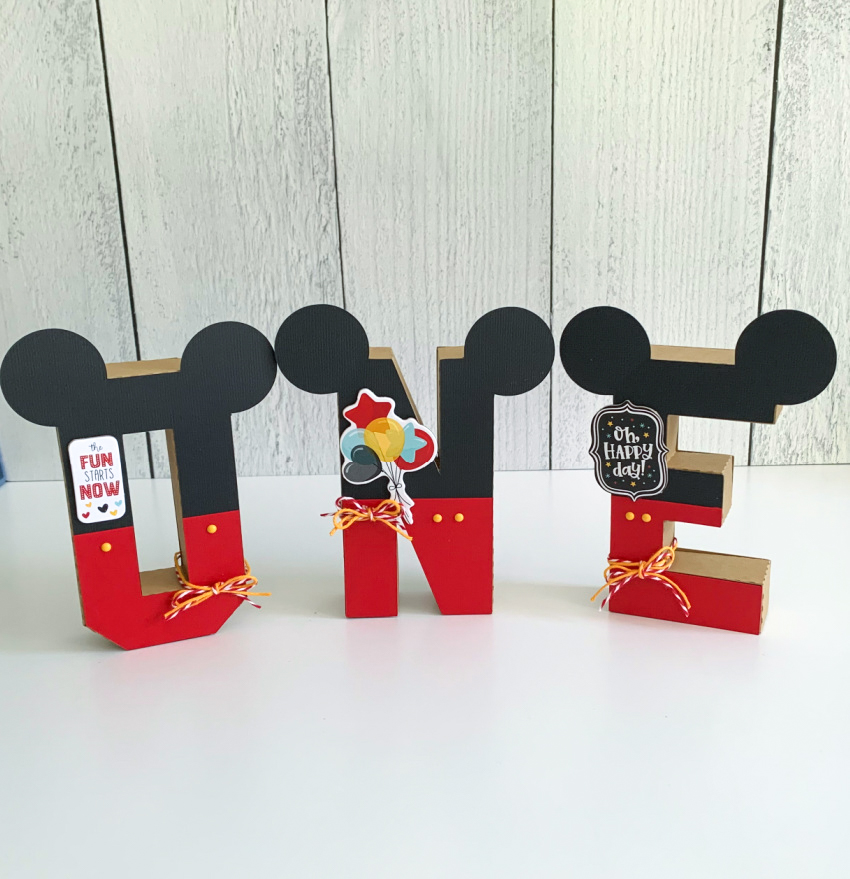
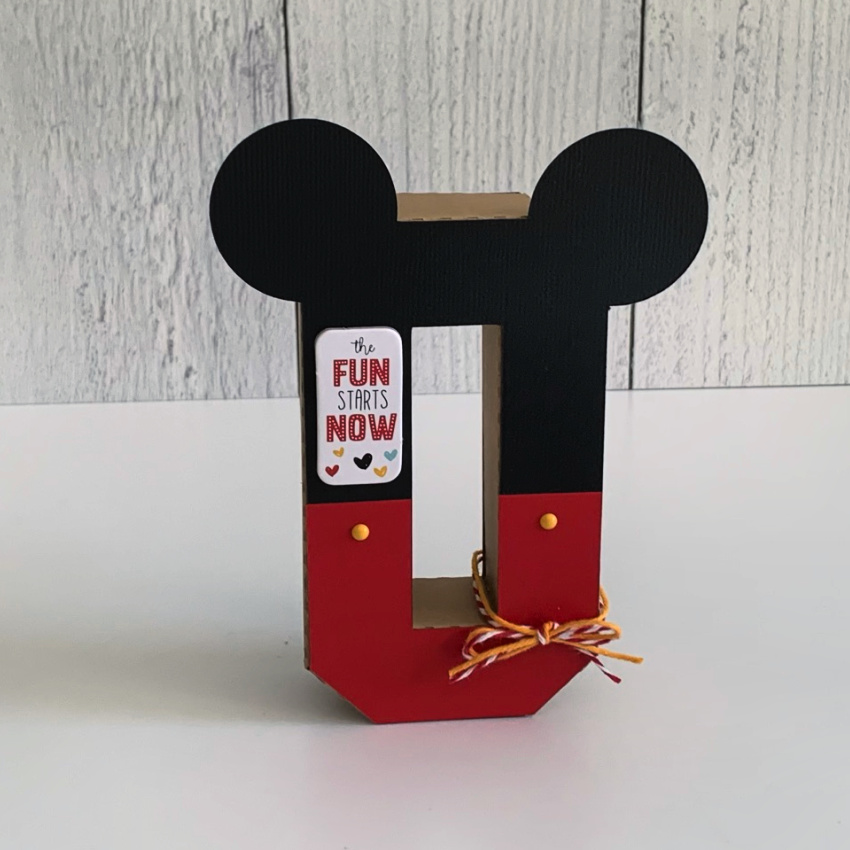
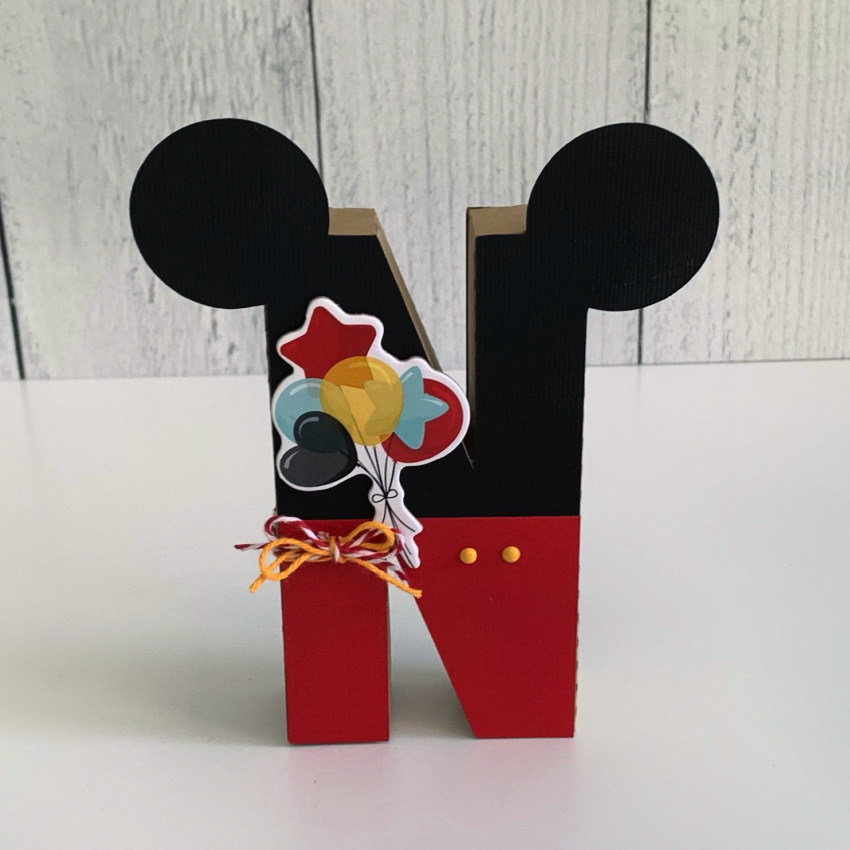
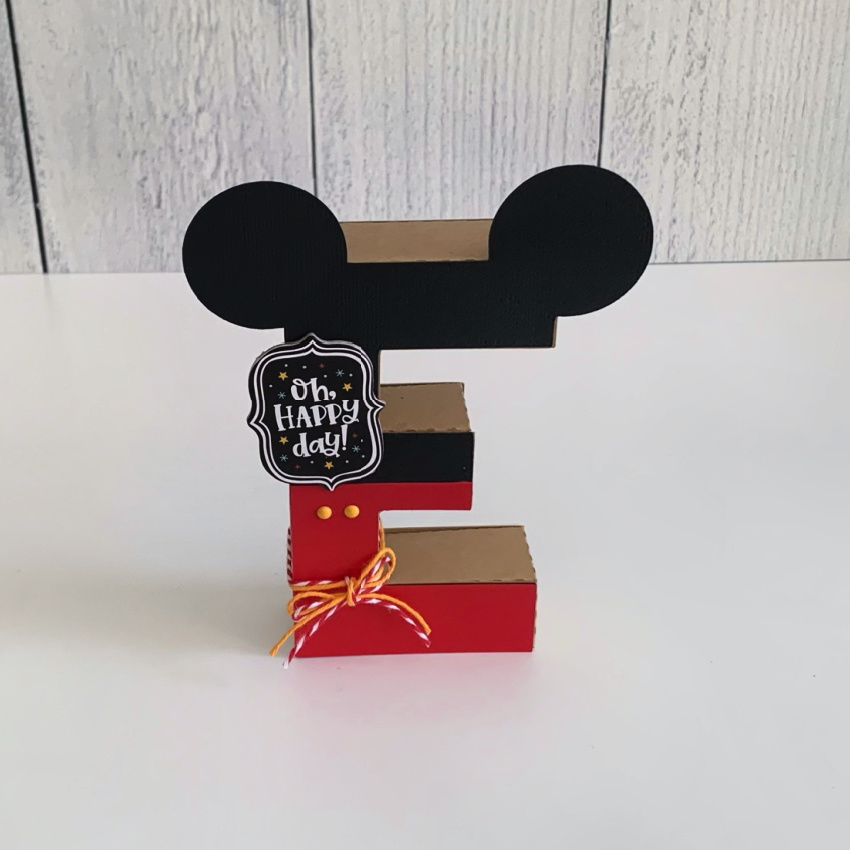
Anita here with a tutorial to show you how I made Mickey Mouse letters for my grandson’s first birthday party.  I used Lori’s awesome files for the 3D Letters, including the 3D Letter Alphabet O (SVG, Silhouette), the 3D Letter Alphabet N (SVG, Silhouette) and the 3D Letter Alphabet E (SVG, Silhouette).   Lori also has a wonderful tutorial on her YouTube page which you can watch here to assist with putting the letters together.

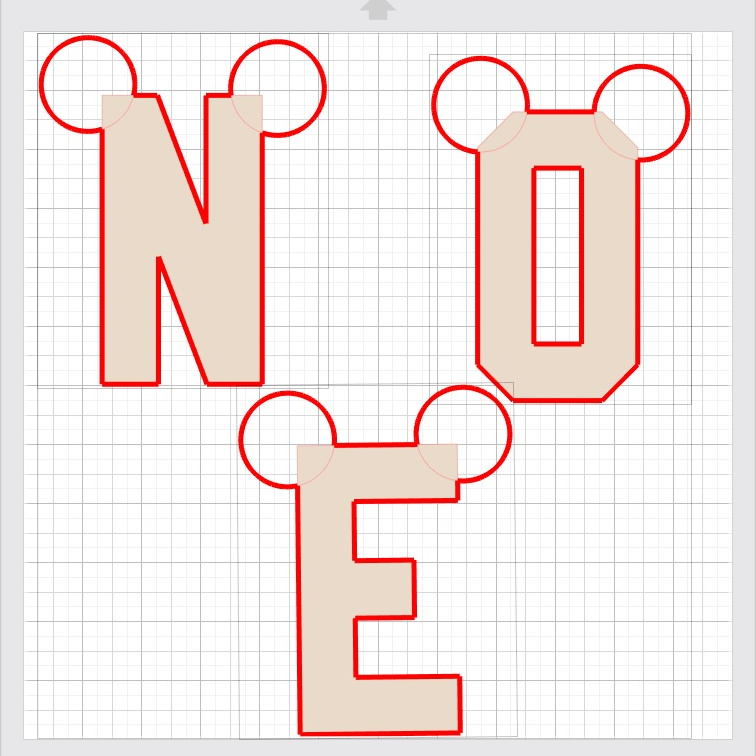
Here are all the pieces that I cut out to make my blocks.  I used kraft cardstock papers for assembling my letters.  I will describe what I did to create the Mickey ears at the top of the letter and cut an extra letter in the red, and cut it to fit near the bottom third of the letters.

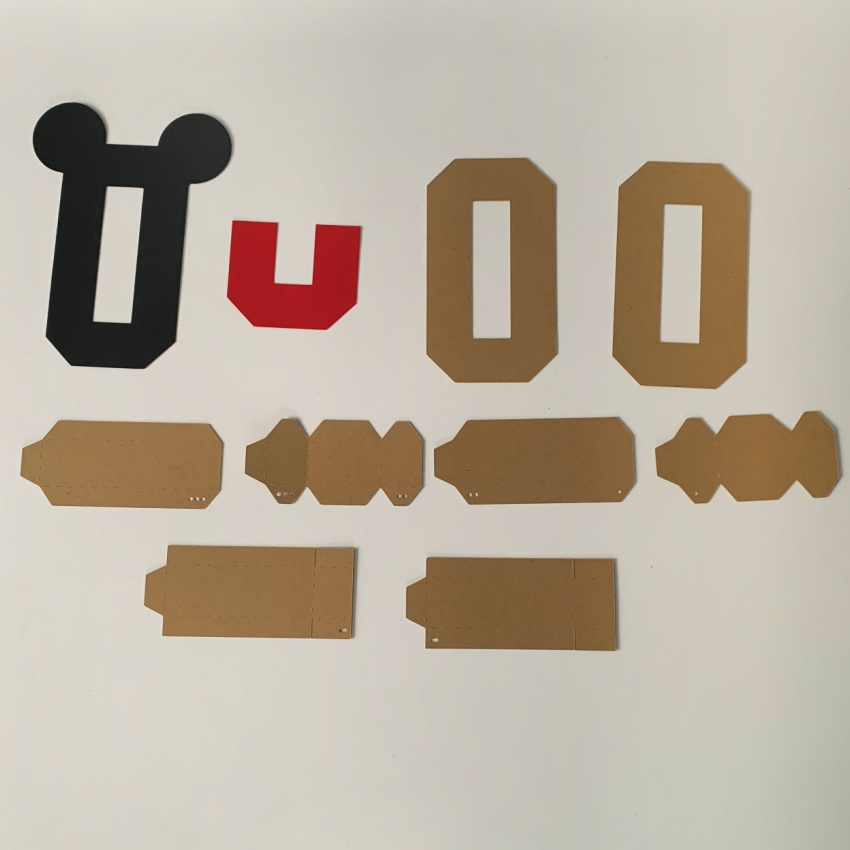
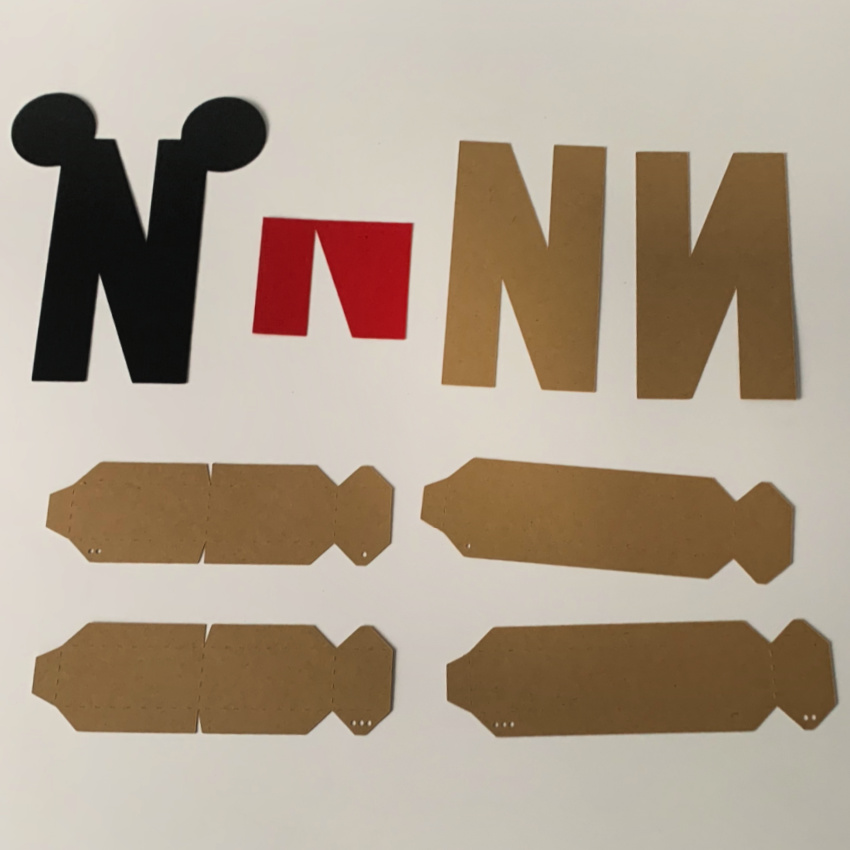
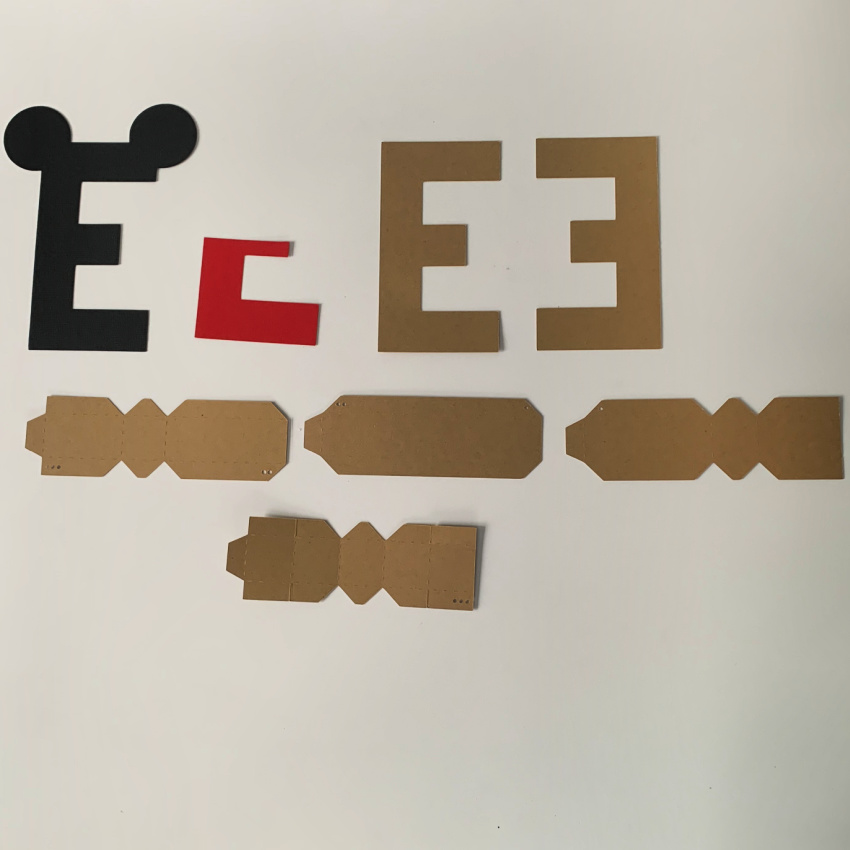
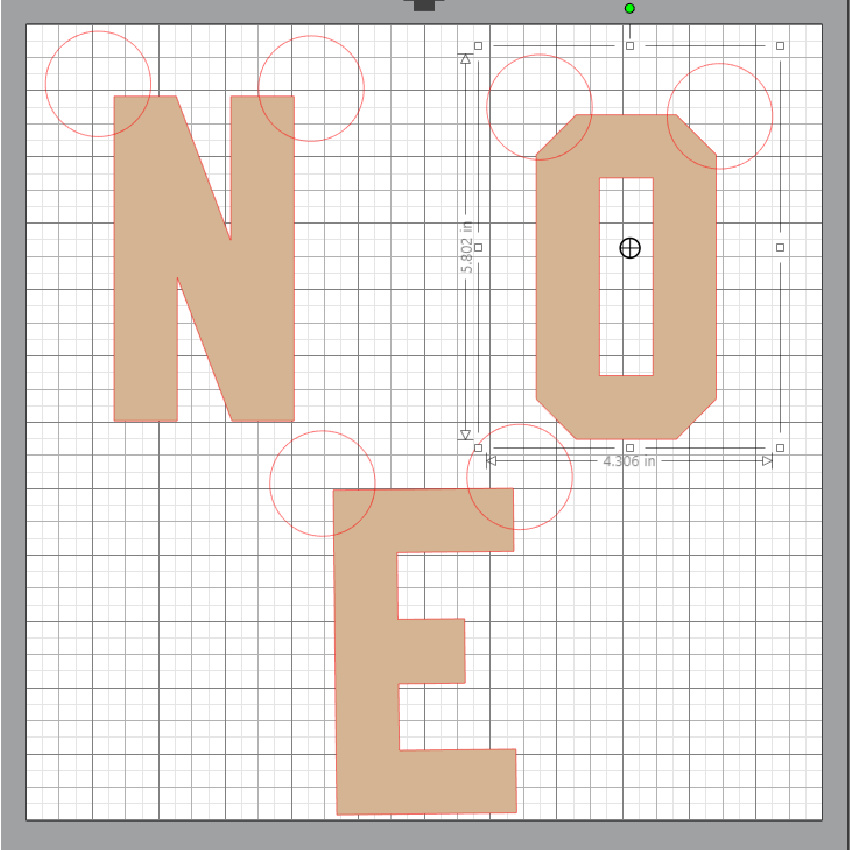
To create the ears, I used the shape tool in my Silhouette Studio software and created a small circles that were the size that I wanted for the ears.  I copy and pasted a copy of the larger front piece from the file as I didn’t want the layered look as shown in the original cut file.  Once I had all three of the letters on the mat I added two circles to each letter.  I then grouped each letter with the ears and arranged them on the mat so that they all fit.  I then sent the file to cut and selected each letter one at a time and then selected cut edge.  I sent it to my Silhouette and it came out perfect.

Thanks for looking and have a great day.

Hugs,

Anita

Perpetual Celebration Calendar Tutorial

Happy Thursday Everyone:

Anita here today with a tutorial for a Perpetual Celebration Calendar.  I have a perpetual calendar which I have been using for years and wanted to replace it with something more fun.  I decided to buy a rolodex and found some great files in Lori’s store that I used to create the pages for my calendar.  I used Memorydex Scalloped Cards (SVG, Silhouette) and used all three included shapes.  Male birthdays got the rectangle shape which can be found in the 4 Cute Tags file (SVG, Silhouette).  I  used 4 Scalloped Shapes (SVG, Silhouette) as the date reminder tags that went on the female birthday cards.  And I used the Nested Hearts file (SVG, Silhouette) for the anniversary cards. For the files without the punch holes in the bottom, I used a memorydex punch to add them.   Please note that each card also has an extra layer on the back of cardstock to give it a bit more stability and to help it to be more stable on the rolodex holder as it spins.

I used the Memorydex Box and Cards (SVG, Silhouette) for the month tab cards.  You can find a tutorial to make the Memorydex Box and Cards here on Lori’s blog.  I also used the Month 4X6 Journaling Cards (SVG, Silhouette)  I resized them to fit on the card and then cut them out.  I did my editing of this file on my Silhouette.   I decorated the cards with ephemera from my stash.

That’s it for me today.  I love how this came out and now each  month I get to flip the pages to see who I will be celebrating that month.

Hugs,

Anita

Sympathy Cards

Happy Columbus Day Everyone:

Anita here with a set of sympathy cards that I made for a dear friend who lost her uncle recently and he was a significant person in her life.  I love how elegant these are.  I used Lori’s file called Sympathy Card Thoughts Prayers which you can find here in Lori’s SVG Shop and here in the Silhouette Design store.  The second card is called Sympathy Card Comfort Strength Hope and you can find that one here in Lori’s SVG store and here in the Silhouette Design store.  I used one of Lori’s new Echo Park Paper collections called Our Wedding.  The card file comes with an insert that you can put behind the card front but I liked the colors showing through the designs.


Lori has cards for every occasion and in these times when you may be choosing to stay closer to home, you can still keep in touch with your family and friends.

Hugs,

Anita

Halloween Styled Mother’s Day Hat Box Tutorial

Happy Fall Everyone:

I fell in love with Lori’s new Echo Park Paper collection called I Love Halloween and knew that I wanted to use it for a Halloween project.  We are going to be making the Mother’s Day Hat Box which you can find here in Lori’s SVG Shop and here in the Silhouette Design store.  This is a fun and easy box to put together.  Let me show you how I did it.

Here are the parts all cut out.  I used my Silhouette Rotary Blade to cut the flowers.   It cut the felt beautifully !

You are going to take your two long rectangle tabbed pieces and fold the tabs down.

Next you are going to glue the tabbed end of the rectangle piece to the other end making a circle.  One strip is slightly longer than the other.  The longer one will form the cover, the shorter one the bottom of the box

The file comes with four round circles. The two slightly smaller ones are for the box base.  The two slightly larger are for the cover.   One is glued inside the box and one is glued on top of the box.  I like to glue my inside circle in first as I find it is easier to ease it to fit.  Then I glue the top of the box on.  I use a wet glue when making projects like this where I am asking the paper to be in different shapes.

I made both boxes and then checked to make sure that one slid easily over the top.  I then glued the top on the box and the decorative band around the bottom.

I then glued the bottom of the box onto the scalloped piece centering it.

I brought the ends of the bow pieces on both sides to the center back of the bow and glued it together well.  Then I wrapped the center bow piece around the bow and glued that as well.

I then added the ribbons of the bow to the back of the bow.

Here are my rolled felt flowers.  I cut them easily with my Silhouette Cameo 4 and the rotary blade.  I started at the end of the flower and rolled them up and secured them well with wet adhesive.  (for a rolled flower tutorial see this post)  Be sure that you don’t put your flowers in the way of the box being able to be opened and closed easily.   I added some embellishments to my box and rolled some of the leaves to give them a bit more dimension.

Lastly, here is the box open with some Halloween candy for your favorite sweetie.  I have my hat out as a Halloween decoration and it makes me smile when I look at it.

That’s it for me today.  Be sure to check out all of Lori’s Halloween SVG files and don’t forget all SVGS, Fonts, Pattern Fills and Commercial Licenses are 30% off through Saturday when you use code SEP2020 at checkout!

Hugs,

Anita

Wedding Anniversary Card

Hi Everyone:

It’s my 35th wedding anniversary today and I made this card for my wonderful husband to celebrate our love.  We had a wonderful European cruise planned to celebrate but given these uncertain times we had to cancel.  We are looking forward to trying again in 2021.  In the meantime, we plan a quiet celebration.  I have no idea where the time has gone though.  I used Lori’s Pop Out Card Heart which you can find here in her SVG Shop and here in the Silhouette Design store.  I also used Whole Heart Whole Life Saying which you can find here in Lori’s SVG Shop and here in the Silhouette Design store for my sentiment.  I used Lori’s new Echo Park Paper line called All Boy to create the card.  This card folds flat and fits nicely into an A2 envelope.

I took the Whole Heart Whole Life sentiment and shrunk it to fit in the center of my heart.  I then grouped that together and used it as a print and cut sentiment with the registration marks turned on in my Silhouette Cameo.  When I went to cut the heart out after it was printed, I ungrouped it and moved the sentiment off the mat.  I cut out the heart and it came out perfect.

My husband really appreciates home made cards and in this time where it is harder to get out to buy what we want, don’t forget that Lori has cards and gift giving items for every occasion in her store.

Thanks for looking and have a great day.

Hugs,

Anita