Autumn Planner Pages & Flowers with Aimee

Hello everyone and Happy Fall!! Aimee here with you today to share my September Planner pages. Fall is my absolute favorite so these pages came together quickly.

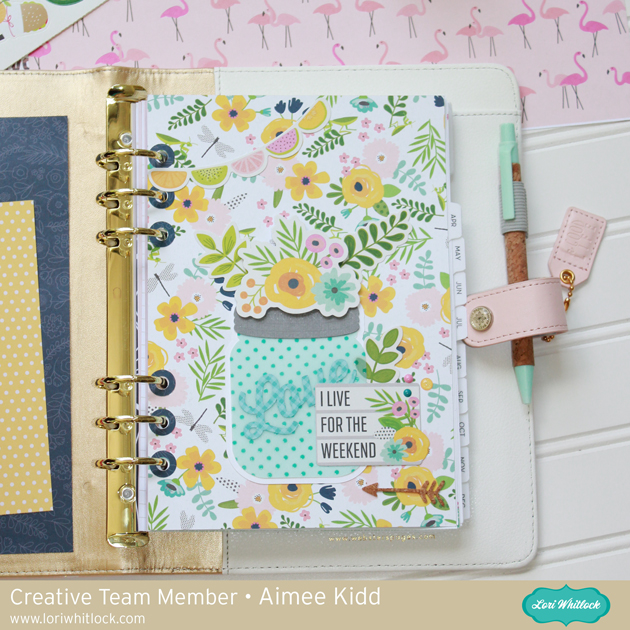
There are so many new files that would create beautiful planner covers! I chose the “it’s Fall Y’all” sentiment along with the wreath and flowers. I started this project with a focus on making DIY flower clips but I had so much fun designing the cover with the new cut files and Lori’s beautiful new “Celebrate Autumn” collection that I lost my focus. LOL!! So here is a close up of the dashboard… 

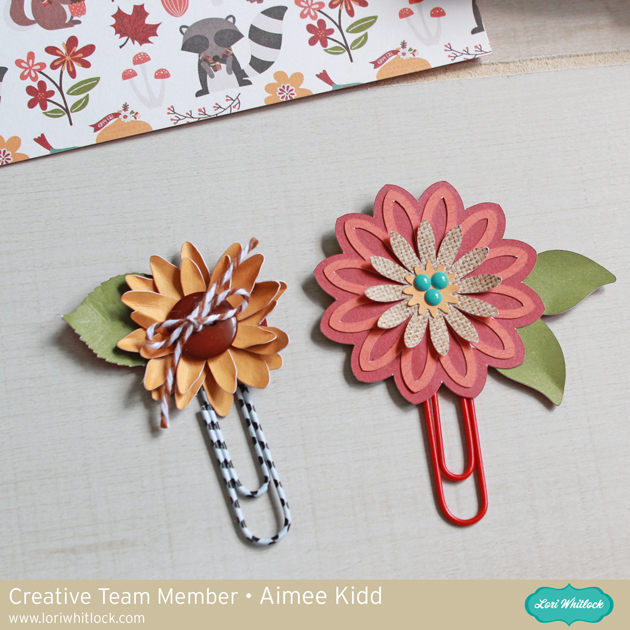
And now I will get to the main part of this post…Lori has a ton of beautiful flowers in her shop so it was difficult trying to figure out which ones to use but these 2 looked the most fall-ish to me. I cut out the flowers, assembled them, and then glued them to a matching paper clip. To make sure they would stay on the paper clip, I adhered paper circles to the backs. Make sure to use a good type of glue so they stay in tact through your planner activities.

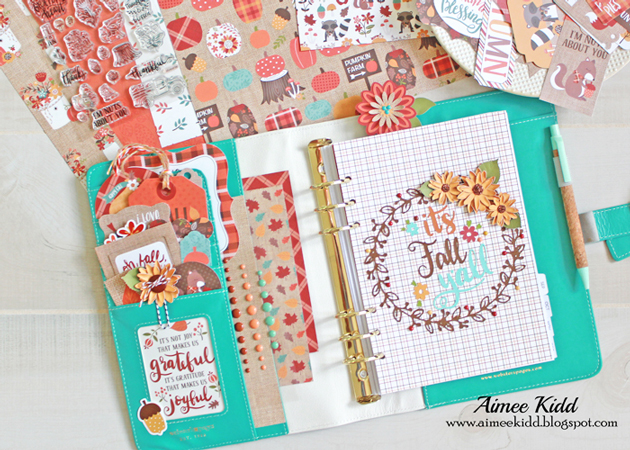
Here is a look at my full dashboard/pocket spread made with the beautiful “Celebrate Autumn” collection…

The weekly pages were just as much fun creating as I really put the stamp set to work!

Lori’s cut files needed to complete this project:

Wreath Welcome Home – Lori Whitlock Shop or Silhouette Design Studio

It’s Fall Y’all – Lori Whitlock Shop or Silhouette Design Studio

Hope you enjoyed taking a look into my Autumn planner pages and will try making your own paper flower clips for your planner!

Aimee


A5 Planner Dashboard Tutorial with Aimee

Hello crafty peeps! Aimee here with you today to share a tutorial on creating planner dashboards. I’ve been doing this all year long because I feel there are so many of Lori’s svg cuts that create a very unique dashboard!

To start off I needed an A5 planner template so I would know how to resize all of my svg pieces. I created this template myself by scanning one of my pages and importing it into my Silhouette program to get the cut lines I needed.

I pulled up the A2 Beach Card svg file and deleted all of the pieces I didn’t need which are the card base, card front panel piece, and the sentiment tag. I know this is a card svg but I just knew it make a fabulous planner dashboard!

I also pulled up the Cloud Dingbat font to get a title for my dashboard.

I wanted it to stand out so I added an offset cut.

I played around with the sizes of the cuts to get it to fit onto my A5 planner page template.

Here are my pieces after I cut them out with my Silhouette.

And here they are adhered down to my August A5 planner page with some added decorations. I also ran my Spectrum Noir Sparkle pen over the sun and umbrella.

And here is finished product in my planner! It sets the tone of how I want the rest of my August planner pages to look.

Here is a look at my January dashboard with a Lori Whitlock sentiment svg.

My April dashboard sports the beautiful mason jar svg cut.

There are so many options of Lori Whitlock svg cuts to create a unique look for all your planner dashboards!

 A2 Beach Card svg – Lori Whitlock shop or at the Silhouette Design Studio

Cloud Dingbats Font – Lori Whitlock shop or at the Silhouette Design Studio

Cold Outside – Lori Whitlock shop or at the Silhouette Design Studio

Mason Jar – Lori Whitlock shop or at the Silhouette Design Studio


And I leave you with… “Happy Planning” using some Lori Whitlock SVGs!!

Aimee

One Dollar Wednesday at Jessica Sprague

Today is One Dollar Wednesday at JessicaSprague.com!

That means from now until midnight (Pacific time) you can pick up a couple of digital kits for a steal…

TODAY for JUST $1 you can grab the popular: Masking Borders 2

MASKING BORDERS 2

I LOVE this collection of borders! So easy to use and  a fun way to add personality.

And, you can snag the following awesome product for HALF OFF… which makes it ONLY $3.50 (that’s a real deal): Kiss Me Collection

KISS ME COLLECTION

First of all is the 2013 Planner. It is on SALE for 75% OFF the entire month, which makes it only $3.25!!!

2013 PLANNER

While you are at jessicasprague.com getting your kits, be sure to check out the samples made with each of these kits in the “more images” tab at the bottom of each listing.

One Buck Wednesday is Back

Today is One Buck Wednesday at Jessicasprague.com!

That means from now until midnight (Pacific time) you can pick up a couple of digital kits for a steal…

TODAY for JUST $1 you can grab the popular: 2013 Calendars 8×10 Vertical. These both make the cutest gifts for your family members and loved ones.

2013 CALENDARS 8X10 VERTICAL

And, you can snag the following awesome product for half off… which makes it ONLY $6.50 (that’s a real deal): 2013 Complete Planner and Add Ons. This kit is really amazing because you can use the month at a glance pages by themselves or with the week at a glance pages. There are also pages to help you stay organized and you can include those in each month or make a section for just them. If you have a digital die cutting machine, make sure and grab the SVG files here to help assemble your planner. It makes it go together so smoothly.

2013 COMPLETE PLANNER AND ADD ONS

While you are at jessicasprague.com getting your kits, be sure to check out the samples made with each of the Calendars in the “more images” tab at the bottom of each listing. There is also a blog post here with many different planner options by our design team.

2013 Planner

Have you seen the planner being offered at jessicasprague.com (PDF files) as well as in the shop (SVG dividers and cover)? I have to say it is one of my favorite projects, and meets a few of my all time favorite criteria, functional, easy to make and beautiful. Seriously, the divider pages took less than 10 seconds each to cut and the covers took even less (yes I really counted) and I used my favorite papers.

Today we have a few different styles to show you. Each designer had a different need, so they became completely different projects using the same files, which I loved.

Christine put her’s in a 3 ring binder and decorated each of her divider tabs. She even added a new section for the add on pages and created a divider tab for each one. BEAUTIFUL! She has more pictures and info at her blog here.


Next I want to show you what Amanda has created.

She used just the add on pages and made mini notebooks. She printed her’s half size (2 per page) and cut them down and bounded them. 

She also added the cute rose cutout to the front of each one.


And finally, this is the planner I have been working on to keep Lori and I organized. I created mine full size (8.5×11) and plan to have it professionally bound at a copy store. Currently the pages are loose because I am hoping for a better deal having 2 bound at the same time. I am making one for my mom for her birthday next month, shhh don’t tell her. These make great gifts and go together so fast. It took longer to print the pages than it did to cut the dividers.

I used Echo Park’s “For the Record” Collection for my entire planner. Each divider is a different pattern (I do plan to go back and add month titles.) Notice how the cover fits perfectly over the dividers so no dividers sticking out, WHICH I LOVE! Also the planner cover has slightly rounded corners so no sharp points that will get ruined or draw blood as the year goes on.

When I organized the monthly, weekly and add on pages, I added a set of add on pages to each month, instead of all in one section like Christine. My brain doesn’t think that way, but I love her idea.  With all those pages my planner measures 1/2″ thick. I think for my mom’s I am going to add a page with all her family members birthdate’s on it and put it in the front. I have more info on my blog here if you want to check it out.

We would love to see what you have done with these files too. Share them on our Facebook page here.