Box Card Birdhouse Flowers Tutorial

Hi there friends! Has Spring sprung where you live yet? It has where I live and I’m ready for it. I have loved all the springtime files that are showing up in Loris’s shop and knew I needed to make one. Today I am sharing an assembly tutorial for the Box Card Birdhouse Flowers (SVGSilhouette).

This card is darling as is, but I needed to put a little spin on it with bees. I used the Bee Happy collection by Echo Park Paper Co. I also resized everything to be a little bigger.


I first glued all of the flowers together. All of the flowers have two layers and a center. I swapped out the paper centers for enamel dots. I then glued all of the flowers onto the green inserts. The middle insert has most of the flowers while the back insert has two flowers. For the first insert I trimmed off the bird and glued on the bee sticker.

Next, I glued on the decor for the birdhouse. (I forgot to take a proper picture) There are two sets of two roof pieces, two rounds for the doorway and a smaller round for decoration. There are also two base pieces for the bottom of the birdhouse and one for a perch. One of the completed roofs and bottom pieces are for the back. The base of the of the box card comes in two pieces that needs to be glued together. Line up the edge of large tab with the side of the house. With the front of the house facing down, I glued the inserts in. Be sure to have the right side of the insert facing you. All of the tabs are valley folds. I added glue to back of the right tab then lined the tab up with the straight edge of the front of the house and the top of the side of the box base. Then lined up the next two inserts up next to the back of the insert in front and the top of the side of the box card. I then carefully folded the inserts over making sure not to bend the leaves of the flowers so that the wrong sides of the inserts are facing up.


I had to trim the edges of the left tabs because they were overlapping the tab in front of it a little bit. Then I added glue to all of them and folded the base of the box card over making sure all the small tab lined up correctly. I then added glue to the large tab on the base and folded the back of the card over holding in place until the glue set.


I then added a bee sticker to the front on the card and tucked one into the back flowers.


I really like how this one turned out. I hope you all have a happy spring and thanks for being here.
Brandie

A NEW Friday $5 Bundle of SVG Files!

Happy Friday, my friends! Do you have something fun going on this weekend? It’s spring break for my daughter. That means spring is truly in the air. This week’s Friday $5 Bundle includes 5 beautiful box cards. This deal is only available until Sunday at midnight, so don’t wait! Take a peek…

Be sure to go grab these SVG files while you can. 

** Because Friday $5 Bundles are already heavily discounted they are not eligible for further discounts including monthly, seasonal and flash sales.

Shop Friday $5 Bundle HERE

Thank you for joining us today! Have fun crafting this weekend!!!

~Lori


Pretty NEW Friday $5 Bundle!

This weekend we have the cutest Friday $5 Bundle which includes 5 amazing flower card and tag SVG files for just five bucks. Spring is just around the corner (at least we can all dream about it), so I thought it was time to put out a cheerful floral $5 bundle. These projects are so pretty and will surely make your recipients happy and brighten their day. This deal is only available until Sunday at midnight, so don’t wait! Take a peek…

Be sure to go grab these SVG files while you can. 

** Because Friday $5 Bundles are already heavily discounted they are not eligible for further discounts including monthly, seasonal and flash sales.

Shop Friday $5 Bundle HERE

Thank you for joining us today! Have fun crafting this weekend!!!

~Lori


Flowers and Borders Layout

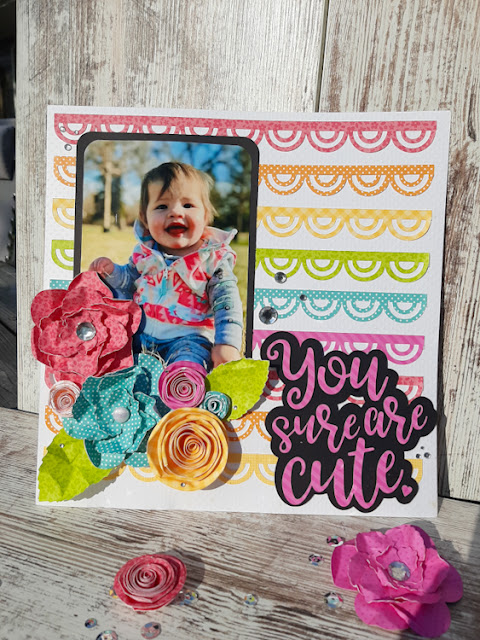
Happy Monday creative friends! Today, I’m sharing a layout I made of my adorable granddaughter using some borders, flowers and a title, all cut from Lori’s files. I will link below. I used some petite patterns from Doodlebug Designs for my project and cut all my elements on my Cricut.

I cut all my flowers and assembled them. They are very easy to make. I used the Rolled Flower 47 (SVG, Silhouette) and 3D Flower (SVG, Silhouette).
My title was the You Sure Are Cute (SVG, Silhouette) file that I offset to give it a little pop. The borders were cut from the Mega Border Bundle (SVG, Silhouette). I welded and sliced them to get the borders the size that I wanted.

I love how bright and fun this page turned out. Thanks for stopping by today and happy crafting!

Chelsea

Make a Crate Full of Flowers with this New SVG!

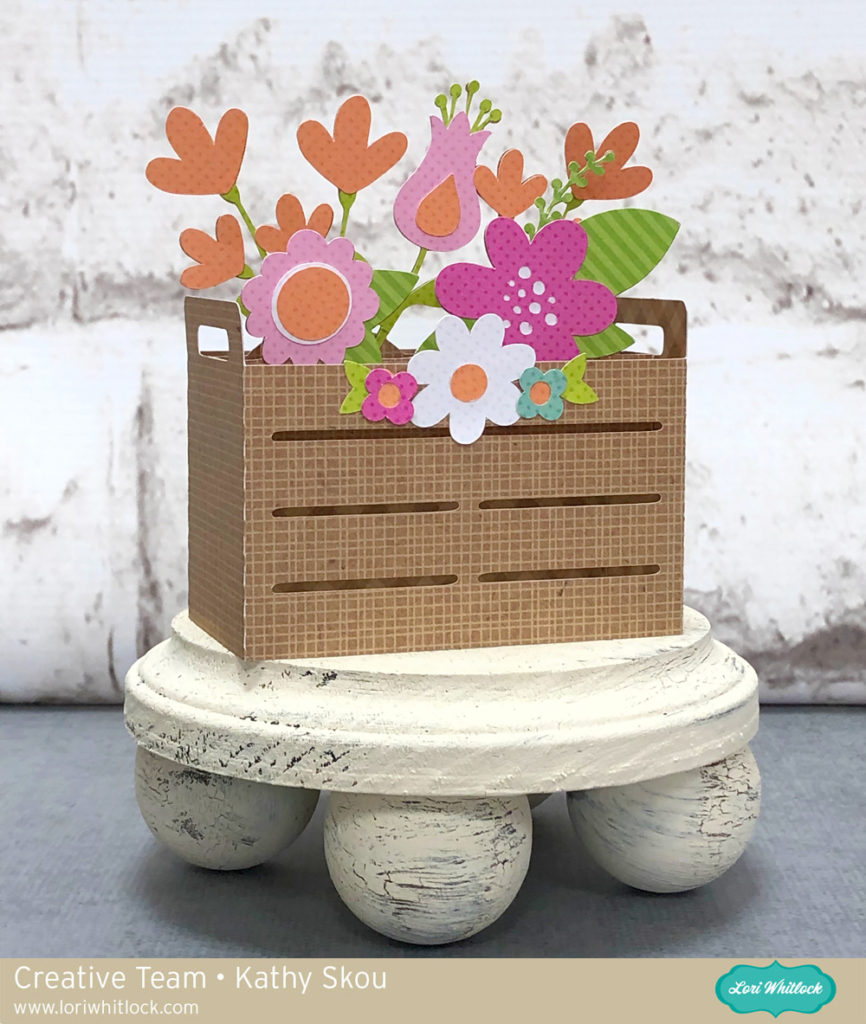
I have a sneak peek of one of the new files being added to the Lori Whitlock SVG shop this week!  Check out this fun Box Card Wooden Flower Crate File (SVGSilhouette ).  Its so bright and cheery and reminds me of our local farmer’s market!

This card is a great all-purpose cards, and is certain to brighten someone’s day!  Be sure to stop by the blog tomorrow to see all of the new files being released this week!  That’s it for me today, thanks for stopping by to peek.

BLOG * INSTAGRAM