3D Christmas Tree Favor Box Tutorial
Hi there paper crafting friends! It’s Michelle Starcher, aka the Bookish Designer, hopping onto the Lori Whitlock blog to walk you through the steps to create Lori’s 3D Christmas Tree Favor Box (SVG, Silhouette). This adorable little Christmas tree is perfect for gifting and sure to make your recipient smile.
I used my SIlhouette Cameo 4 to cut the pieces for the 3D Christmas Tree Favor Box. I was able to use paper scraps for the majority of the project. In fact, I only used one piece of “new” paper for the entire project. I used a full-size 12×12 piece of cardstock to cut the pieces to make the tree boxes. Although the file showed the pieces in two different colors of green, I made them the same color.
Once all of the pieces were cut, I inked the edges of the patterned paper I used for the tree using Distress Ink. Next, I used my tape gun to adhere the patterned pieces to the top of the outside tree box as shown below. (The outside tree box is the bigger of the two green pieces and has two triangles.) Once I had the patterned paper attached, I folded both tree box pieces along the score lines and added adhesive tape to the tabs. Next, I built the two tree boxes by folding along the score lines and attaching the tabs to close the boxes on three sides.
Until next time,
Michelle, aka the Bookish Designer
Reminder: The 30% OFF sale is still going on this week in the SVG Shop. Code: DEC2022.
Watering Can Favor Box Tutorial
Hello everyone, I have a quick and easy tutorial to share with you today! This watering can favor box (SVG, Silhouette) makes such a pretty gift and it’s so simple to put together. I just love making little boxes like this and filling them with candies to give to someone special!
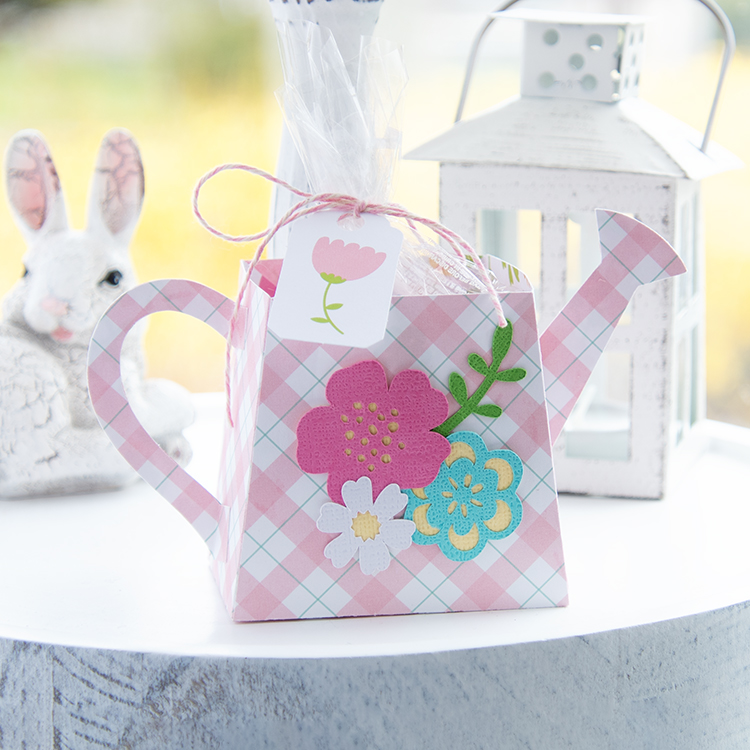
I made a mirror left or right copy of the handle and spout so I could glue them together just to make them a little more sturdy and to have the same paper pattern on both sides.
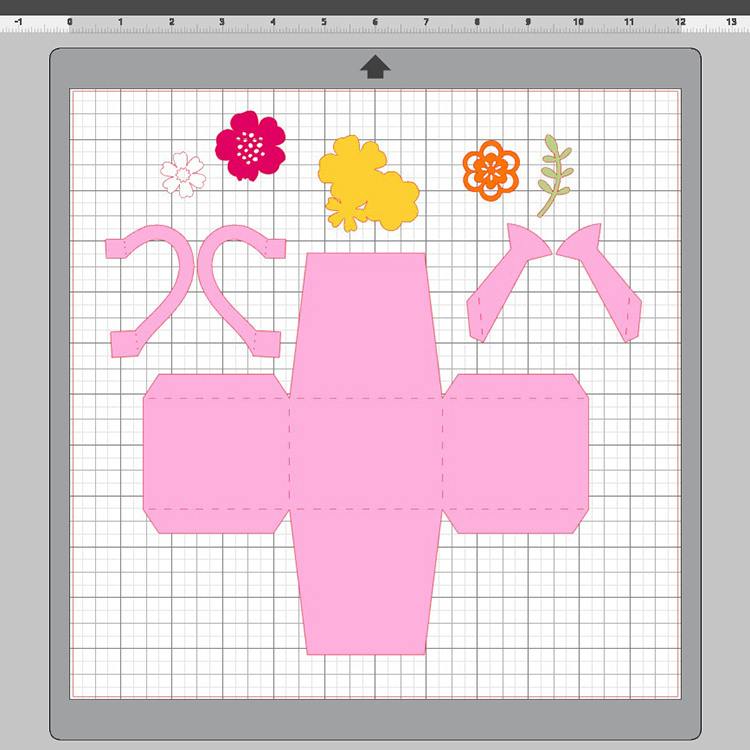
Here are the pieces cut out and score lines all folded. The patterned paper used here is from Echo Park’s Easter Wishes collection, there are some lovely papers in this collection that can be used for non-Easter projects, the cute little tag I used is from the ephemera frames and tags pack of the collection.
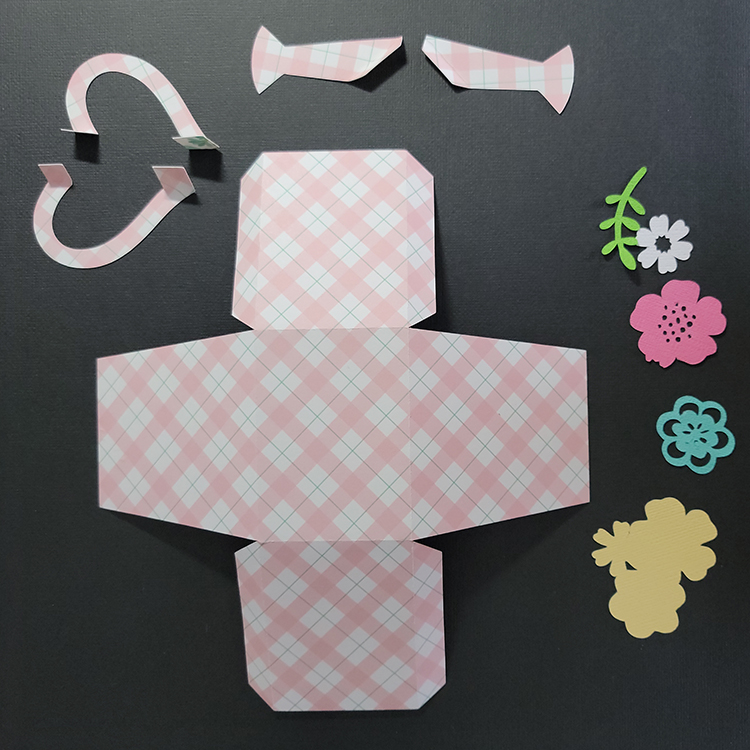
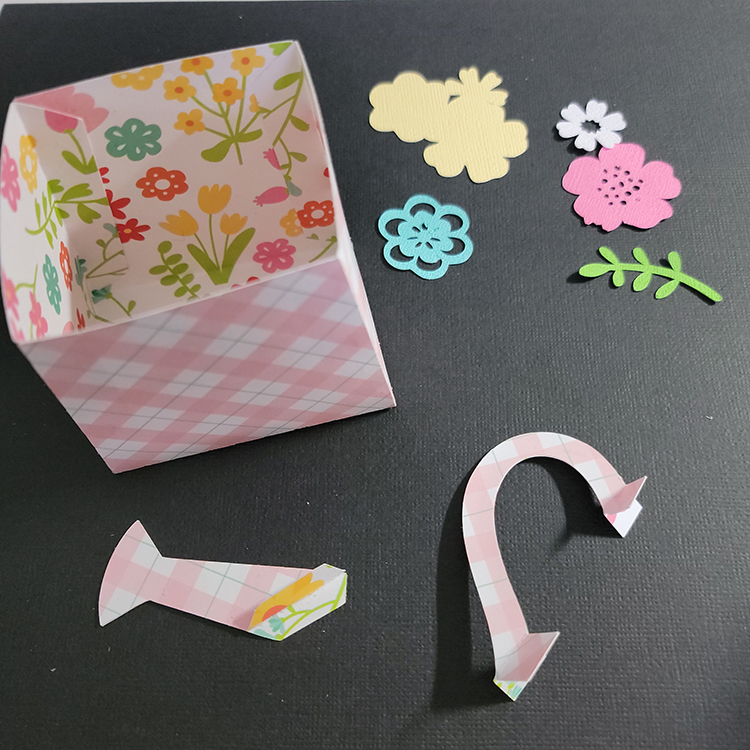
I glued the box together and also glued the handle and spout together folding out the tabs so they can be glued on each side of the box. The blue flower is glued down to the yellow piece first then pink and white last and I added the leaves to the back of the flowers and then glued them to the box.

Back to School Favor Boxes
Hello Crafty Friends! Michelle here with you today to share the cutest little Back to School Favor Boxes.
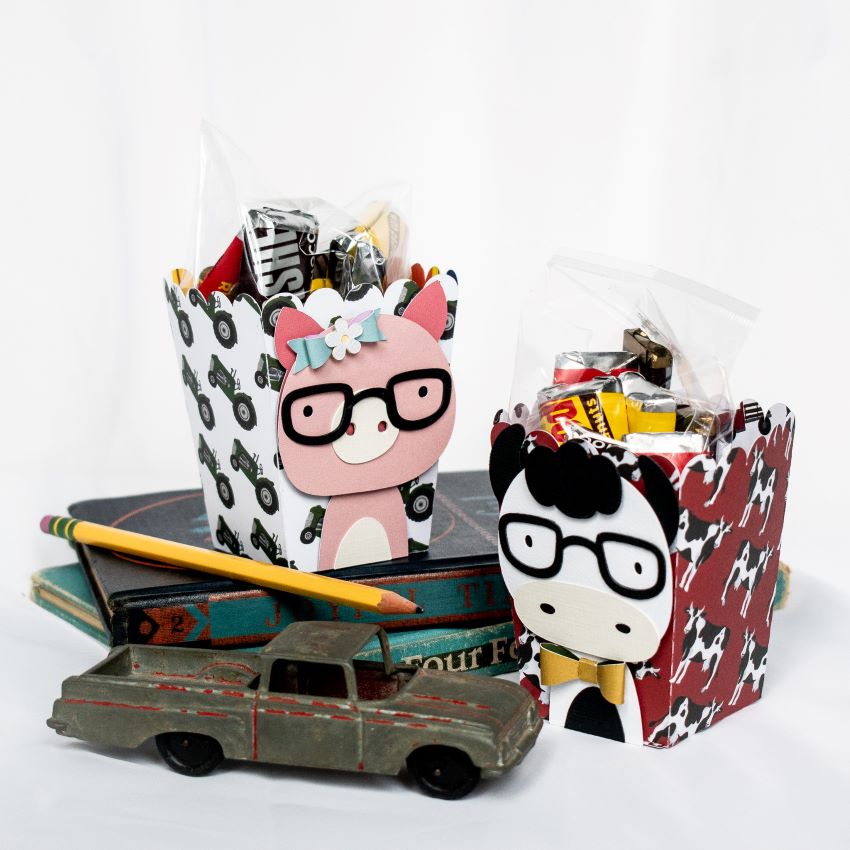
Aren’t they adorable? The boxes can be used for any occasional, but their sweet little glasses reminded me of back-to-school time. They look ready to study!
You can find the pig at the Lori Whitlock SVG Shop and also at the Silhouette Design Store. The cow can also be found at the Lori Whitlock SVG Shop and the Silhouette Design Store. There’s more little animals in this set, so be sure to check those out as well. Just for fun, I added the little bows. You can find that SVG file at the Silhouette Design Store or at the Lori Whitlock SVG Shop. It’s a great file to add to your SVG collection.
Happy Crafting!
Graduation Hat Box with Kathy
Hi Everyone! I have fun little project for you today, Lori’s new Circle Graduation Hat Box! My daughter is graduating from High School this year, so I know I’m going to use this file a lot! Take a peek…

I chose blue and white because those are our High School colors, but you can customize this to go with any school color scheme! The box goes together really quickly, and is very sturdy. I added a cute little tassel made from some white baker’s twine. Here’s what the box looks like when it’s open:
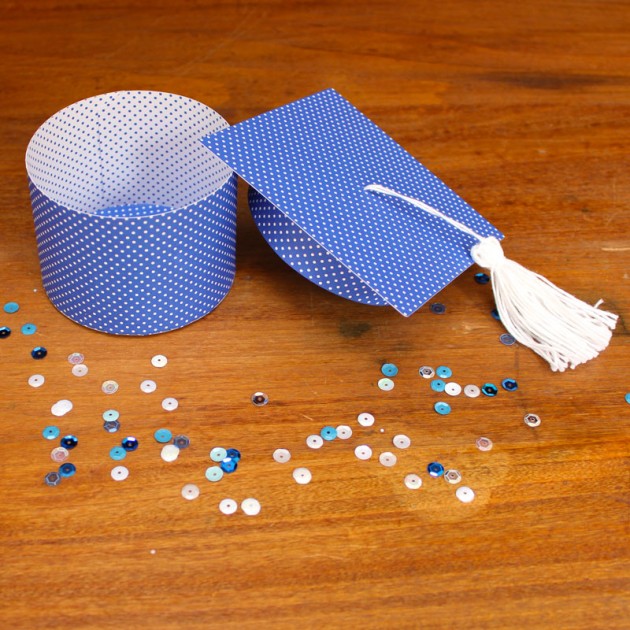
It’s the perfect size for a small gift or gift card. You could even make a bunch as favors and fill them with candies. That’s it for me today, make sure to stop by the blog tomorrow to see the Tuesday Freebie and all of the new files that have been added to the shop! Thanks for stopping by to peek!


