NEW SVG Files + NEW Freebie!

ALL WEEK, this SVG file is FREE with any $1.99 purchase!

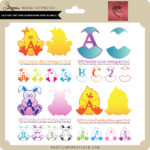
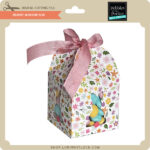
Hi Everyone! We have a FREE file with purchase all this week! All you need need to do is place your qualifying order and the free file will be added to your cart automatically! Simply place an order of $1.99+ in the Lori Whiltock SVG Shop and this Belly Box Hippo file will automatically be added to your order for FREE!  No coupon code necessary!  This offer is good through next Monday.

(Your cart must reach $1.99+ before the FREE file will automatically be added. The files will be available for immediate download after you pay for your order by visiting ORDERS > ORDER # > RED DOWNLOAD ARROW)
Another deal we have going on right now is the FREE 2023 April Kit of the Month with any $20+ purchase (purchase must be in one transaction). Simply place your qualifying order in the Lori Whitlock SVG Shop and this file will be automatically added to your cart for FREE. No coupon code necessary. This offer is good through April 30, 2023.
(Your cart must reach $20+ before the FREE file will automatically be added. The files will be available for immediate download after you pay for your order by visiting ORDERS > ORDER # > RED DOWNLOAD ARROW)

NEW FILES – 25% OFF this week!

Check out the new SVG files we have for this week! The NEW SVG files are ON SALE 25% OFF through Sunday at midnight in the SVG Shop.

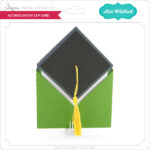
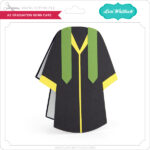
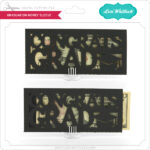
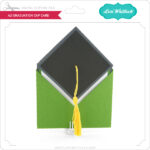
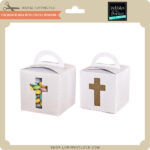
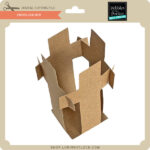
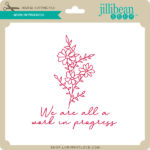
This week I designed a new Graduation Project Bundle. We also have some awesome new SVG files from Jillibean, Pebbles, Quietfire, and Dresden. Take a peek…

These downloads include SVG files that may be used with Cricut Explore, Silhouette (Designer Edition upgrade required), Eclips, Brother Scan and Cut, and any other software that will open SVG files. Be sure to go get them while they are on SALE this week.

Thanks for checking out the NEW FILES and be sure to go grab the freebies of the week.

Have a great day!

Lori

Carrot Favor Box with Crate Tutorial

 Anita here with a tutorial on Lori’s Carrot Favor Box. I made this for my niece who is away at college. I filled the boxes with jelly beans and M&M’s. You can find the file here (SVGSilhouette).
Here are the pieces that come with this file:

This shows the items folded on their score lines.

I decided to use a paper crimper to crimp my grass the give it some more fluff in my crate.

This shows the grass in the crate.

This last photo shows all of the items separately before I put them together into the crate.


Such a fun and easy project and I know that she will enjoy opening her carrots up to see what treats are inside for me.  Have a great day.
Hugs,
Anita

Hexagon Pop Up Card Easter Bunny Tutorial

Hi friends. Time for Tutorial Thursday. Today I’m sharing a tutorial for the Hexagon Pop up Card Easter Bunny (SVGSilhouette).

Let’s get started by cutting out all the pieces.

These pieces are for the base of the card.

Adhere the panels to the long piece.

Adhere the two eggs to this piece labeled 1.

These are all the pieces for the number 2 piece.

Layer and adhere all these pieces onto this bunny layer.  Notice that you will layer the egg first, then the arms, then the feet pieces.

Adhere the eggs to piece 3.  You will notice later that the middle egg is mostly hidden.  So keep that in mind in choosing the colors for these three eggs.

Here are the three pieces all prepared for the card.

Let’s work on the base now.  My paper is double-sided with two colors.  I want the blueish color to end up on the outside.  Fold this piece in half and adhere the middle section.  I’m adhering the blue sides together. Fold all the creases toward the pink side.

Now take piece 2 and slide it into the middle slot of the base. From the underside, adhere the back of piece 2 to the middle of the base.

Now insert Piece 1 into the front slot of the base.  You can now see that Piece 2 is flat against the middle of the base. Adhere the tab of Piece 1 to the bottom of the base.

With both Piece 1 and Piece 2 in place, we are ready to adhere this side of the base. Adhere the glue tab to the front flap of the base.

Slide Piece 3 into the back slot of the base behind the bunny. Adhere the piece 3 glue tab onto the base. And adhere the glue tab to the back flap of the base.

From this view, you can see how the pieces slide into the base and the glue tabs at the bottom of the base.

We have our bunny layered part ready.  Adhere the glue tab on the Happy Easter piece.

Slide the Happy Easter piece onto the bunny part. Notice the little tabs on the bunny piece will slide into the slits of the Happy Easter piece.

Now flatten the bunny card part, by gently pushing the bunny part down.  Place adhesive on the front rectangle part of the base.  Slide the Happy Easter part onto the adhesive, and line it up, and adhere.

Turn the card over and place adhesive on the back rectangle as well. This one is a little trickier to get. Make sure you don’t get any adhesive on the bottom of the base. Press and adhere.

Here it is all assembled.

This is what it looks like when it is flat.

There are many cards in this hexagon style. Check out these other hexagon Easter cards in the shop.

Thanks for stopping by!

Ashley

50% OFF + Cuteness + March KOTM!!

Just wanted to make sure you know….. we have a 50% OFF flash sale on SVGs at shop.loriwhitlock.com now through Friday, March 3! Use code: 50FLASH at checkout. It’s a great chance to stock up on all your St. Patrick’s and Easter SVG file projects.

This week I designed some new St. Patrick’s Day Grid Card SVG FILES and an adorable set of Character Treat Boxes! Check them out below….. SHOP NEW FILES HERE

I also wanted to let you know about our new 2023 March Kit of the Month that is FREE with any $20 purchase… it will automatically be added to your cart with your qualifying purchase. No code necessary.
Thank you for joining us today! Have fun crafting!!
Lori

Easter Shadowbox Card

Today I have one of Lori’s Easter Shadowbox cards to share.  These are quick to put together and have such a lovely impact with the different layers.

Shadow Box Card Easter Jesus

SVG/Silhouette

I added pop dots to the stone to give it more dimension. This card folds flat to fit into a 5×7 envelope.  For help with assembly, Lori has a tutorial here for this type of shadow box card.

Have a great day!

Ashley