Pop Out Birthday Card with Ashley

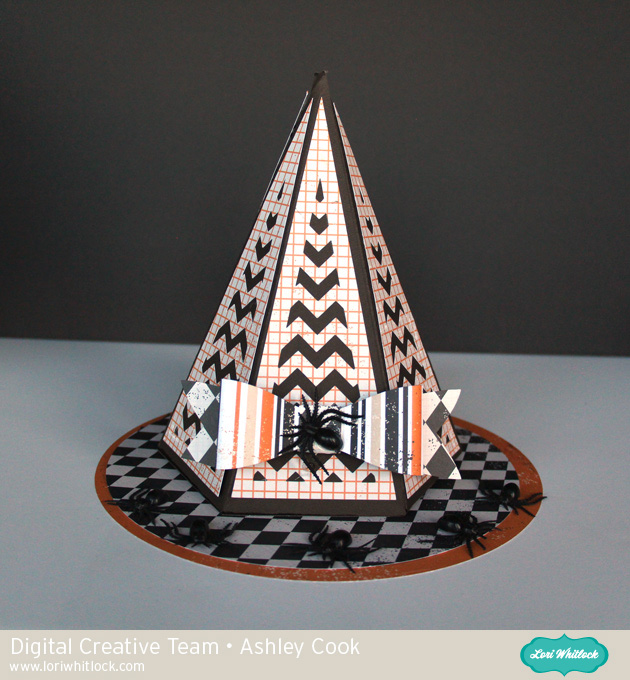
Hi Everyone, Today I’m sharing the new Pop Out Birthday card. Such a fun card to send and easy to assemble!

Image 1

You can find this card in Lori’s shop and in the Silhouette Store.  

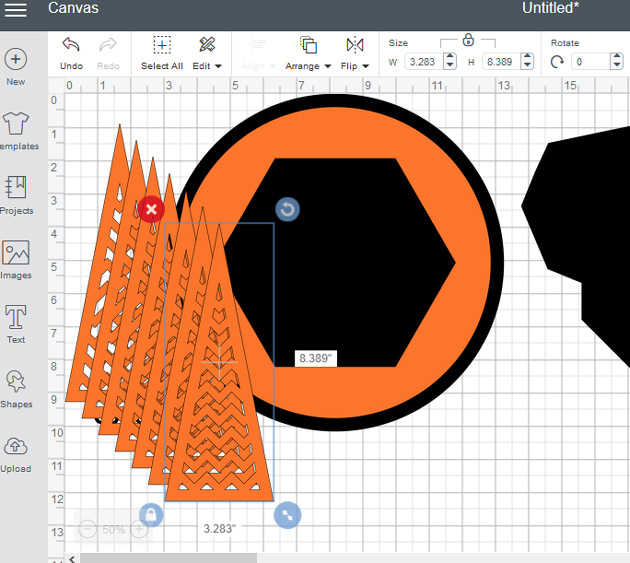
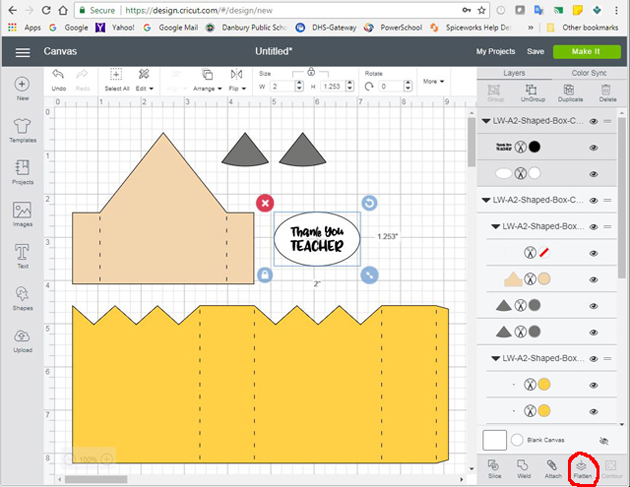
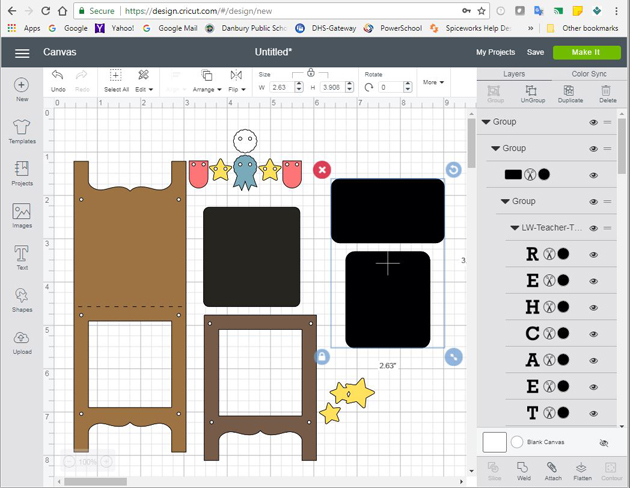
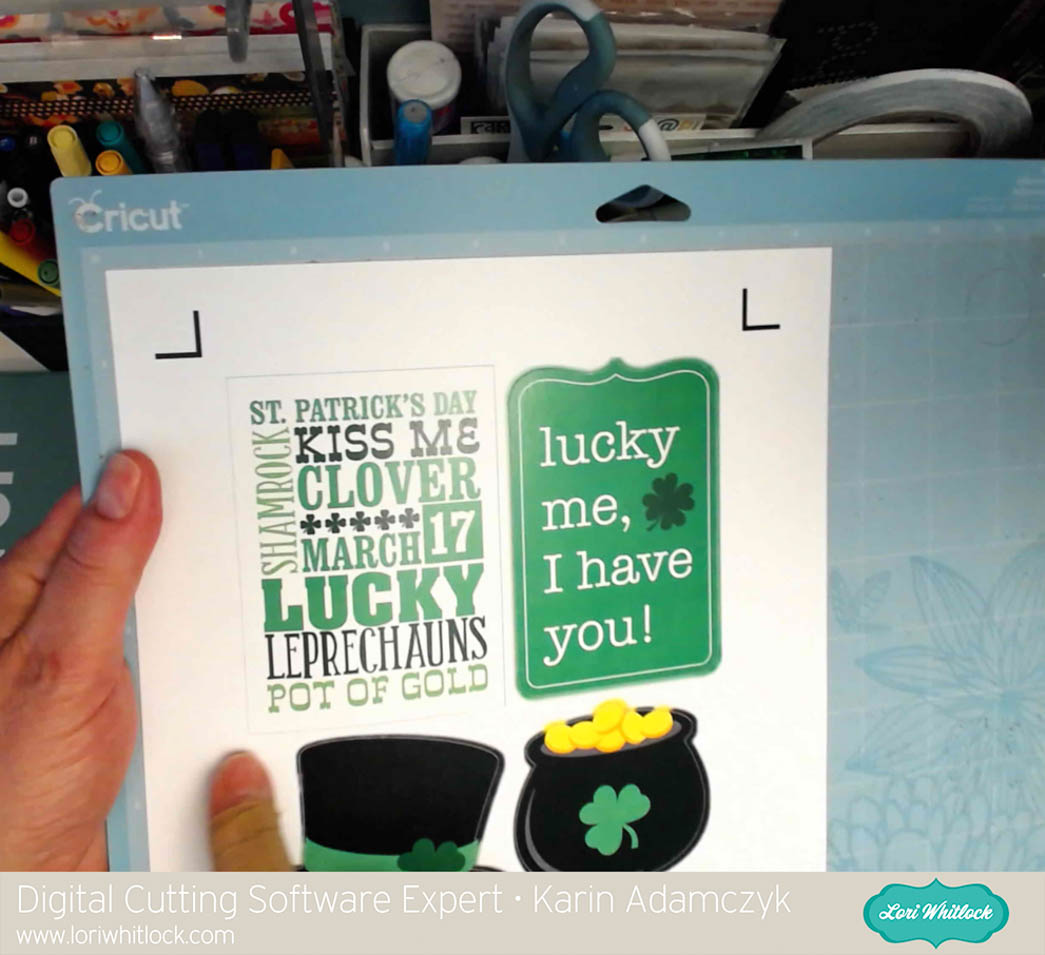
When you open this file in Cricut Design Space, there are a few steps to take before you cut.

1. Ungroup the file.

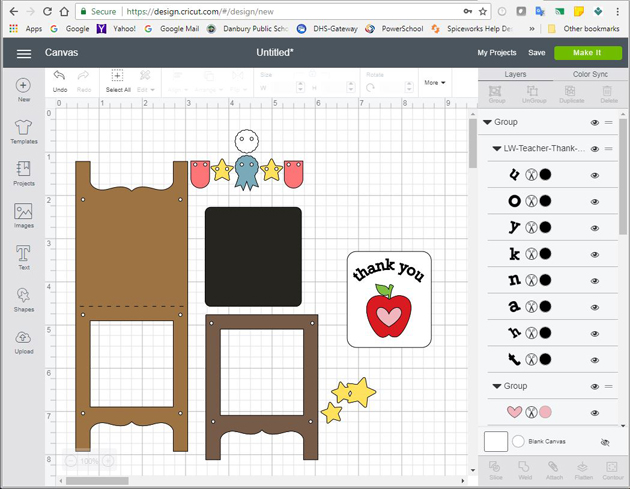
2. Optional: I changed out the dashed cut lines to score lines.  To do this, select the score line which is grouped in Shapes. Align the score line with the dashed cut line and resize as necessary.  Repeat for all the score lines on the white layer.

3. Group the 3 score lines  you created and delete the original dashed cut lines.

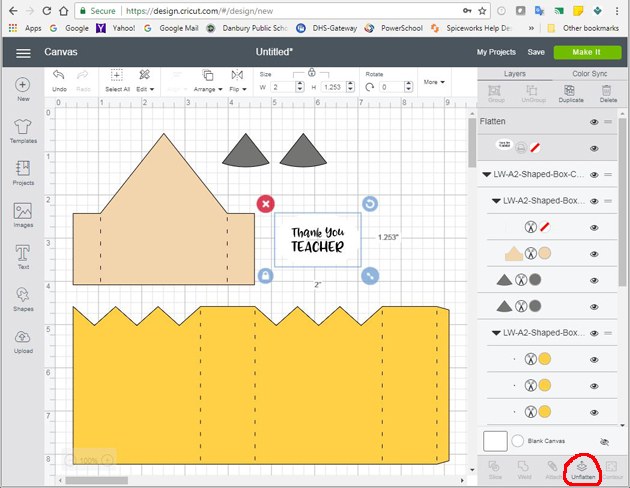
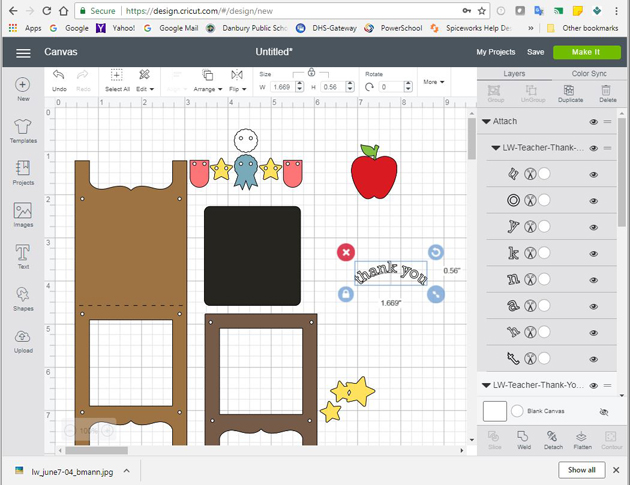
4. Select the score lines and the white card and then select Attach.

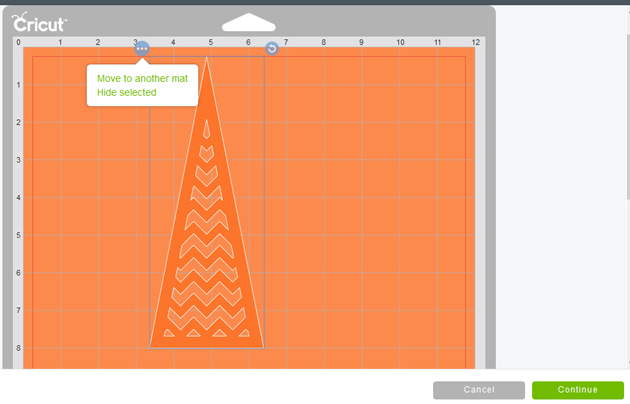
5. Repeat the processwith the blue card–replace dashed cut line with Score Line, Attach the the Score line with the blue card.

6. Now you are ready to cut.

You don’t have to replace the dashed lines if you are not using a Cricut Scoring wheel or scoring tool.  The dashed lines will be cut instead of scored.  But you will still need to attach the dashed lines to the appropriate layer.

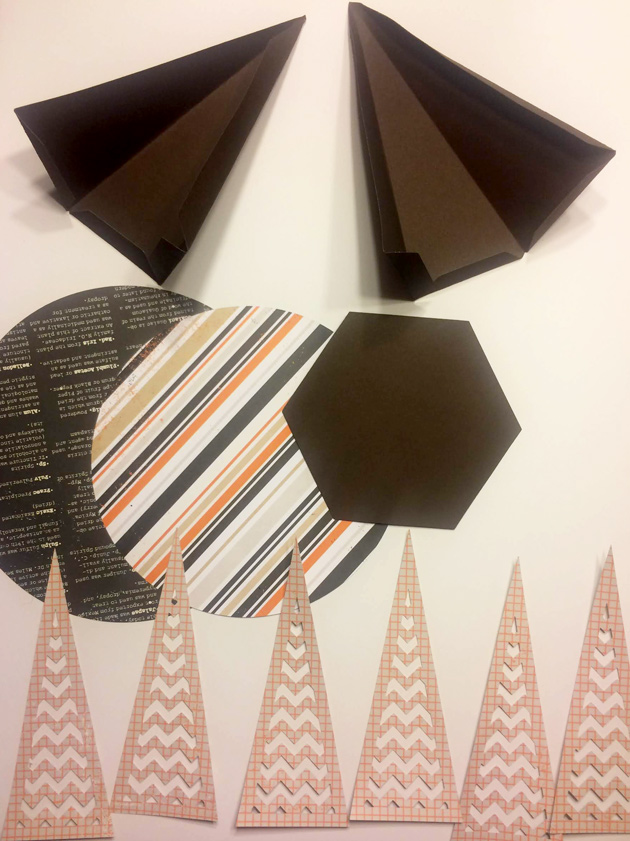
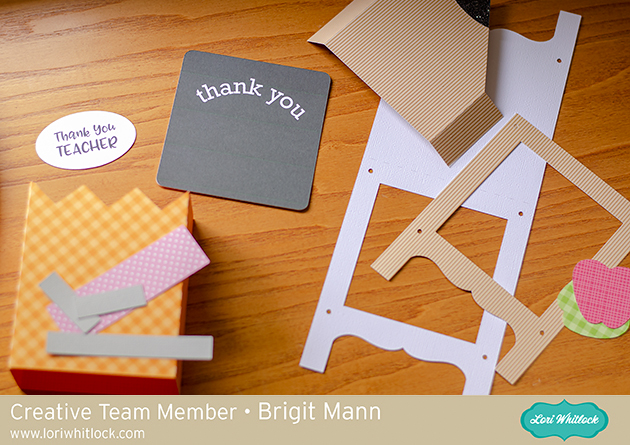
Once you’ve cut the two card pieces, simply adhere the pop out portion of the card to the base, careful not to glue under the pop out section.  Then decorate the front.

  I used paper from Lori’s Spring Fling Collection with Echo Park.  Have a great day!

Witch’s Hat with Ashley

October is here! Get all those Fall and Halloween decor items out.  Today, I’m sharing a witch’s hat.  You can find it at the Silhouette Design Store and in Lori’s Shop.

I have a quick Cricut Design Space tip.  When you open this witch hat SVG in Design Space, there is one of each shape and the notes of how many to cut.  You can quickly duplicate the panel pieces six times.  You don’t even need to arrange them.

When you click Make It, Design Space sorts your shapes onto mats.  It doesn’t always sort with saving paper in mind though.  To move a shape to another mat, click on the 3 dots at the top of the image and select Move to another mat.  Then you can arrange your shapes.  I was able to arrange 6 panels onto one 12 X 12 piece of paper.

Here are all the cut pieces.

I used a 3D bow to finish it off. The bow can be found here at the  Silhouette Design Store  and here in Lori’s Shop.


Have a great day!


Print n Cut Teacher Cards Tutorial with Brigit

Hello there, here’s a quick tutorial on how I print n cut these Teacher thank you sentiments for cards in Cricut Design Space.

For the A2 shaped box card pencil I ungrouped the whole project, selected the thank you teacher and flatten it.

When it’s unflatten the outlines are gone, but it will still cut out just the oval.

When you make it, you will send to printer first and then place on mat to cut.

The A2 chalkboard teacher card I added one of the teacher thank you tags to the chalkboard piece. When I imported the tags they were black so I ungrouped, deleted the ones I wasn’t using, selected the top layer of the one I wanted, selected arrange at the top and moved to back and changed the color to white.

So now you can see everything on the tag.

I just wanted the thank you to print out on the chalkboard so I moved the apple and deleted the tag, selected the thank you and attached, and changed one of the letters on the thank you to white which changed all of the letters.

I ungrouped the chalkboard card, deleted what I didn’t want to use, resized and center aligned the thank you over the chalkboard leaving room for the apple. I selected both and flatten, now it will print n cut.

I cut out both projects together using my Cricut Maker, this way I could print both thank you sentiments at one time. You can see the two print n cuts below.

I love the ability to print n cut sentiments for my projects, you can create a nice custom fit and it’s super quick and easy.

Here’s a closer look at both cards.

Get the A2 pencil shaped box card at the Silhouette Design Store.

Get the A2 teacher chalkboard easel card at the Silhouette Design Store.

Get the thank you teacher favor tags from the Silhouette Design Store.

Thanks for stopping by and have a wonderful day!


Digital Life Cards and Print Elements with the Cricut Explore with Karin

20160708-2016-07-08_17-00-04-Edit


I worked on a series of videos to show you how I am using Lori Whitlock’s digital life cards in my Project Life binder. I combined the videos into the one below and will add another in two weeks showing how far I have progressed in a very short time.
I had started a Project Life binder in 2012 and had it very well organized, but then I never kept it up. Since it is now so much later, I have decided that I won’t organize the binder by date. Instead I will just work through all my images and journalling using digital life cards and make my binder look nice and complete the project.
I literally have hundreds of files to work with so I need to organize them before I get started. I used Adobe Photoshop Lightroom to do this because it makes it so easy to find what I need. Also, if I want to tag elements for specific topics or themes, Lightroom makes this very easy. The image above shows how the thumbnails look in Lightroom.
20160708-2016-07-08_17-00-52-Edit
The image above shows how I took an element, uploaded it into Design Space, cleaned away the outer white area to have the scalloped edge and inner portions as a print element that I cut out with my Cricut Explore.
20160708-2016-07-08_17-02-13-Edit
In my video, I show you how I set up the element in the upper left corner of the print then cut image above to use it as a card in a 3×4 pocket.
20160708-2016-07-08_17-02-59-Edit
This image shows you how the cutting line goes around the outside of the card.

Thanks so much for stopping by. Be sure to check back in two weeks when I post a flip through of my Project Life binder so far.


Father’s Day Toolbox Card with Karin

20160612-_MG_5139-Edit

Here is another really cute Father’s Day card from the Lori Whitlock SVG Shop. This time, it’s in the shape of a toolbox and it’s full of very useful tools.

The supplies I used include:

Lori Whitlock’s Toolbox card

Cricut card stock

Cricut pearl paper

Versamark stamp pad

Zing Pewter Metallic Finish embossing powder

Ranger black heat tool

ATG adhesive


In the video below, I show you how I set everything up in Design Space and then put the card together for you.

Have a great day!