Reindeer Christmas Present Box Card

Hello everyone! Marcia here today. I have a holiday card to share with you today. I love to send holiday cards to friends and family as well as receive them. I especially love a box card that can sit on a tabletop or counter and doubles as home décor. This 5×7 Box Card Christmas Present Reindeer (SVGSilhouette) cut file can be found in Lori’s Store along with many other varieties of holiday cards. I used the new Echo Park Paper The Magic Of Christmas collection.

This card folds flat to fit into a standard A7 (5.25″ x 7.25″) envelope.  For assembly help, see the Shaped box card tutorial here.  Thanks so much for stopping by. Be sure to check out Lori’s Store for more holiday card ideas.
~Marcia

Gingerbread Man Christmas Present Box Card Tutorial

Hello everyone! Marcia here today. Since it is July and Lori just came out with some new Christmas box cards, I thought I would get a jump on making my Christmas cards. Do you start making Christmas projects in July? My mother-in-law loves gingerbread, so I thought the Gingerbread Man Christmas Present Box Card (SVG, Silhouette) would be perfect for her. There are similar new Christmas Present Box Cards with Santa, Reindeer, Snowman, etc…

Let me show you how easy these box cards are to make.

Step 1.  Decide on cardstock colors and/or pattern papers and cut out all pieces. I like to match the base cardstock as close as possible to the pattern paper I am using. The cut file comes with a tag and three different sentiments. You can use the print and cut feature of your machine to create the tag. Otherwise, a stamped sentiment works well too. Before assembling, I ink the edges of my papers to give the shapes dimension. Here I have the pieces roughly arranged in layers.

Step 2.  Adhere the Flower together, the Mug, and the Gingerbread Man. To get the eyes and mouth just perfect, save the negative piece and use it as a guide. You’ll never again have eyes too wide apart or a crooked smile ever again! Adhere the ribbon and bow paper pieces onto the card base.

Step 3.  Cut a piece of twine and attach to the tag. Using a sharp pick, poke holes in the bow using the dots as a guide. Thread the ends of the twine through so you can tie it off in a knot in the back of the bow. I secured the tag in place with foam tape. (Optionally, you could thread the twine through before adhering the bow front the the bow back.) Glue the side tab to the opposite side to form the card base. Using foam tape, add the flower to the front.

Step 4. Adhere the inserts into the card base placing the mug in front of the gingerbread man.

These cards do fold flat for mailing in a 5×7 envelope. Lori has lots of Christmas card ideas in her shop. Go check them all out and have some fun making your own cards!

Thanks so much for stopping by.
~Marcia

12 Days of Christmas – Day 6 & ‘Tis the Season of Gift Cards

Welcome to Day 6 of our 12 Days of Christmas! Each day from December 1-12, there will be a free SVG file of the day, along with a special promotion!  For Day 6 we have this Fa La La Holiday Penguin will be free today only, so don’t miss out!

In addition, today only, you can get 50% off all items under the Bundle Category in my SVG shop!  Just use code BUNDLE50 at checkout!


And check out these amazing projects by Michelle!

Hi there paper crafting friends!  It’s Michelle Starcher, aka the Bookish Designer, popping in on the blog to share some of the projects I have been working on for Christmas gift giving. There have been so many news stories about shipping delays and empty shelves in stores, I know a lot of us are looking at giving gift cards and cash for Christmas this year.  If you are looking for a way to add a personal touch to these gifts, Lori has the solution.  There are so many different options available in the shop when you are giving the gift of cash or a gift card.  Today I am sharing two that I made- one that holds a gift card and another that holds the gift of money.

When you aren’t sure what to give your niece or nephew for the holidays, I am pretty sure you will never go wrong with the gift of cash.  The Money Roll Gift Bag (SVG, Silhouette) is a great option to use if you want to give the gift of money in a creative way.  After all,  it’s all in the packaging! Tape some bills together and roll them up. Insert them into the box and stick one end of the roll out of the slit. Then, apply the tab to the exposed end of the “money roll.” There is a tutorial showing how easy it is to assemble here.

If you are looking for a fun, interactive way to present a gift card, I suggest the Pop Up Drawer (SVG, Silhouette).  For my project, I converted the Birthday Penguin file and used leftover stickers, papers, and journal cards from an older Christmas collection.  This interactive box features a drawer that when opened automatically “pops up” the card on top! This file is versatile you can give a small gift or candy in this box or use the included gift card holder to house a gift card, like I did.  Here is an easy tutorial.

If you are running out of time or just can’t find the perfect gift, you’re not alone.  Thankfully, Lori has so many amazing options in the shop that we can give the gift of cash or a gift card without feeling guilty about not giving a more personalized gift.  Let me know your favorite file in the comments below.

Until next time,

Michelle

12 Days of Christmas Day 2 & Christmas Ornament Gift Tag

Welcome to Day 2 of our 12 Days of Christmas! Each day from December 1-12, there will be a free SVG file of the day, along with a special promotion!  For Day 2 we have this absolutely adorable A2 Christmas Card Reindeer File.  This file will be free today only, so don’t miss out!

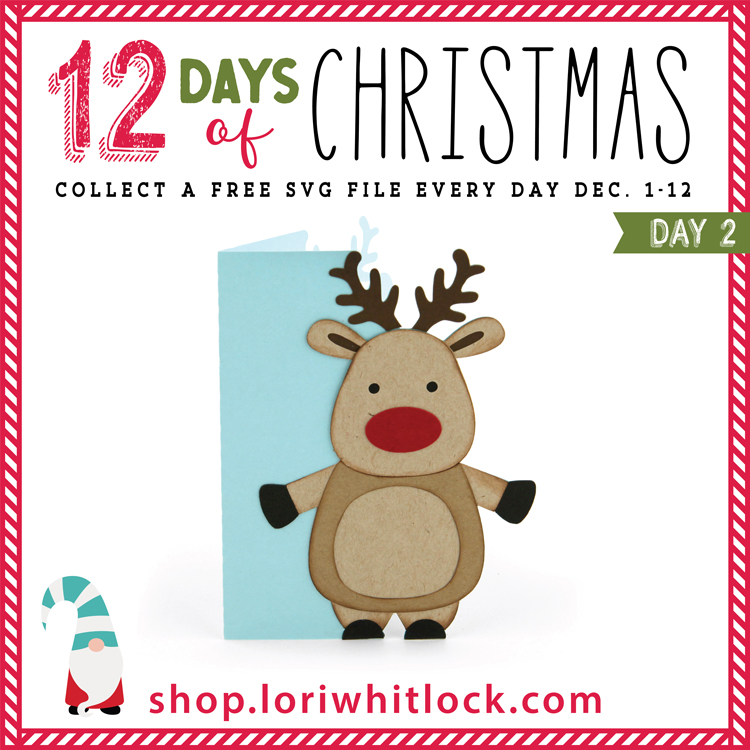
In addition, today only, you can get 40% off all items under the Cards Category in my SVG shop!  Just use code CARDS40 at checkout!

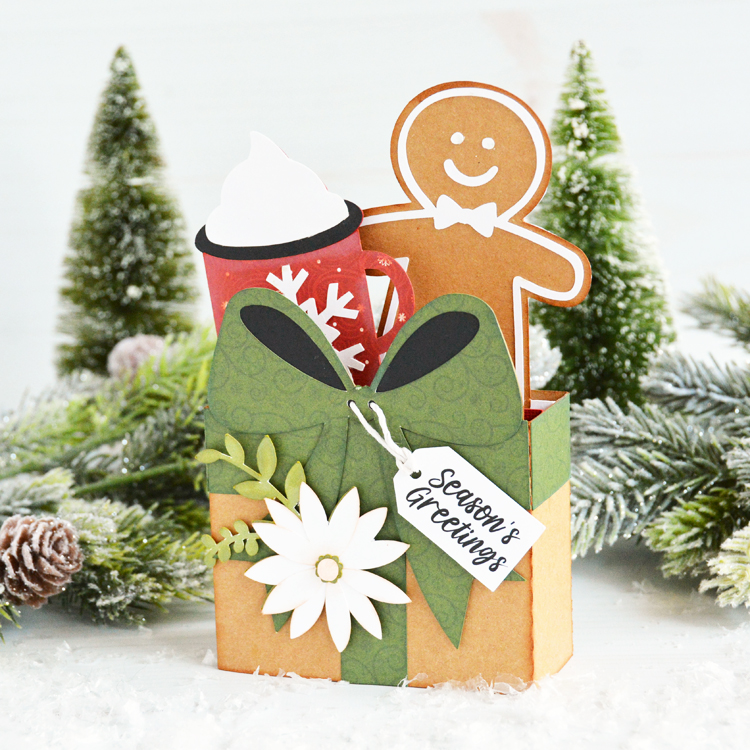
And now check out these adorable ornament gift tags from Aimee!

Hello crafty friends! Aimee here with you today and I will be sharing a quick tutorial on putting the Christmas Ornament Tree (Lori’ Shop, Silhouette) file together along with the Christmas Ornament Snowman 2 (Lori’s Shop, Silhouette). This is such a fun ornament to put together to hang on your tree or as a gift tag on a present that the receiver could hang on their tree. This could also be a fun activity if you have kids or grandkids. Gather all of the supplies and make the ornaments together while munching on a fresh batch of homemade Christmas cookies!

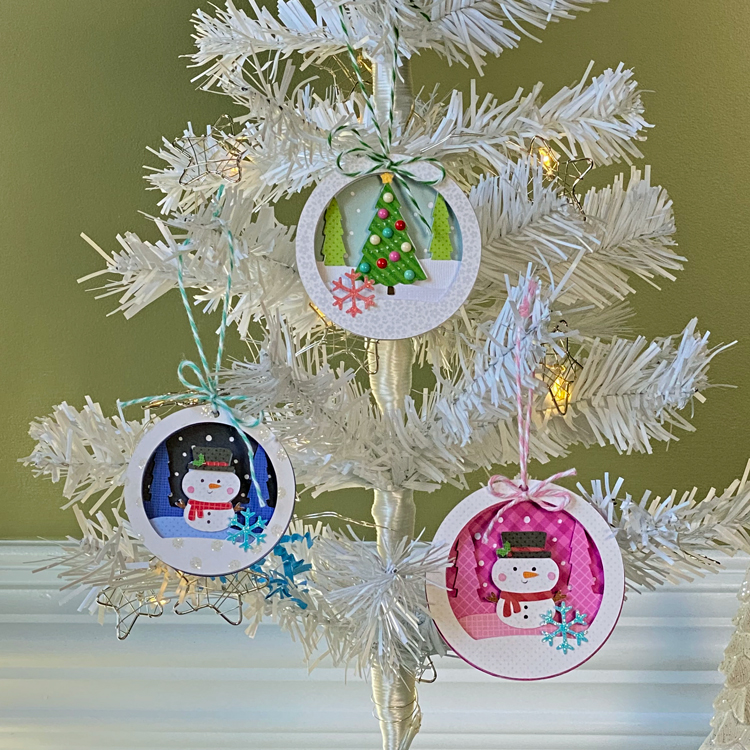
Let’s get started on making these little cuties! My ornaments are a little on the smaller size because my tree here is only 2ft tall..so I resized them to be 2 3/4″ tall.

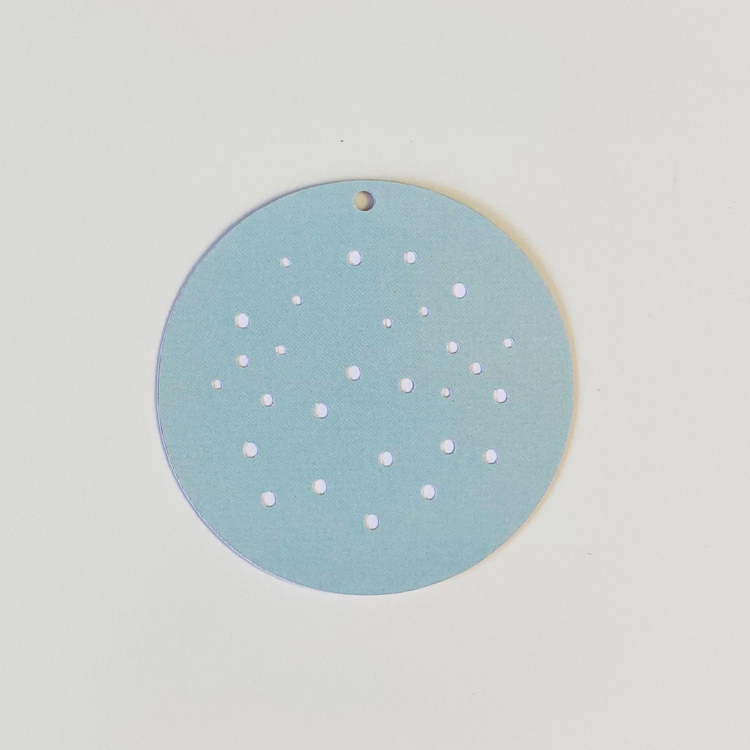
Gather a bunch of Christmas papers/embellishments (and sticky foam strips) and let’s get to cutting out the layers. A little tip, something I do is to use my die cut machine program to change up colors to get an idea of what the finished product will look like. That’s how I came up with the blue and pink background snowman ornaments.

This first layer (which is the back of the ornament) will be the only time you will glue the layers together.

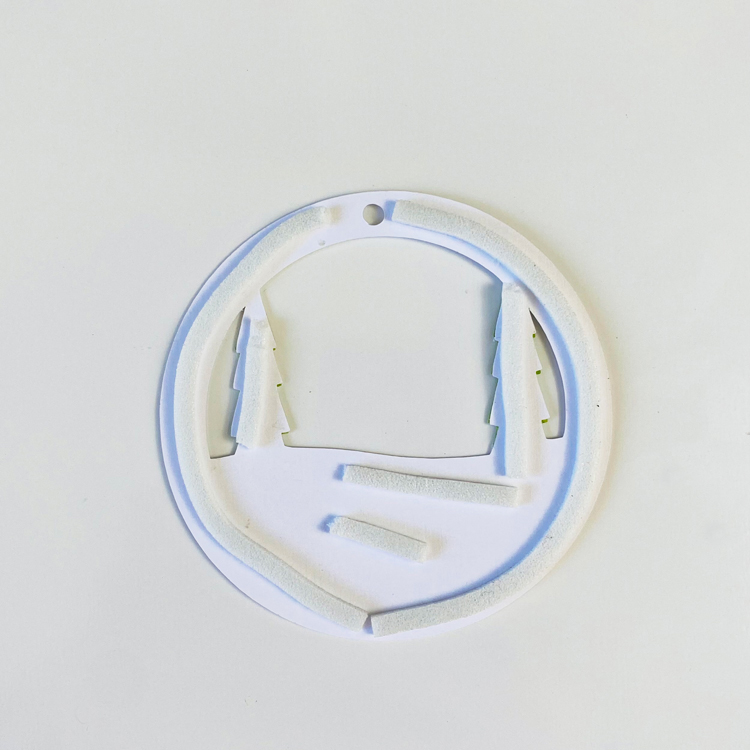
The small trees layer you will want to add foam adhesive pretty much around the entire piece.

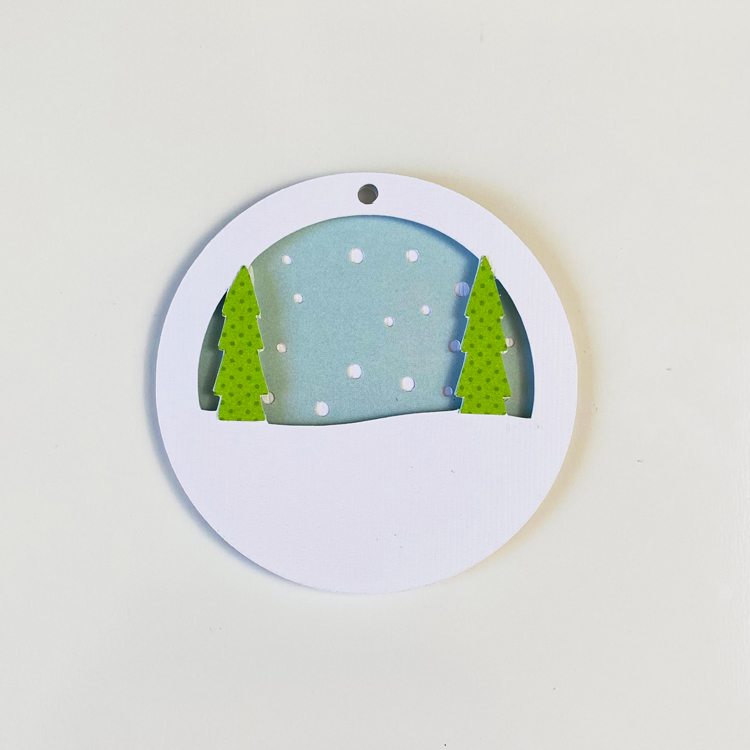
Now adhere that layer to the snowy background layer. Be sure to line up the outer edges and the top holes together when adding each layer. As you see in the picture below, there are green trees. I cut out a separate layer in green pattern paper and then snipped the trees out and adhered them to the solid white layer.

For the big tree layer, do not add any sticky foam strips to the back of the tree.

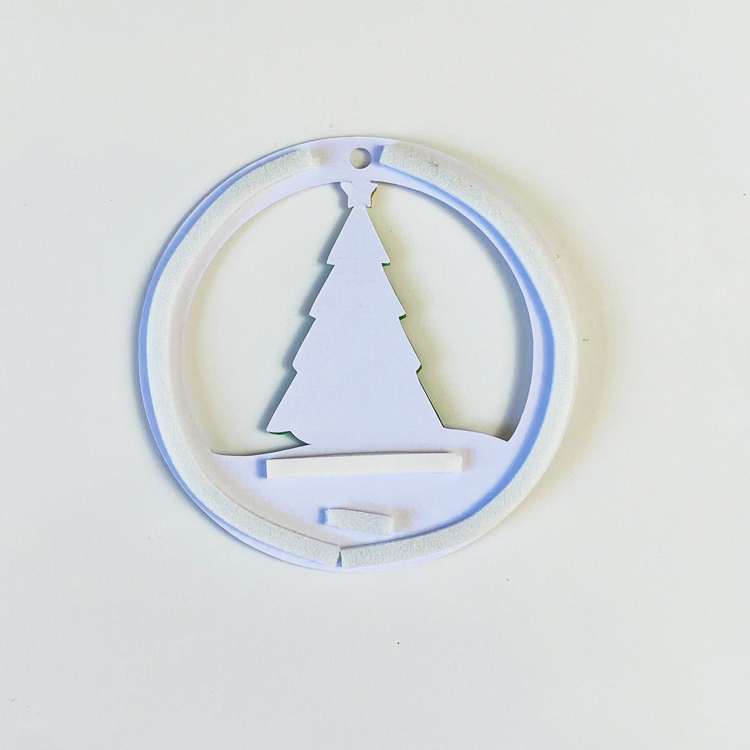
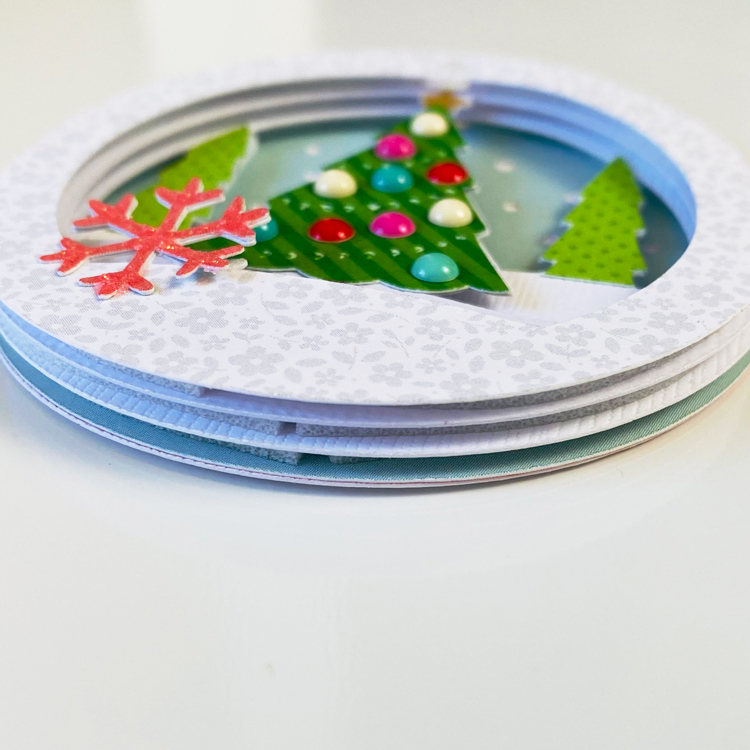
Here is a side shot of all of the layers adhered together to show you how thick the ornament will be. I will say they feel quite sturdy and should last for years!

Now, add some string and a bow…

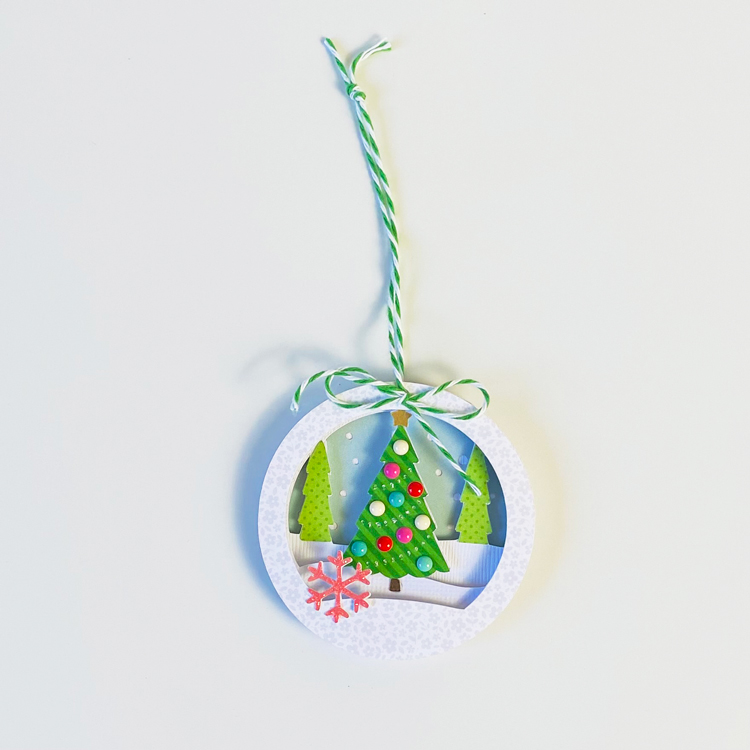
and your sweet ornaments are ready to hang on the tree or used on a present to serve as a gift tag/ornament.

Thanks for stopping by today and I hope you enjoy this tutorial on putting these ornaments together!

Merry Christmas!

Aimee

Sleigh Poinsettia Box Card

Hello everyone!! I just love the new sleigh box cards that Lori came out with recently, not only are they adorable they are super simple to put together. I made the sleigh poinsettia (SVG, Silhouette) one and used paper and a couple of stickers from the lovely The First Noel Collection by Echo Park. The file comes with a Merry Christmas printable sentiment but I used a sentiment sticker from the collection instead.


Thanks for stopping by and have a wonderful day!