Shadow Box Card Friends


Anita here with a card that I made for a dear friend who is moving away to be closer to her daughter and be in a warmer climate.  I wanted to give her a special card which reflected the importance of her friendship to me.  I made this 5X7 Shadow Box Card Friends which you can find here in Lori’s SVG Shop and here in the Silhouette Design store.  I used one of Lori’s new Echo Park Paper collections called A Slice of Summer to piece it together.  This card folds flat for mailing and is sure to add some cheer to a friend’s day.

If you need help with assembly, Lori has a video here.  That’s it for me today.  Thanks for looking and have a great day.  Be sure to check out Lori’s other beautiful friendship cards.

Hugs,

Anita

Button Card Tutorial

Lori has some fun new button cards in her shop.  The whole collection can be found here. They are also available individually in the Silhouette Design Store.


This card is called the Flower Card Button (SVG, Silhouette).  I’m going to share a quick tutorial using Cricut Design Space.  You can create this card with the Silhouette as well.  When you upload and open the image in Design Space, it looks like this:

Ungroup the pieces of the card.  Now let’s look at the button sentiment.  Lori has included a circle that is the size of  the medium We R Memory Keepers button (37 mm).  A smaller circle is also included that could be used instead of a button if you did not have a button maker.  Both Mom and Mum are included in the file.


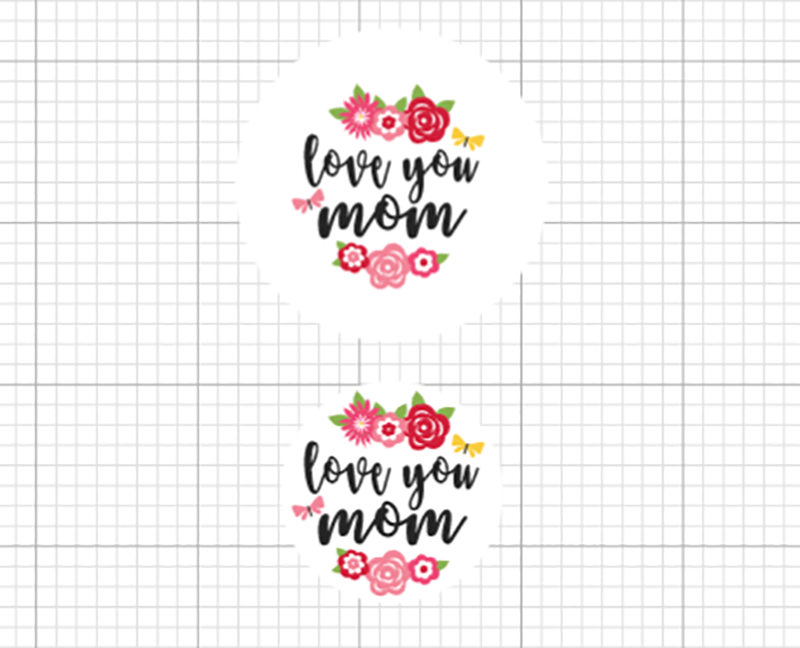
If you want to change any of the colors on the button, this is the time to do that.  Once you have the colors, it is time to flatten the image for Print then Cut.  Select one of the circles and all the pieces in it like shown, and click Flatten (bottom right of screen).

You know you have the file flattened correctly when it looks like this on your screen:

And in your layers, the image looks like this.

Sometimes when flattening files, you might need to ungroup before you flatten. This file is ready to print then cut.  After printing and cutting, you have all your pieces:

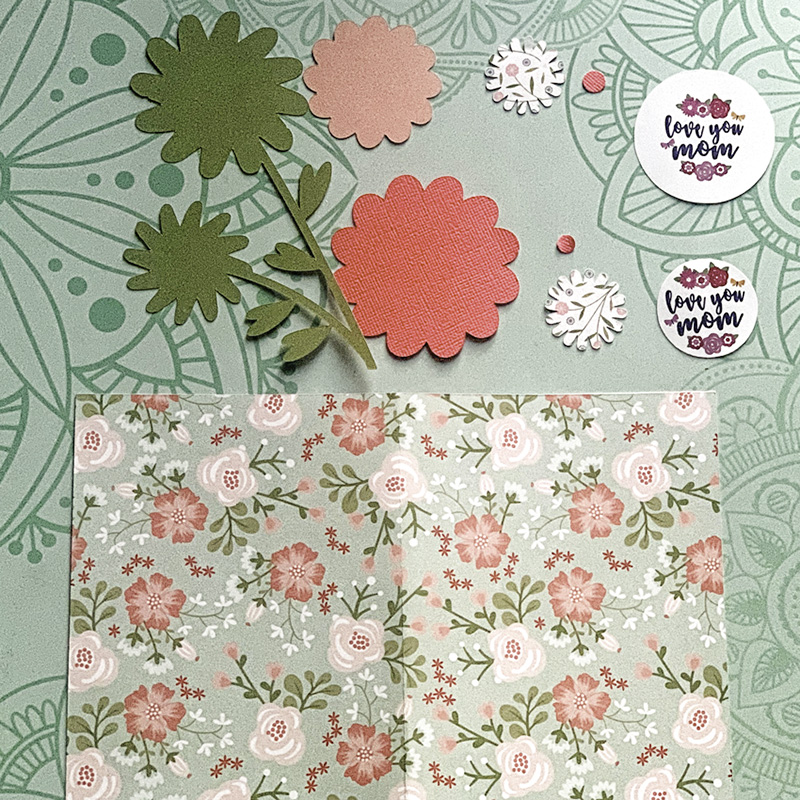
The flower parts are easy to assemble on the card.   If you have a Button press, make a button.

You can make the button with the pin in the back so it can be worn or attached to something else.  Or you can take the pin out, so it will just be an embellishment on the card. I made both to show you.

I decided to use the button without the pin back for the card.  I love the dimension it adds.  If you don’t have a button press, you can use the included smaller circle and mount it to chipboard and/or a pop dot.

I used papers from Lori’s Our Wedding Collection. I hope you enjoy this tutorial for the Button card.  The real question is, Do you call the item in this file a button or badge? Or something else?

Have a great day!

Fall Themed Circular Pop-Up Card

Hi there paper crafting friends!  It’s Michelle Starcher, aka the Bookish Designer, popping in on the blog to share the Circular Pop-Up Card I made (SVG, Silhouette).  I decided to make this adorable little card hold for my mom since we can’t make it home for Thanksgiving this year.  I hope it will remind her of previous Thanksgivings when we were all together.

This adorable card lays flat and then opens like an accordion to reveal your photos and personalized elements. The file gives you the option to create the square or pentagon depending on how many pieces you use for the project.  I cut four copies of the file to create my square shaped card.  I assembled all of the pieces and added my pictures and embellishments before assembling the card pieces. The project was super easy, and only took me a couple of hours to create.  Be sure to watch Lori’s video for an assembly tutorial.

I hope my mom likes her special Thanksgiving card  (SVG, Silhouetteas much as I do! I’ve been wanting to make one of these circular pop-up cards for while now.  I love how quick and easy it was to put together:)

Until next time,

Michelle

Pop Up Card Valentine Sewing

Happy Monday Everyone:
I hope that your new year is off to a great start. My second favorite holiday after Christmas is Valentine’s Day. I love celebrating all the wonderful people and things in life that make it special. Of course, there is chocolate too which is a great bonus.
I have a group of great friends  I sew with so I decided to make a sewing themed Valentine for each lady. I used Lori’s SVG file called Pop Up Card Valentine Sewing and you can find it here in Lori’s SVG shop  and here in the Silhouette store. I got the bundle that Lori sells as I fell in love with all of them. You can find the bundle here.

Did you know that Lori has fill papers in her store? This was my first time using these files. I downloaded the file and opened and printed them from my Silhouette software. For this card I used Be My Valentine Fills.  You can find that set here in Lori’s SVG store. I used patterns numbered 4, 5, 6, 10, 11 and 12. I also used Lori Whitlock Pattern Fill Textured Solids which you can find here in Lori’s SVG store. Be sure to check out all the different fill paper options that Lori has.

That’s it for me. Have a great week.
Hugs,

Anita

Christmas City Wiper Card

Are your Christmas cards ready to mail? Mine aren’t, but I’m working on it! Hello crafty friends! Michelle Zerull here with you today to share this magical Christmas City Wiper Card.

What makes it so magical? When you open it, the moon rises over the night sky and Santa appears!

Isn’t it fun? It was fun to put together too. You can find the SVG files for your digital cutting machine at the Lori Whitlock SVG Shop, or at the Silhouette Design Store. If you’ve never made a Wiper Card, you can watch Lori’s YouTube Wiper Card video. However, I must warn you. Once you’ve made your Wiper Card, you’re going to want to make more!

Have a crafty day!