Silhouette Tutorial with Brigit: Chalkboard Tutorial

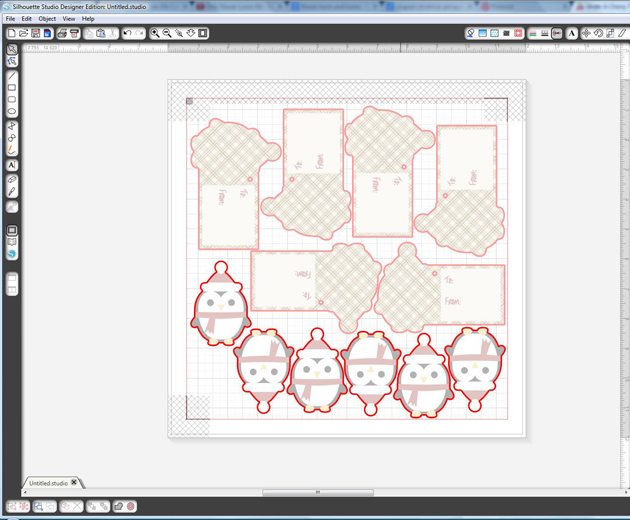
Hi everyone, I made some chalkboard Christmas tags recently and love the technique so much I thought I’d make a chalkboard tutorial using one of Lori’s vinyl phrases and a Christmas card.


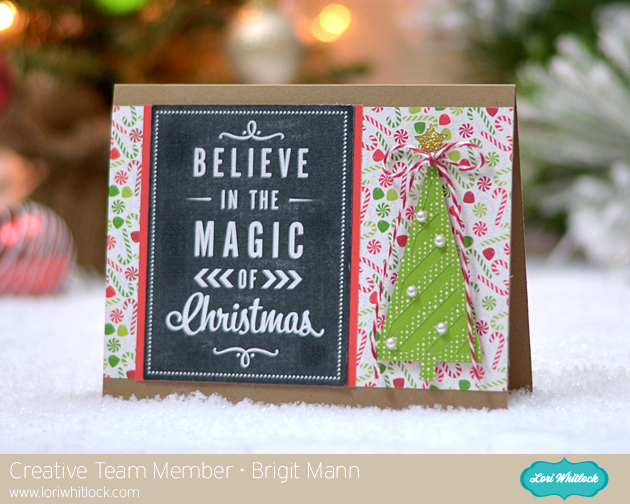
I used Lori’s Merry Christmas with Tree card and the Believe in the Magic of Christmas Vinyl.  These phrases for vinyl are just perfect for this chalkboard technique, it’s a quick and simple project.


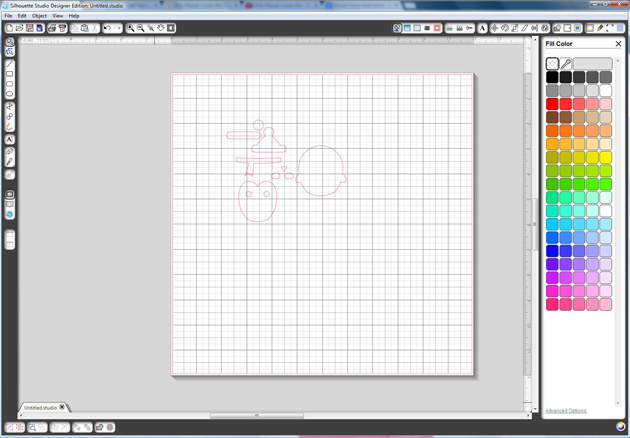
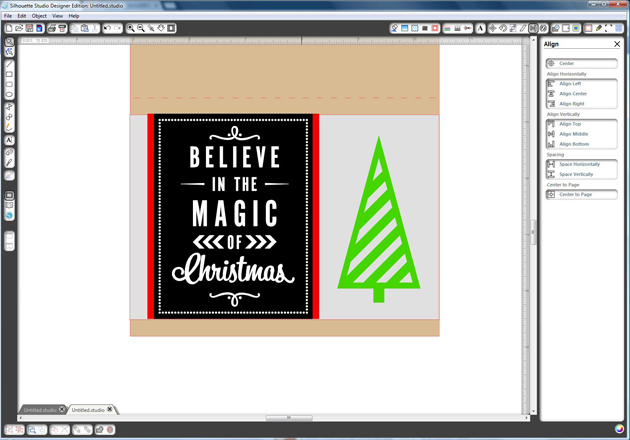
First add your card and phrase to your mat.


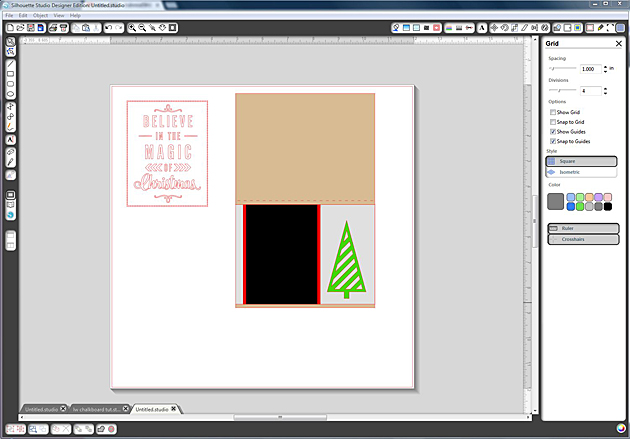
I ungrouped the card and assembled how the card would look.

I disregarded the banners and made the tree a little bigger, you could keep the banners but I wanted the chalkboard text to really be the focal point.


Line up the gray, red and black layers so they are aligned together at the top.

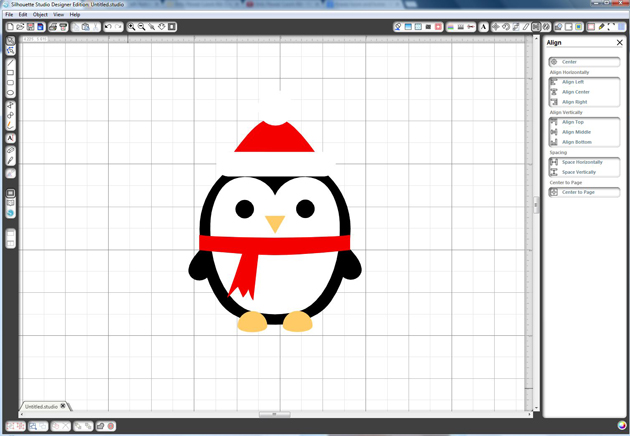
Resize the vinyl text and place it over the black layer.

It’s short so I selected the gray, red and black layers and resized them so the text would have the same black border going around.


You can see in this photo how the vinyl is pretty even against the black layer now.


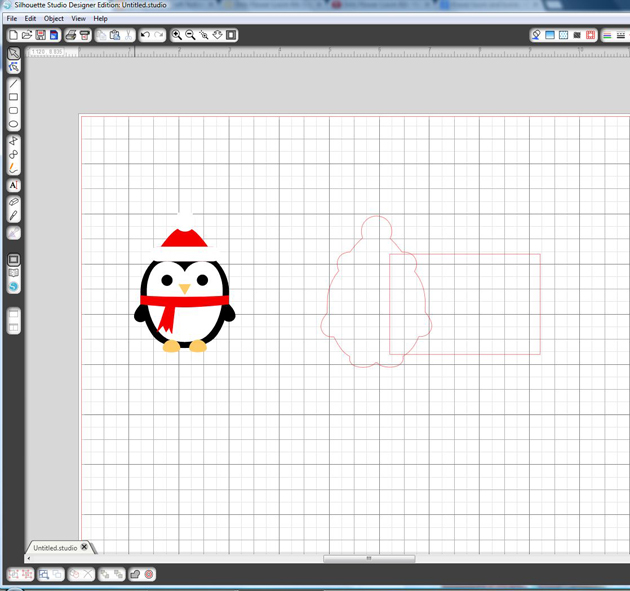
This next part I had seen someone from Silhouette do in a video.

I really like how it adds a shadow to the text.

Make a copy of the vinyl, select the background one and go to the advanced under the Fill Color Window.

Slide the transparency, I used around  42%.


Center both vinyl pieces and the black layer all together.

Select only the top vinyl layer and move it with your arrow key down three and over to the left three.

Or you can go up and over to the right, whatever your preference is.

There’s your shadow, now group your two vinyl layers and black pieces together.


Move the rest of the card off the mat.

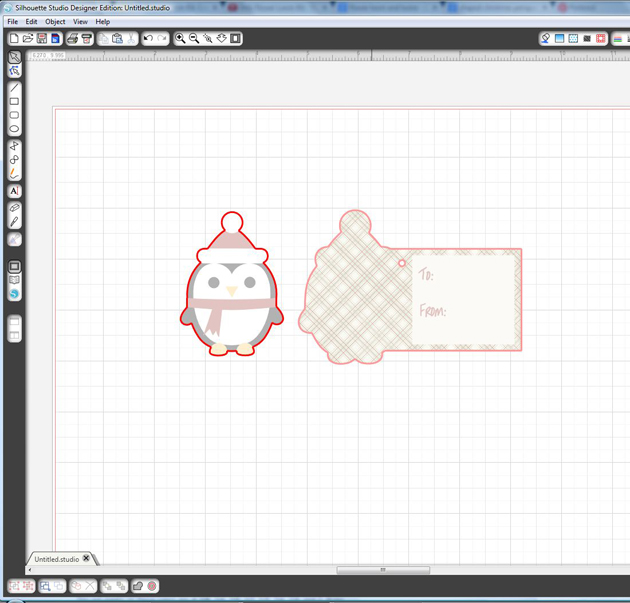
Select the grouped text, go to the Cut Style Window and select Cut Edge.

It should look like the picture above, you only want it to cut around the black.


Now your ready to print n cut.

Under the Registration Mark window check Show Reg Marks.

Under Paper Tools Window select your paper size, I customized mine to save paper.


Take a piece of chalk and go over the whole piece.

Or you can leave more black if you’d like and not as much chalk.

Take a paper towel and removed the excess chalk.

You can keep adding and removing until you get it how you like.

Last I inked the edges with some black ink.


Well I hope you get a chance to use this tutorial to create some chalkboard projects, it really is a lot of fun!


Thanks for stopping by you can visit me at http://www.brigitsscraps.com

Santa Box & Christmas Card Set 1 with Brigit

Hi everyone!! I have a cute gift set to share using this adorable santa box and card from the Christmas Card Set 1.


The box is so quick and easy to make, would be great for a teacher’s gift or even for the whole class, I filled mine with some chocolate kisses.


The shape of this card is so nice, I changed the layout and added the Christmas Santa subway art, which I love!  I moved the holly to the side and added the ribbon and Trendy Twine.


The paper is Echo Park’s Reflections Christmas designed by Lori.  I added a beige layer to the back of the subway art and did a print n cut instead of cutting all the letters out individually.

Thanks for stopping by, you can visit me at http://www.brigitsscraps.com.

Have a wonderful day!!

Silhouette Tutorial with Brigit: Making Christmas Tags

Hi everyone!  Brigit here with a fun print n cut tutorial for you today.

These cute penguin Christmas tags are so easy to make and really helps save some time.

Start by getting the penguin  from the Christmas Icon Set, I love this set by the way, so many cute svg files in there.

Ungroup and fill each piece with colors, zoom in and layer the penguin together like I’ve done below, select all and group together.

You want to create an outline for your penguin, select him and go to the Offset Window, choose offset and change offset distance to .1 and apply.

Draw a 2″ x 3″ box and place it over the offset of the penguin you just created, like I have in the photo below, with both selected right click and weld or you can go to the Modify Window and weld.

Place a circle about .125″ on your tag, (this is for your twine or ribbon) and select both the tag and circle, right click and choose make compound path, this helps later when you choose to only cut around the edge of the tag.

Fill your tag with digital paper, I’m using Echo Park’s Reflections Christmas designed by Lori.

I added a 1.75″ x 2″ box and filled with beige then added the text so you could see it better.

Fill your text with color or if you just want it outlined make sure under the Line Style Window you check the Print Lines of Selected Shapes.

It’s important that you only cutout the outline of your shapes. I chose to cut my penguin out separately so I could pop dot him up.  Go to the Cut Style Window select tag and choose the Cut Edge, do the same for the penguin, it should look like the photo below.

In the Registration Window select Show Reg Marks

Under Page select your printer page.

I have a wide format printer so mine is setup to print on a 12″ x 12″ size paper.

I was able to fit 6 tags but you can re-size to fit more if you’d like.

I hope you find this tutorial helpful.  Christmastime can get very busy so these pnc tags come in handy when you need some quickly.

Thanks for stopping by, you can visit me at http://www.brigitsscraps.com

Autumn Card and Bag by Brigit

Hi everyone!  I have an autumn acorn set to share with you today. I used Echo Park’s Reflections Fall paper designed by Lorii, it’s one of my favorite collections, I used the digital version for this project.

For the Fall Acorn Pop-Up card I ungrouped and moved the acorn over so I could add the Autumn Days phase, which I did a print n cut with my Silhouette Cameo.  I weaved some Chocolate Truffle Trendy Twine through the holes with a needle, these pop-up cards of Lori’s are perfect for that.

The Acorn Treat Bag is so simple to put together, I added some vellum in the front so I could put a tealight with some potpourri inside.  Just added a pretty crochet bow with some twine, a wooden button and a sentiment from the paper collection.

Thanks for stopping by today, hope you enjoyed my project, you can visit me at http://www.brigitsscraps.com

Silhouette Tutorial: Fabric Transfer with Brigit

Hi everyone!!  Here’s a fun tutorial on creating a fabric transfer treat bag using SSDE.  It’s such an easy project and comes out great on these cotton muslin bags, so cute for a special Halloween treat.

I used Avery Light Fabric Transfer paper, but whatever you use make sure you read the directions, I believe with their dark fabric you don’t have to do a mirror image.  Other brands may be different also.

I used Lori’s Halloween Embellishments 1 set and the happy halloween from the Halloween Titles.  I ended up adding a witch’s hat to the ghost and a circle for the moon just to fill in the design a little more.

I ungrouped and colored all the pieces, you won’t see the ghost if you use white so add a black line around him, I made it a little thicker under the line style window and then checked print lines of selected shapes.  After you place everything where you want select all and group.

The bag I used is 5″ x 7″ so I resized my design a little larger then 4.5″ x 4.5″, I wanted some space on the bottom and top and some on both sides.

With your design selected click on the Replicate Window and select mirror right, you can move the original off the mat or delete it if you want.  Place the mirrored one in your printable area and print it out.

I cut out around the whole transfer leaving a little border, you could create a shadow layer and do a print n cut but I didn’t want to waste the top margin of my transfer paper.

Use a hot iron without steam, again read the directions of your transfer paper.  I recommend a hard flat surface, not an ironing board. Iron any wrinkles in your bag first so you have a nice area for your transfer

Here it is finished, I slowly moved my iron from side to side and then bottom to top for about 45 seconds.  The colors really came out great.  I tied some Trendy Twine to the end of the bag’s string and pulled it through till it came out the other end so I would have some nice Halloween twine as my tie instead.

Hope you’ve enjoyed this project, you can visit me at http://www.brigitsscraps.com, thanks for stopping by!!