Halloween Treat Boxes Tutorial by Brigit

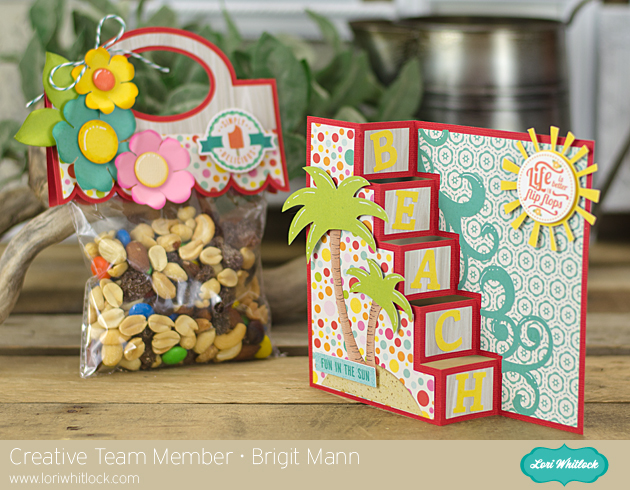
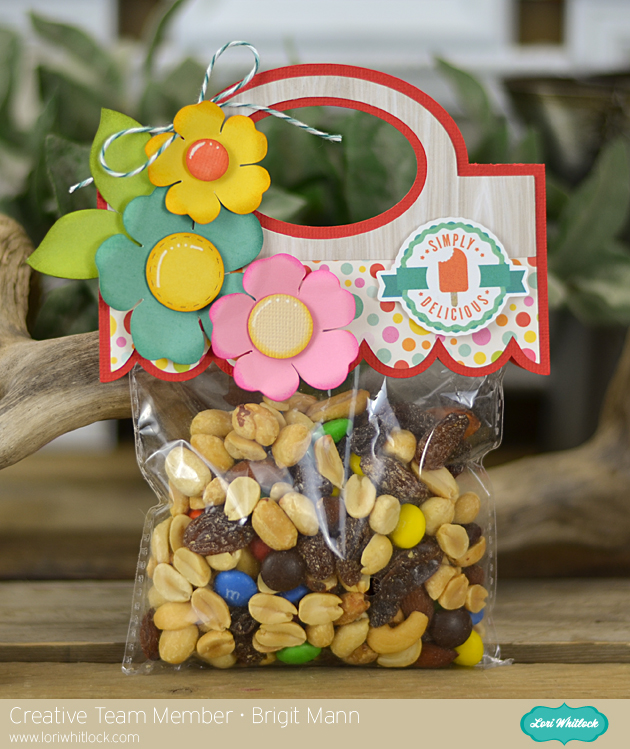
Hello there, it’s Brigit here, I have a quick tutorial on how I made these cute Halloween treat boxes. When I need a bunch of boxes I like to use the print and cut feature to create labels this way I can put them together very quickly. For these two I used two sheets from Doodlebug Design’s Halloween Parade paper collection.

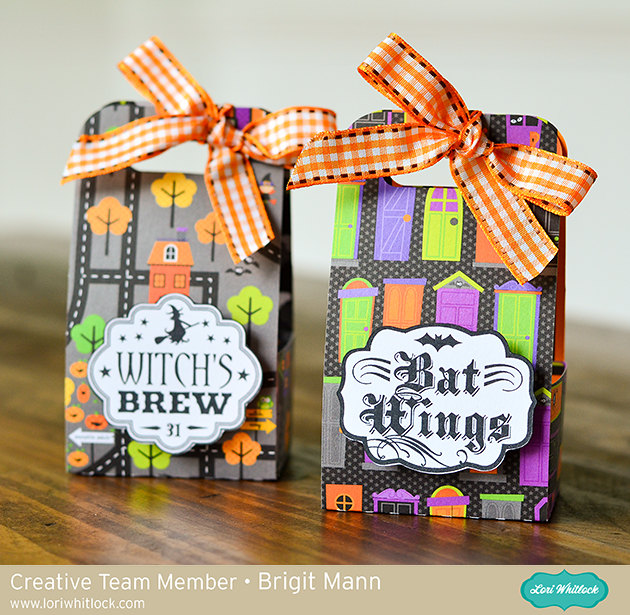
 For this project, I used the 2 on 12×12 Handle Ribbon Treat Box which you can get here at Lori’s shop or at the Silhouette Design Store here.  As the name applies you can get two of these on one sheet of 12 x 12 paper so it’s a great little treat box if you need a bunch.

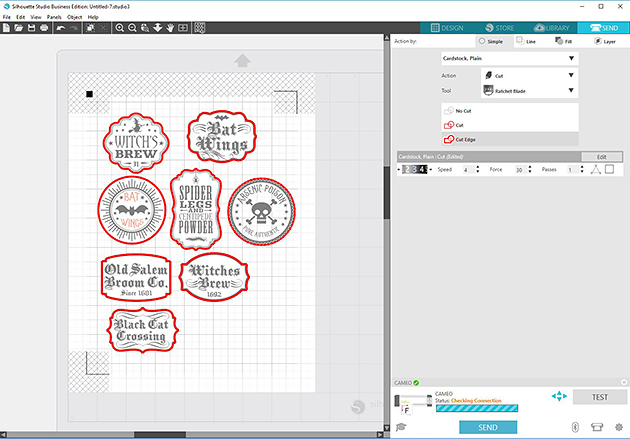
 I used the labels from the 5 Halloween Apothecary Labels set and a couple from the Halloween Label Set.  These are sold individually at the Silhouette Design Store, witches brew, spider legs, arsenic poison, crows feet, bat wings, old salem, and another bat wings. I sized them to fit the box and copied to a new page in Silhouette Studio, I use the Business Edition.

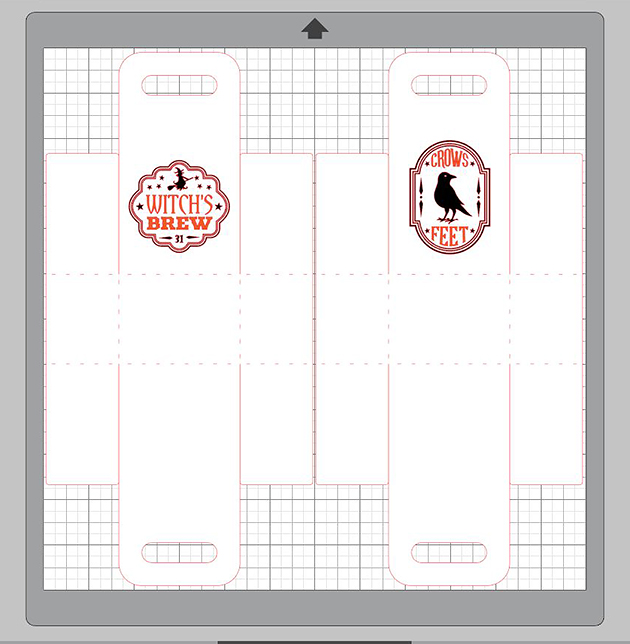
I printed out my sheet and cut them on my Brother ScanNCut 2 which is what I prefer to use cause I’m not limited to registration marks, but I do have a Cameo so if I was going to print n cut with it I would check the registration marks under the page setup.

 For the apothecary labels when I selected cut edge the inside pieces were still selected so I grouped them made a duplicate, released and changed the color to white then aligned them together.

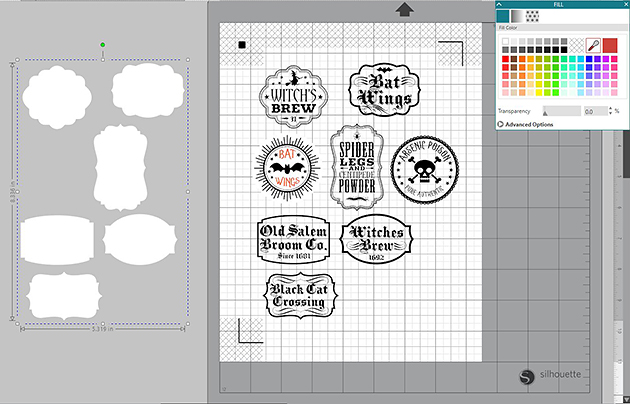
I was able to select cut edge then and the inside pieces weren’t selected.

Thanks for stopping by and have a wonderful day!


Summer Projects with Brigit

Hi everyone!!  I have a cute summer project to share with you today.  I love the new step cards Lori has in her shop, they are so much fun to put together and decorate.


For the paper I used Echo Park’s Summer Bliss designed by Lori, what a colorful fun paper collection.


As you can see this is the 5 step card but there’s a bunch of different ones in the store so definitely check them out.  I added the palm treessun and I used the tilt font for the beach letters.  The two sentiments are from the Summer Bliss collection.


I think this bag topper is so cute, it comes with the 3 flowers and a thank you.  There’s a couple of different ones of these also in the store and they’re all adorable.


Don’t forget to enter the Link Up Party, theme is Flower, you have until the 23rd!


Thanks for stopping by, you can visit me at http://www.brigitsscraps.com


Have a wonderful day!!

Mixer Shaped Card with Brigit

Hi everyone!!  I’m such a big fan of shaped cards, one of my favorite things to work with.  How cute is this Mixer Shaped Card from Lori’s shop I just love it!!


I think this is one of my favorites, I enjoy baking so much and just love my kitchenaid mixer!!

The paper collection is Carta Bella’s Homemade With Love, the flowers and sentiment are included, it’s totally perfect for this card.  I just added some Peppermint Stick Trendy Twine with a cute little button and a couple of turquoise enamel dots.


Thanks for stopping by, you can visit me at Brigit’s Scraps

Have a great day!!

Silhouette Tutorial with Brigit: Using Pattern Paper as a Fill in SSDE

Hi Everyone!!  A couple of people have asked me this question so I have a quick but helpful tip today, filling different size shapes with the same size pattern.  I chose this no glue rectangle box from Lori’s shop, it’s perfect because the side layer pieces are smaller than the top.


The flower is from the 3D flower Set 8 and digital paper is Lori’s Maggie collection.

Stamp sentiment is from Jaded Blossom Stamps.


The first thing I do is ungroup the pieces, the score lines of the box are separate but I want to keep that all together so I select around the box and then choose Make under the Modify window or you can right click and Make a Compound Path.


Now onto the layer pieces, they are still grouped together, if you select your pattern paper it will fill all the shapes at once but the 4 layer sides will be smaller and I want them all the same size.


(I don’t import my paper into SSDE, as you can see in the right-hand side I have it sorted on my computer in folders and keep it opened next to my program for easy access and drag and drop it into my shapes.  This way it only fills one shape at a time when it’s grouped.)


So what I do is select all my shapes and Make a Compound Path, then when I fill with pattern paper it fills all the pieces at once and the pattern size is all the same also.  That’s it, simple!!


Then you can resize it all at once in the advance settings under the Fill Pattern Window if you’d like.


Thanks for stopping by, I hope you find this tip helpful!  You can visit me at http://www.brigitsscraps.com.

Valentine Gifts with Brigit

 Hi everyone Brigit here with a Valentine Gift set to share with you today!

I used Lori’s 3D Teacup Cocoa Mug and the card with the three snowflakes from the Christmas Card Set 2.

I didn’t use all the elements that come with the card and I switched it up a bit. I thought the scalloped edge tied in well with the circle scallop on the cup.

I added the flower hearts which you can find in the Silhouette Online Store and the Love You which is part of the Handwritten Title Set 1. I did a print and cut with both of these on red pattern paper.

This cup makes such a cute gift container, switch it up for different occasions.

The stamp sentiments are both from Jaded Blossoms and I used some Strawberry Cupcake Trendy Twine. The digital paper is from Echo Park’s Head Over Heels Collection.

Thanks for stopping by, you can find me at http://www.brigitsscraps.com.