Valentine Truck Box Card Tutorial

Hi friends! Today I am sharing an assembly tutorial for the Boc Card Valentine Truck Back End (SVG, Silhouette). I used 80lbs cardstock and a few designer papers from the Little Ladybug collection by Echo Park Paper Co. This cut file does have a lot of small pieces but totally manageable with a fine-tip glue bottle.
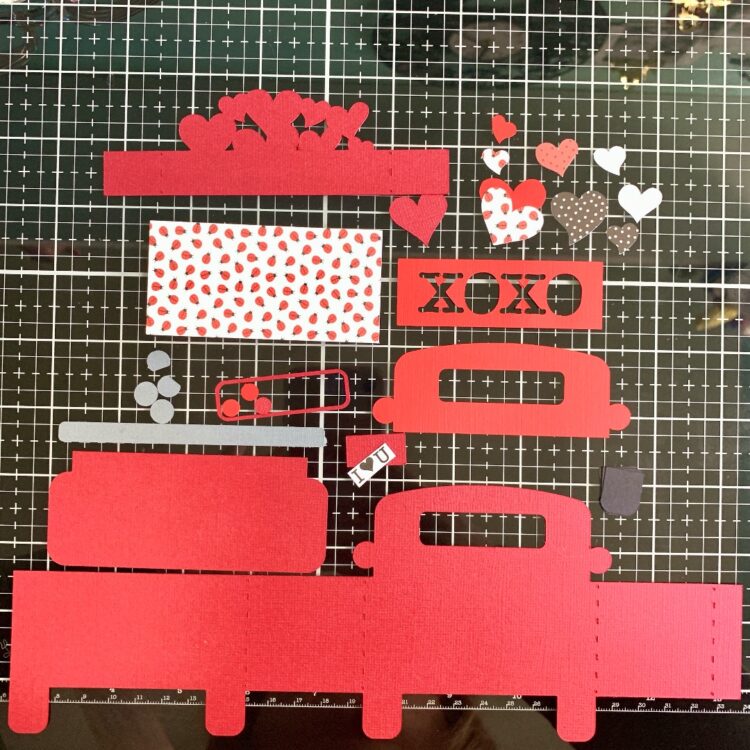
First, I assembled all of the decorative elements. The back of the cab of the truck has a border for the window and two rear-view mirrors. The tailgate has three layers. A foundation, a decorative layer, and the XOXO layer. It also has two taillights with two layers, a bumper, and a license plate with two layers. All of the hearts are for the inside insert of the box card. For the card base, I flipped the card over, folded all the scored lines as valley folds, and glued the black tires into place.
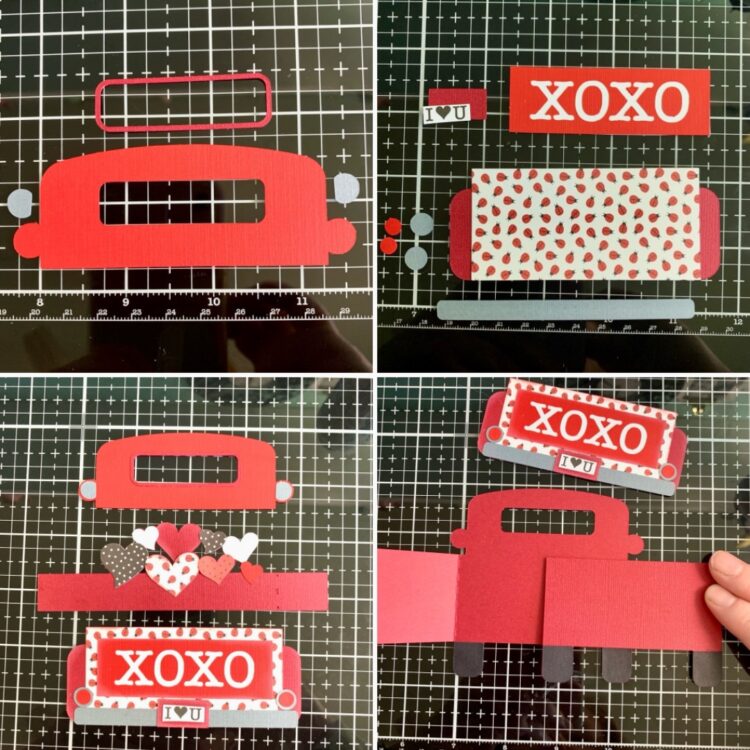
With the card base open I glued the back of the cab onto the inside of the card base. Then folded the score lines on the insert as valley folds and added glue to the tabs. I lined up the tab on the right next to the score line on the inside of the card base. Then folded over the left side of the card base on top of the glue on the left tab of the insert making sure everything was level and flat while folded down. I added glue to the tab on the card base and folded the right side of the card base down on the glue making sure it was lined up with the score line.
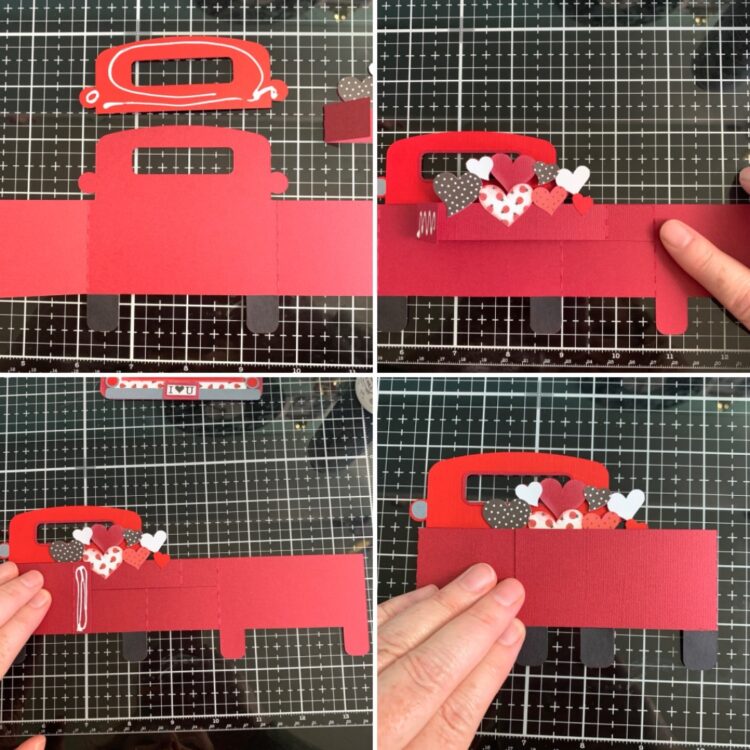
Now with the card folded flat, I added glue to the back/tailgate portion of the truck and added the tailgate to the box card.
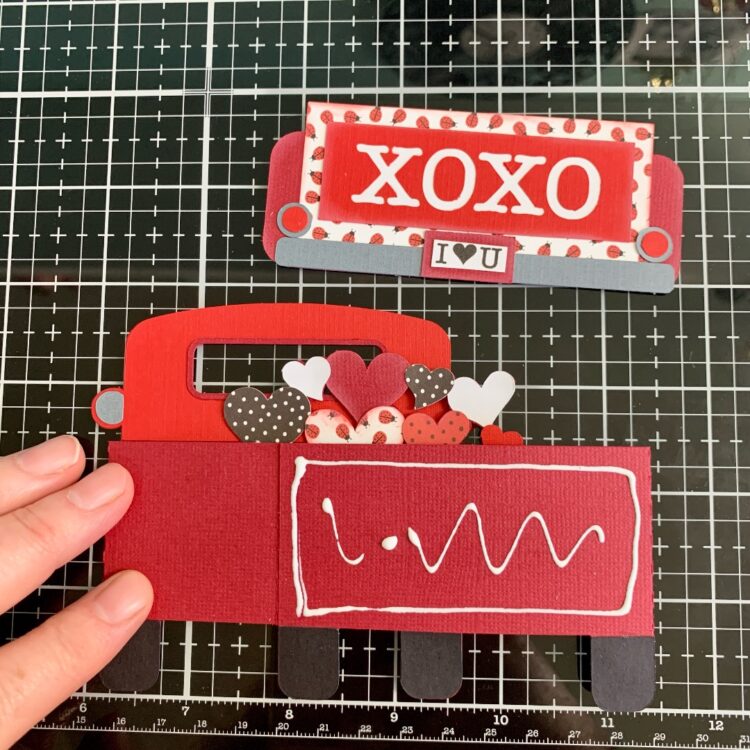
Now it is ready to send to a valentine!
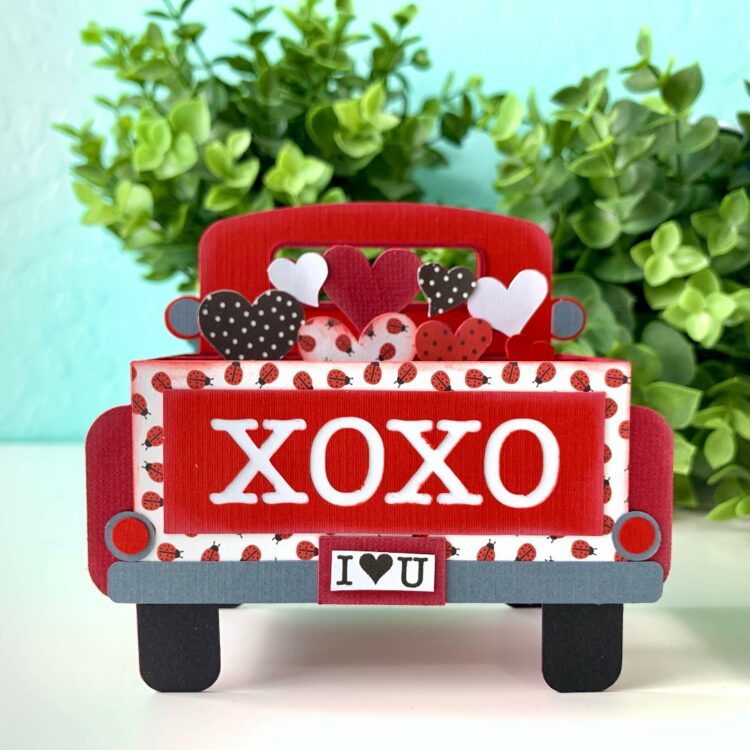
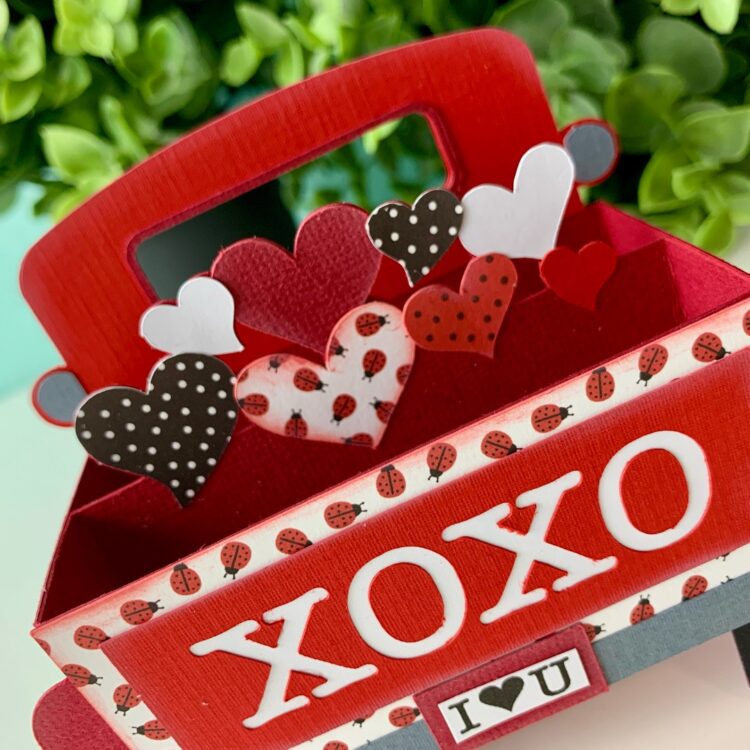
That’s all for me today. Thanks for stopping by!
Brandie

Snow Globe Shadow Box Gingerbread Card Tutorial

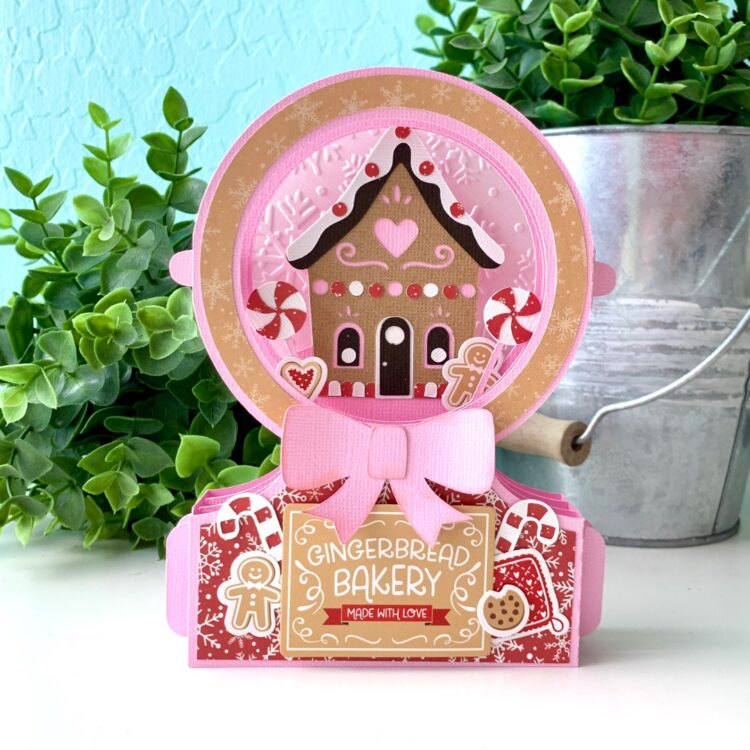
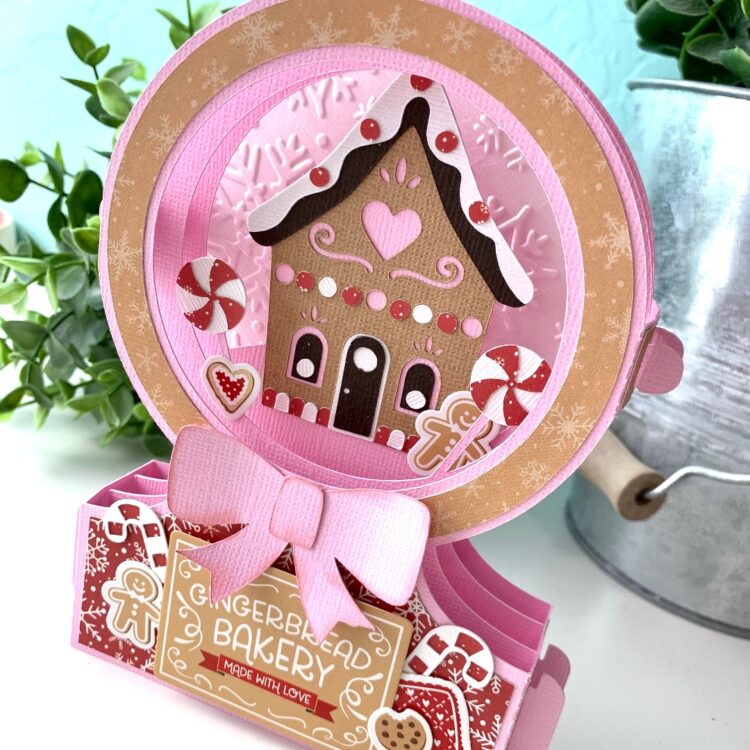
Hi friends! I know I know it’s a little early for some of you, but I have moved on to Christmas crafting. I was inspired by the Have a Holly Jolly Christmas Collection by Lori Whitlock and Echo Park. I loved all the gingerbread houses and baking elements. So cute. I saw this Snow Globe Shadow Box Card Gingerbread (SVG, Silhouette) and thought it would be perfect with this collection.

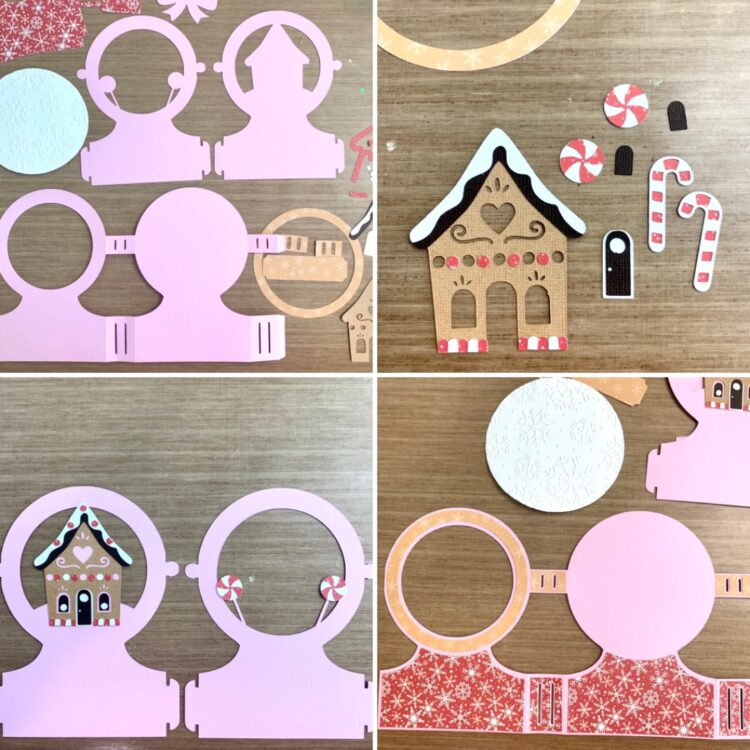
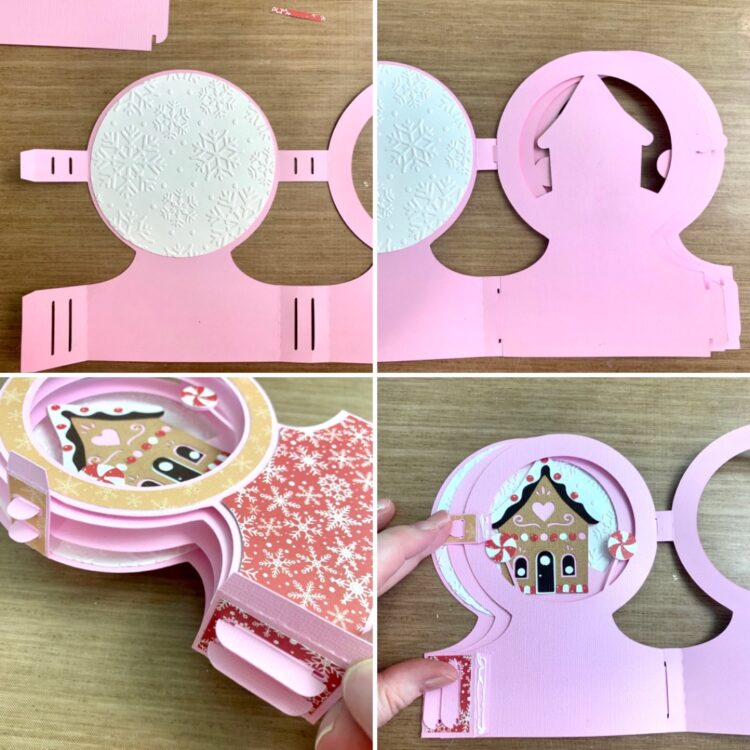
This card comes together fairly easy. If you have a hard time with traditional box card assembly, try this version. I thought this was much easier. The toughest part is the tiny pieces used to decorate the gingerbread house. There are two inserts, the snow globe frame, and the decorative elements. All of the folds are mountain folds. I assembled the tiny pieces first. I used a fine tip glue bottle to get everything assembled then glued everything down on the inserts. The front insert has the round peppermint candies, and the back insert has the house. The door and the window are glued down after the house is in place. The decorative panels all glued to the outside of the snow globe frame.

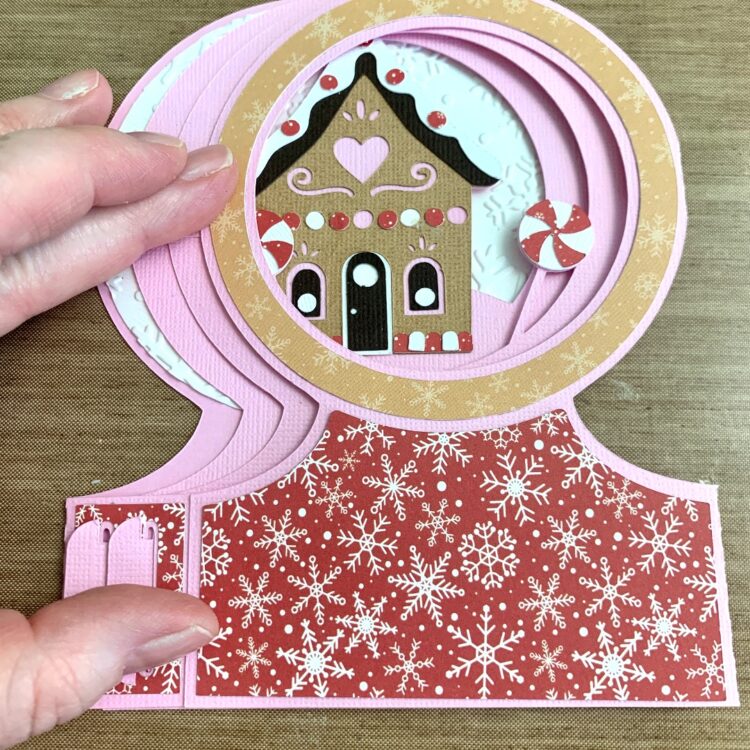
Once all of the outside panels were secure I flipped the card over and glued down the decorative background of the snow globe. I embossed mine with a snowflake embossing folder. The two inserts have tabs that will slide into the slots. I then gently folded the inserts over and slid the other tabs into the slots. I added glue the tabs on the snow globe base and folded the front of the card over and made sure everything was lined up and held for a few seconds while the glue took hold.

I love how this card turned out, so festive and sweet. Thanks for stopping by today and I hope you have a lovely holiday!
Brandie


A2 Shadow Box Card Fall Sunflowers

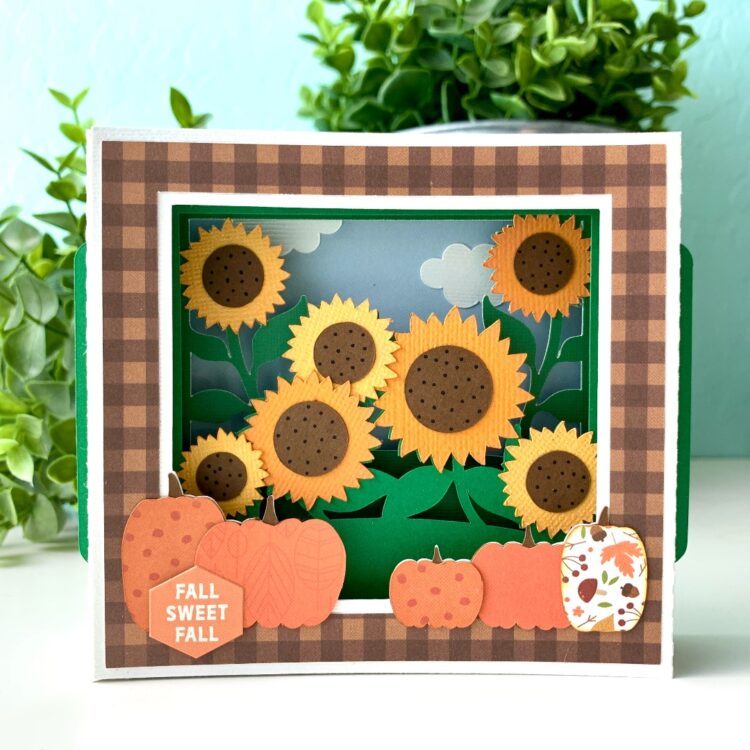
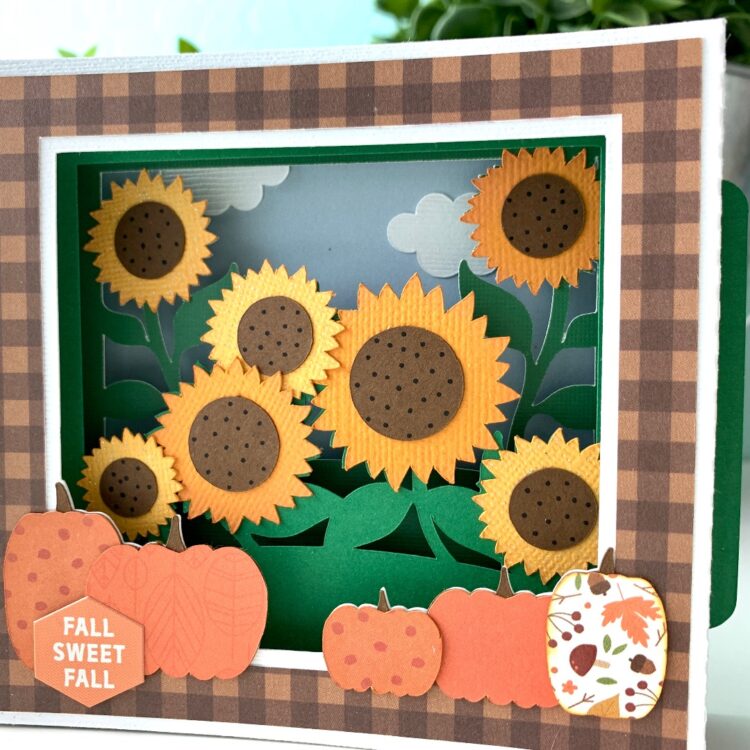
Hi there and happy Monday! Today I’m stopping in to share one of the new A2 Shadow Box Cards (SVG Bundle). I made the Fall Sunflower card (SVG, Silhouette). These cards are easy to assemble and have lots of darling details. This card would work well for many occasions. I think it would make the cutest birthday card or simply to brighten someone’s day.  I used papers and a sticker from the I Love Fall collection by Echo Park Paper Co.

Thanks for stopping by today and I hope you get a chance to craft a little.

Brandie

Shaped Card Lemon

Hi there crafty friends! Today I am sharing the Shaped Card Lemon (SVGSilhouette). I like making cards like this in batches. They are quick and easy to assemble and are great for when I need some craft therapy! Cards like this also come in handy when I need to send a quick note to someone. I pulled out all my summer papers and embellishment. Most of the stickers came from the A Slice of Summer sticker book by Echo Park Paper Co. and a few from the Here Comes the Sun sticker book.

I love how bright and cheerful they turned out. Thanks for stopping by today!

Brandie Adams


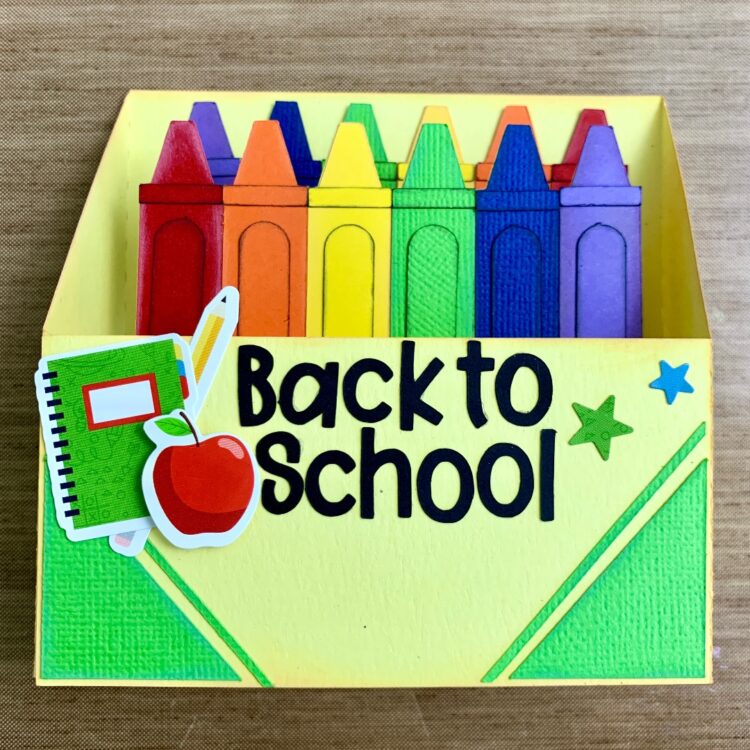
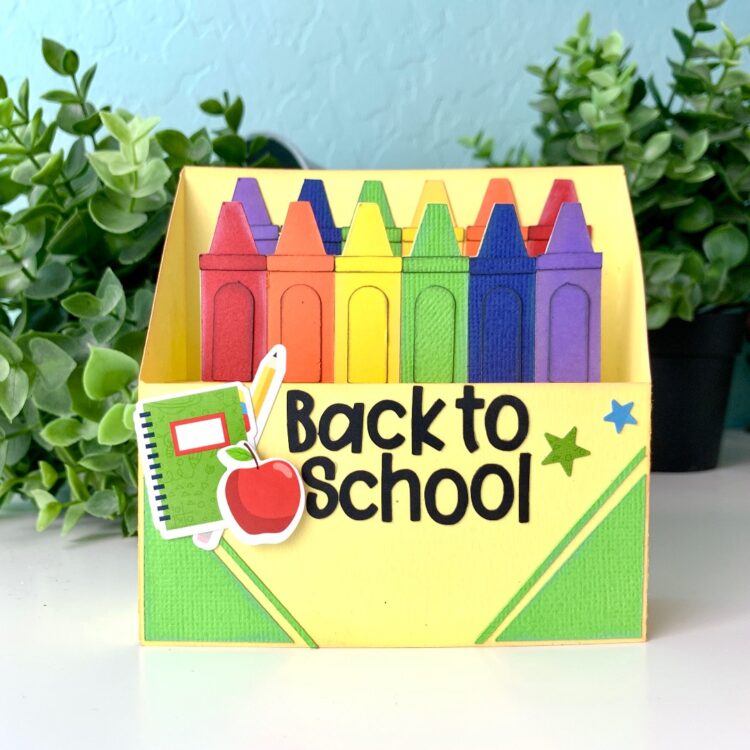
Box Card Crayon Back to School Tutorial

Hi there! Are your kids already headed back to school? Mine starts next week and I have nieces and nephews who have already started. Crazy. With school starting soon we also have “meet the teacher night” and I like to give a card to our new teacher. This year I made the Box Card Crayon Back to School (SVG,) card. Here is how I made it.

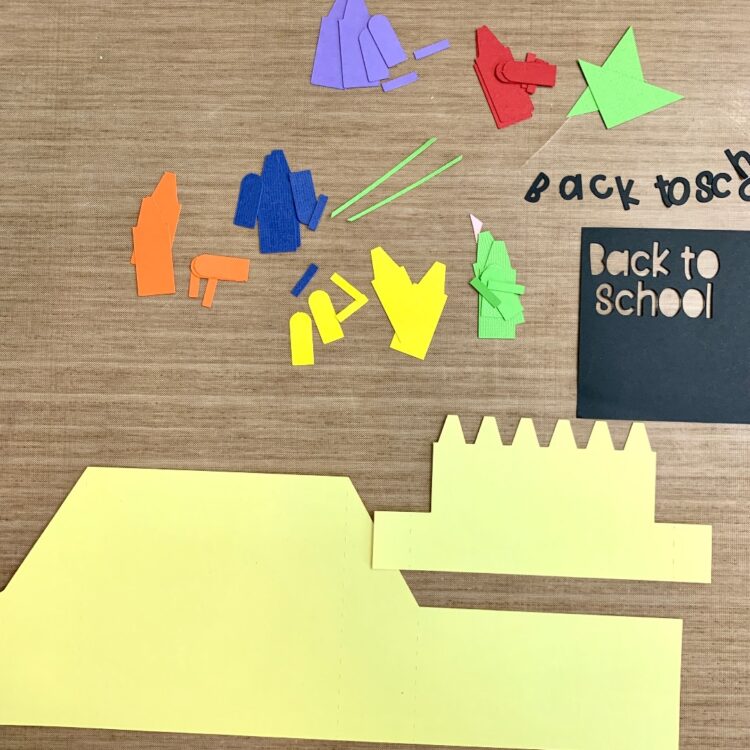
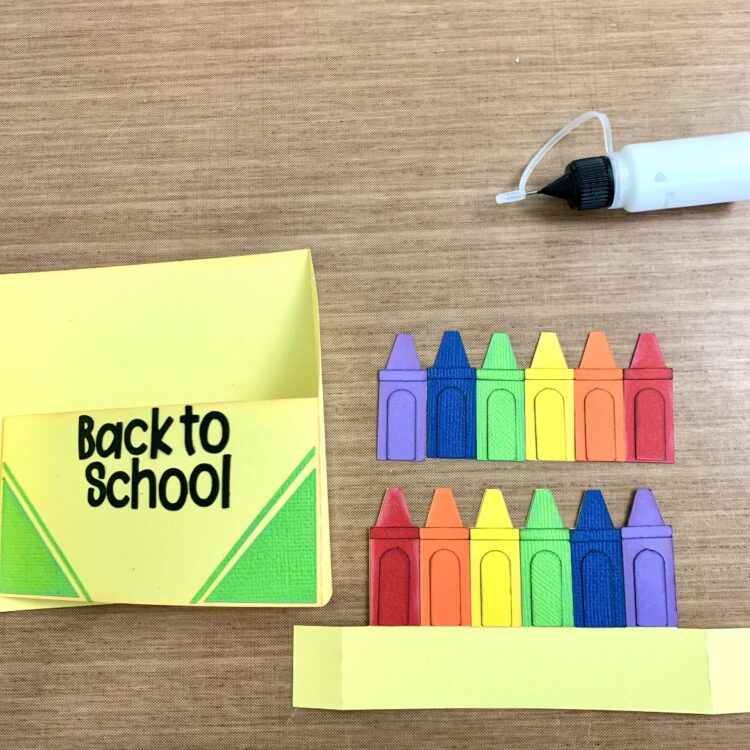
This box card only has one insert, but I cut two of each of the crayons. The pieces are kind of small but manageable. I used a sticker maker for some of the really small ones and I fine tip glue bottle for everything else. I folded all of the score lines as mountain folds. I inked the outside pieces with like colors and the smaller detail pieces of the crayons I used black ink.

I glued the crayons in ROYGBV order on the insert and glued the second set of crayons in the reverse order on the inside of the back of the box card (I did this after I glued the box together). I also glued the front details of the crayon box on as well as the sentiment.

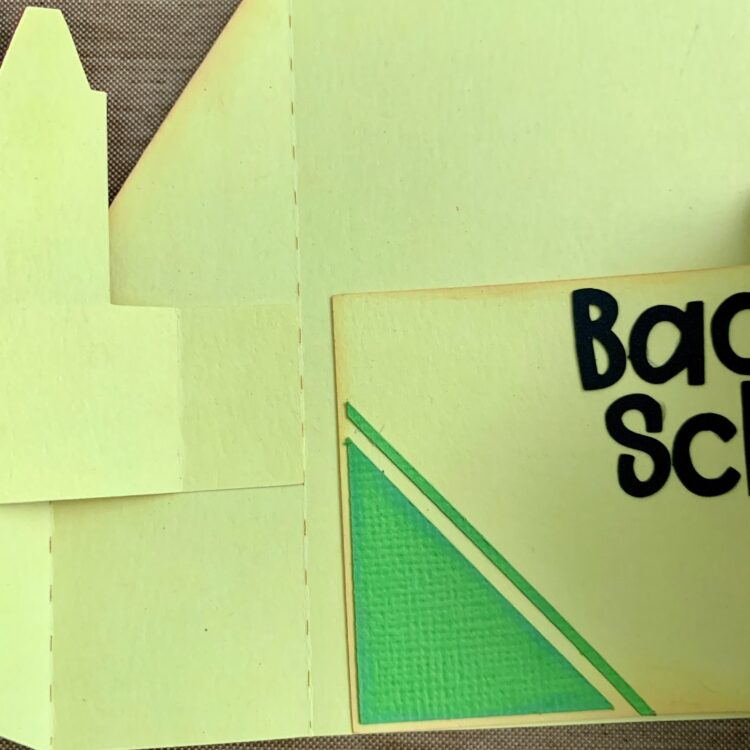
With the crayon box open flat, I glued the left tab of the insert onto the left side of the box card lining up the tab up with the innermost score line. I also folded the front of the box card over to help line everything up.

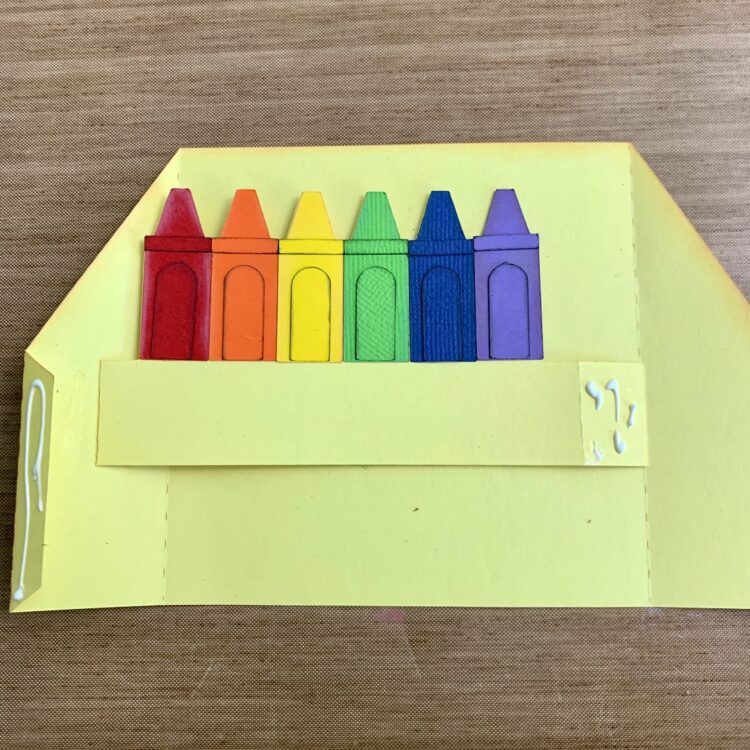
With the box card open flat again I folded the left outside edge tab in and added the glue. Then I added glue to the right-side tab on the insert. The tab should be lined up with the score line on the inside of the box card.

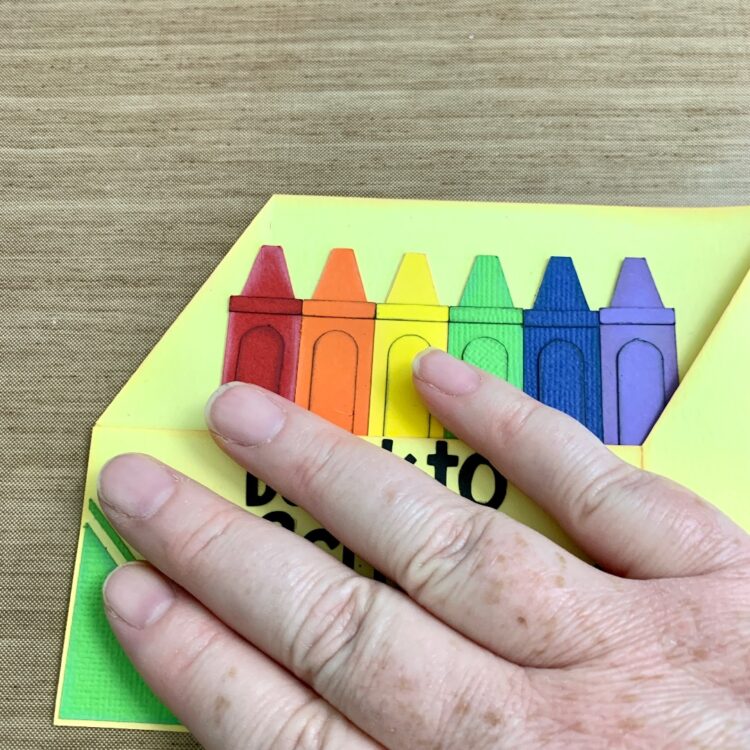
I folded the front of the box card over and held in place while the glued set. Also making sure everything was lined up correctly.

I glued the second row of crayons in and added a few stickers from the School Rules collection by Echo Park Paper.


This card turned out so cute. Thanks for stopping by today and Happy Back to School!
Brandie