New Back to School SVG files 25% OFF!

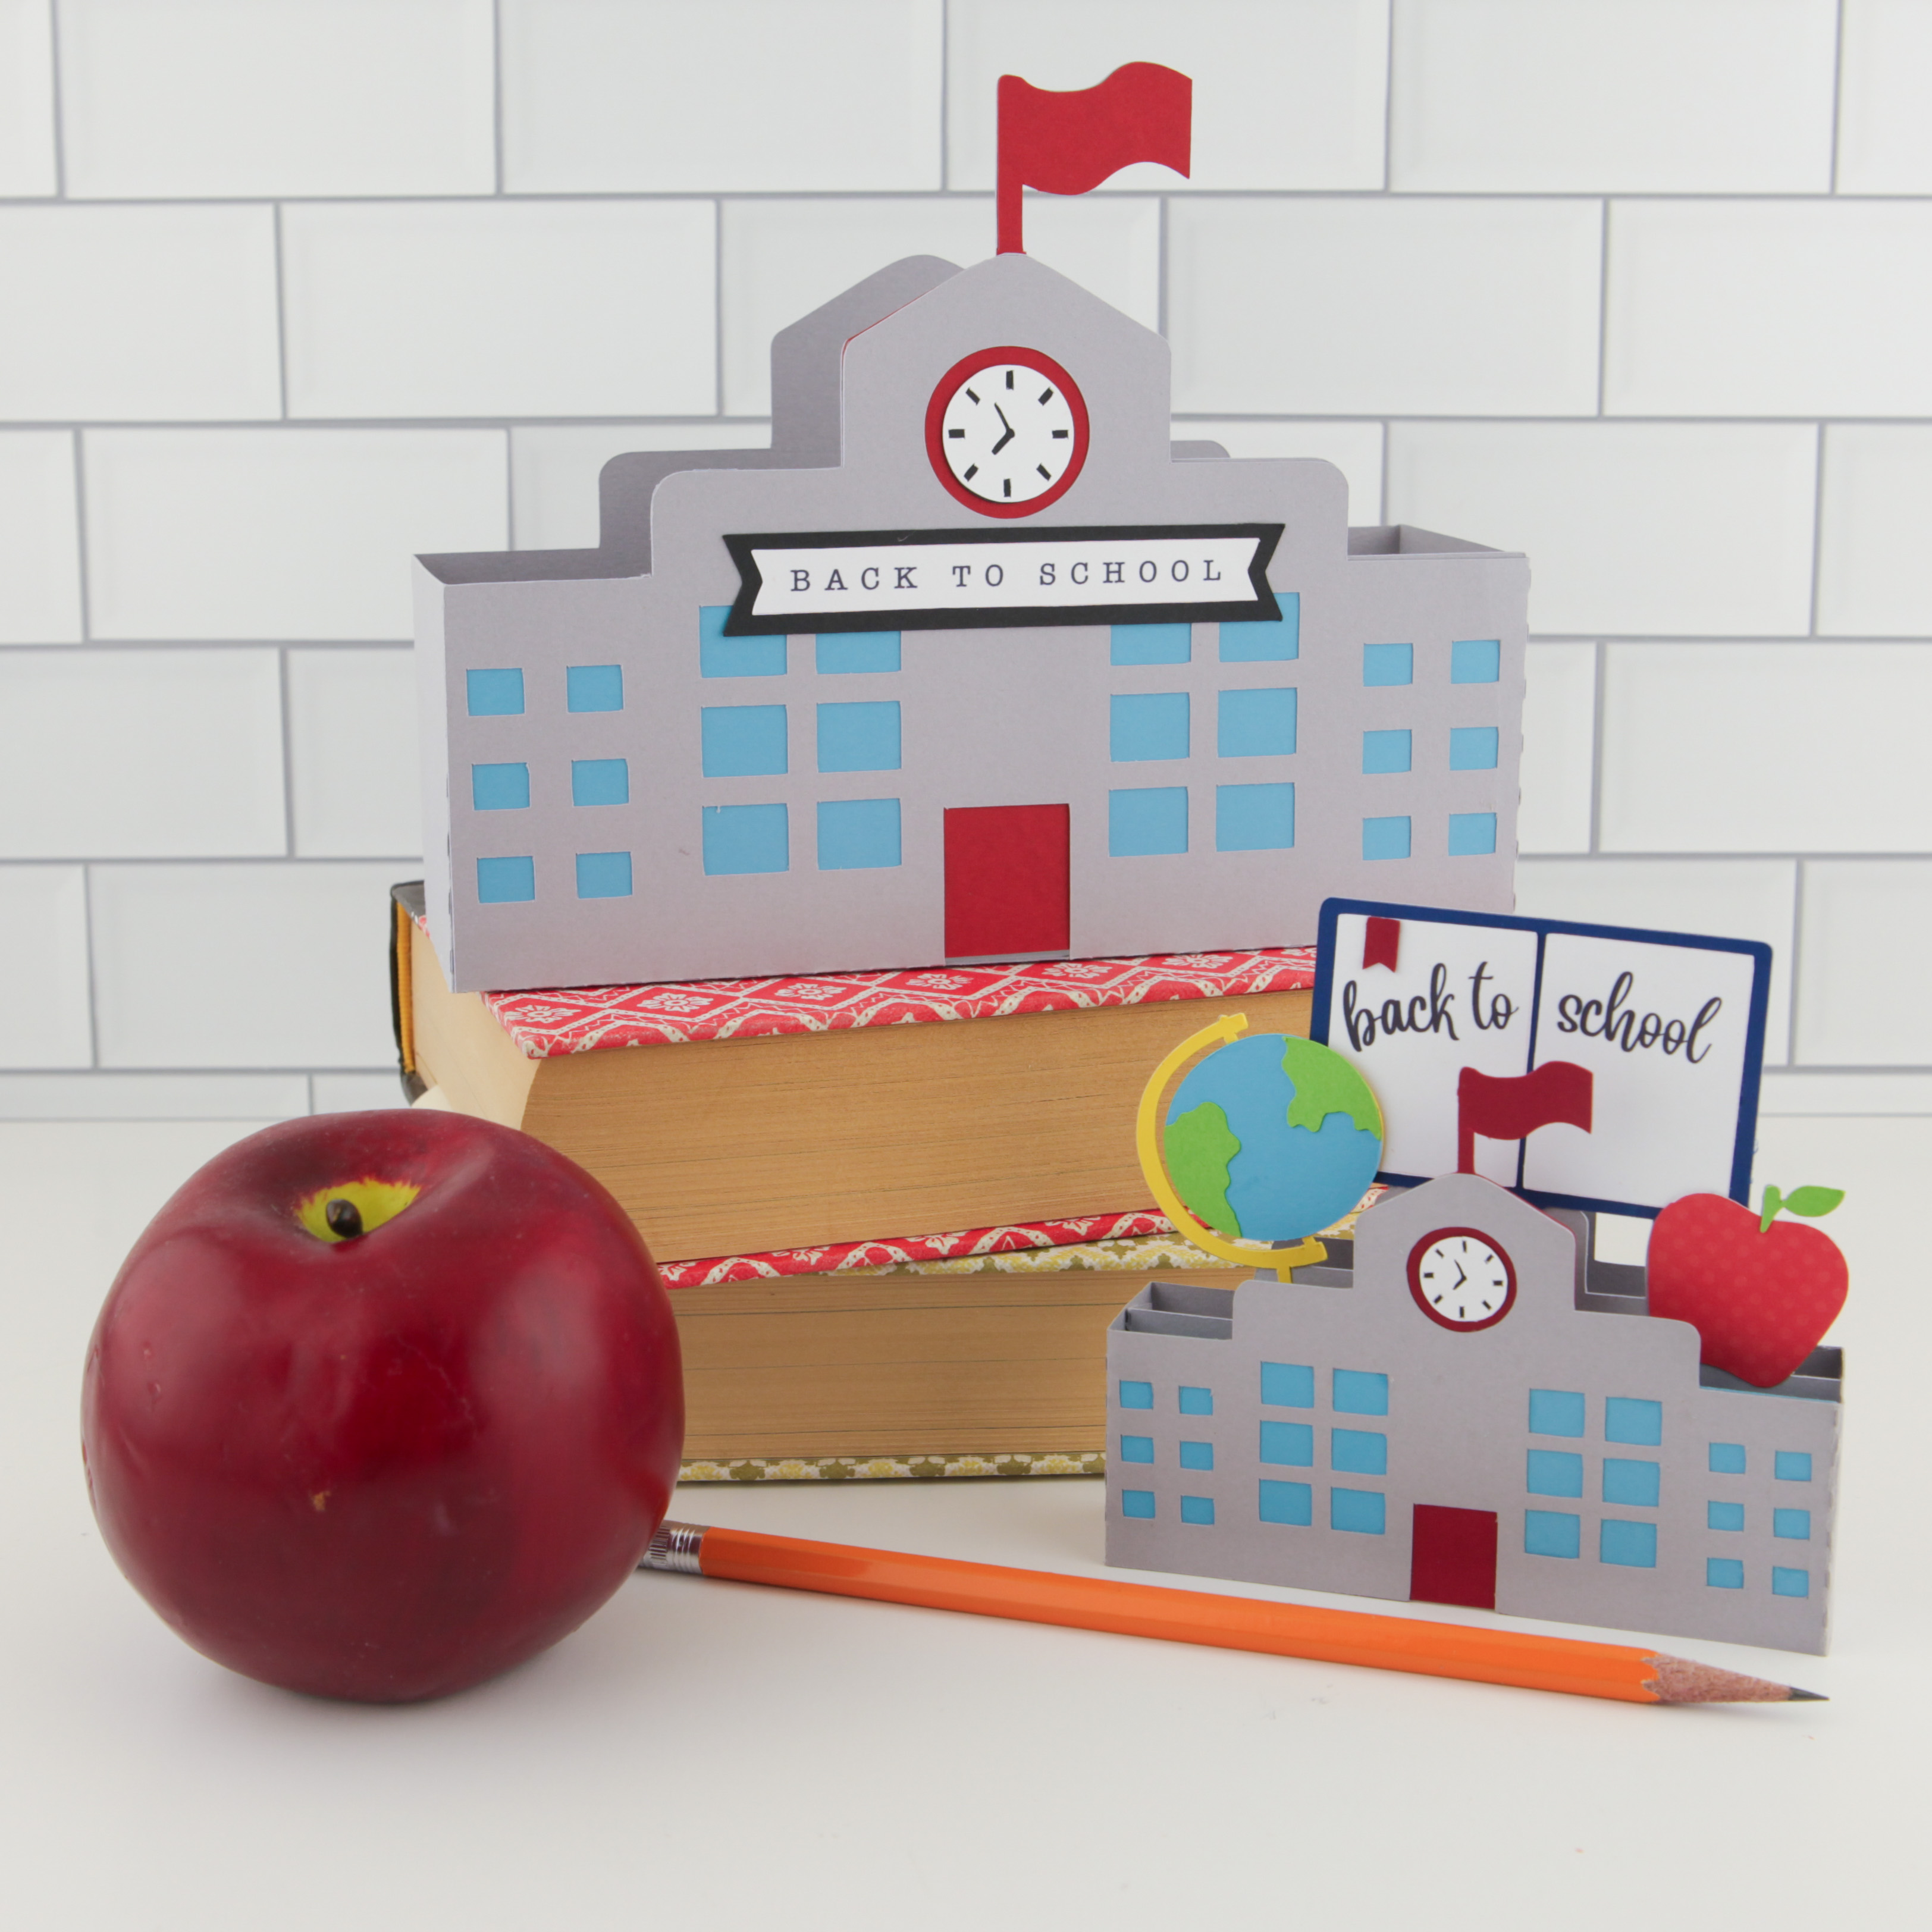
It’s that time of the year when the kids are headed back to school. Many of you know that my youngest is leaving for college on Saturday. It is such a bitter-sweet time at our house. Ashlyn is truly a delight and I can’t wait to see her flourish at college this year. I just might find some free time to do some fun new things with my business in the future. We will see — keep your eyes open. In honor of all those students and teachers that are headed back to school this week, I designed this CUTE School Project Bundle 2 with 5 super cute SVG files. These new files are available in the Lori Whitlock SVG Shop. And, the best part is that these new SVG files are all 25% OFF this week and they are available in a bundle and individually. Check them out….

Thanks for checking out the NEW FILES! Be sure to grab the weekly freebie with a $1.99 purchase and the FREE kit of the month SVG files for July with your $20 purchase.

I hope that you all have a wonderful day! Have fun crafting!

Lori

Book Box Tutorial with Kathy

Hi Everyone, it’s Kathy today with a tutorial showing how to assemble Lori’s new Book Boxes.  These boxes are so cute and come in three different sizes!  I used the Small Book Box as a gift card holder for my daughter’s  English Teacher… he has been so helpful, writing college recommendations, helping to edit essays and providing much morale support, she wanted to make sure he knew how much he is appreciated!

I started by cutting the pieces out using Lori’s Pinstripes Collection for Echo Park.  For the book “cover” you want to run it along the edge of your desk or table to curve the spine area.  The same for the spine cover (blue).

The first assembly step is to glue together the main box piece, making sure the tabs are inside the box.

Next, I added the “pages” strips to the side and the bottom of the box.  Be aware, the bottom page piece is supposed to stick out a bit further then the box bottom.

Next I added the decorative panels to the book cover.


I then added the spine cover, making sure to line up the outside score lines.

***  A quick note on the last two steps… I did it in the incorrect order… You want to add the spine piece first, then cover with the cover pieces, but mine was already glued… it still looks great, but goes to show, even the “experts” make mistakes!!

The next step is to add the cover to the box.  You want to line the edges of the open end of the box up with the outside score lines on the spine of the cover.

I found it easier to do one side at a time.

All that’s left is to add the outside embellishments!  I used some gold sticker paper I had in my stash to make the corner protectors.

I used the stickers from the Pinstripes collection to write a Thank You “title” on the spine.

That’s it for me today, thanks for stopping by to peek!