Camping Backpack Tutorial

Hello everyone Brigit here, I’m so happy to be back on Lori’s Creative Team again, I’ve really missed being here!

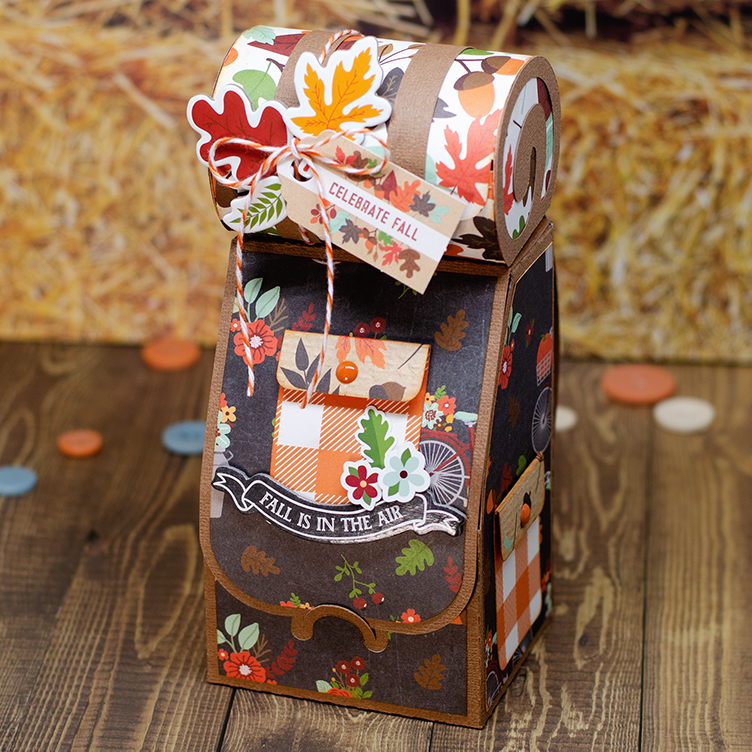
I have a tutorial to share today, I love making bags and boxes to fill with treats and I thought this Camping Backpack that Lori made for Father’s Day (SVGSilhouette) would be such a cute fall gift box with hot chocolate and marshmallows inside.

This is really a super easy box to put together and it can be used for so many different gift ideas.

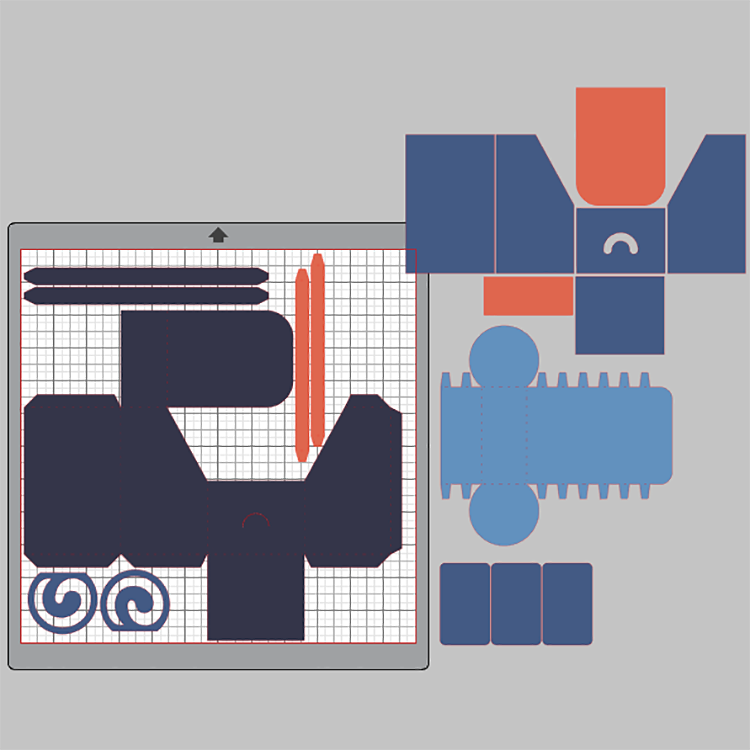
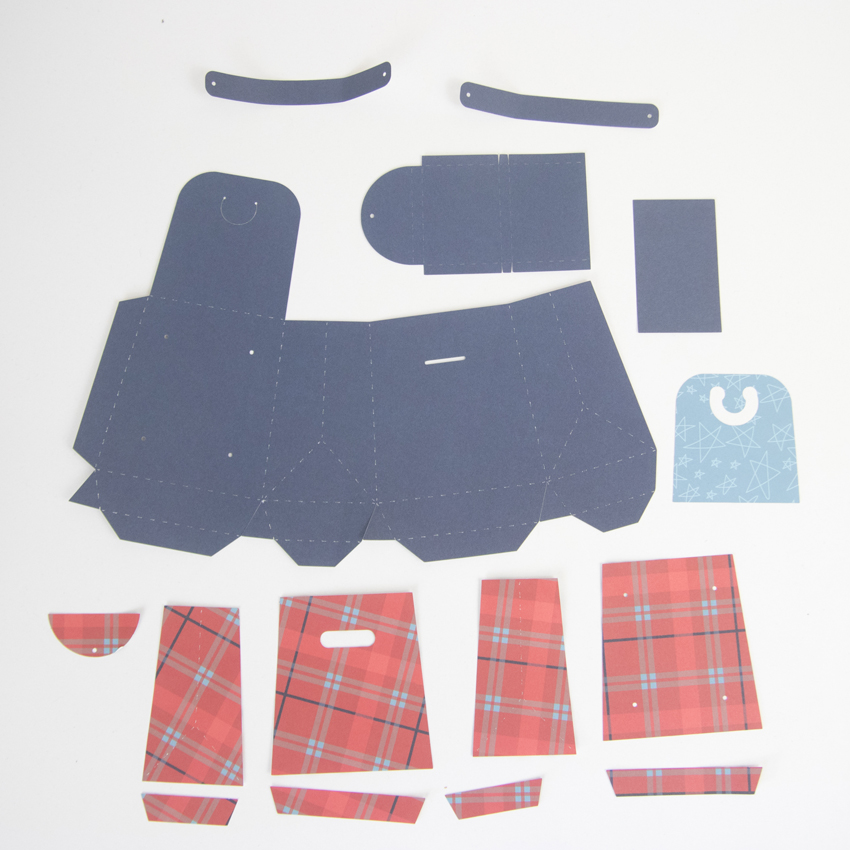
I use Silhouette Studio so the first thing I always do is select the paper I want to use and then I separate the pieces into groups like I’ve done above and then I’ll group and change the color. On this project, I only ended up using one sheet of solid cardstock and three-patterned sheets from Echo Park’s My Favorite Fall Collection. All the embellishments I used for this project are also from that same collection.

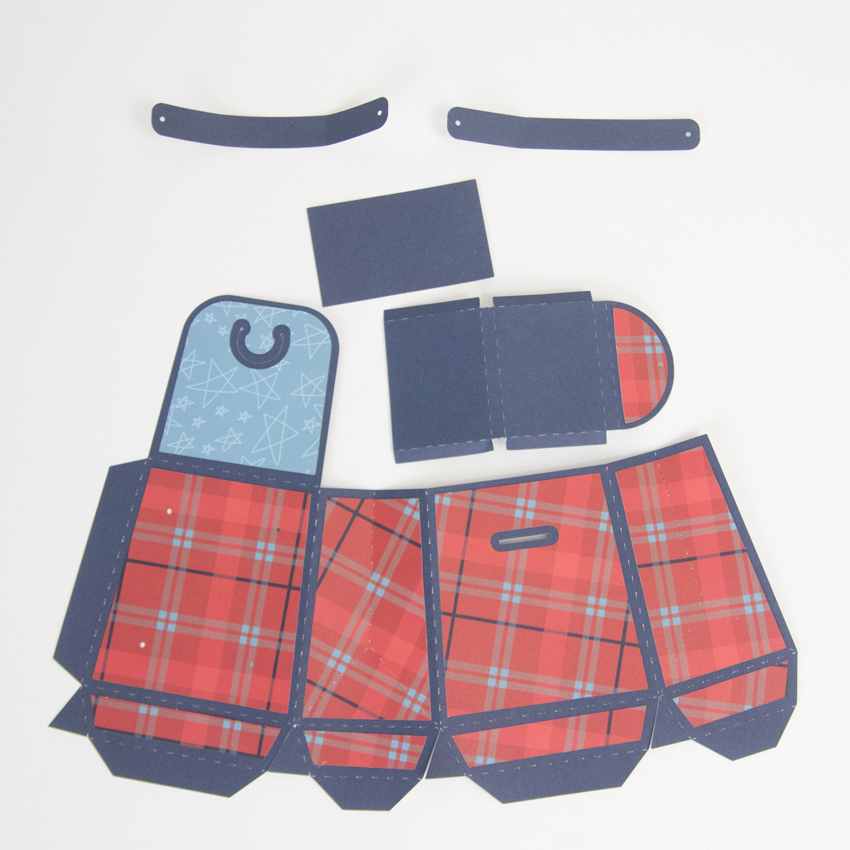
For the pockets you can see in the photo above on the 3 medium blue rectangles that I welded the top and bottoms together, the paper is double-sided so I just folded down for the top flap.

I didn’t use the tag in this file but if you need a tutorial on print and cut Kathy has a good one here using Silhouette Studio. We also have one for Cricut here.

The main box is just one piece, I added the layers first and then folded all the score lines and glued the side flap first and then the top and bottom, that’s it, I just love how this box went together!

After assembling the box I added the two straps in the back, I trimmed them a little just to make them a little bit shorter and then added the pockets.

For the top sleeping bag I used a bone folder to curve it first, this really helps with the assembly. I glued two flaps at a time going from one side to another and it worked out great.

Here is the sleeping bag all rolled up, I just added the two bands and then the side pieces. Last I glued it to the top of the backpack and embellished it.

I really enjoyed putting this project together!

Thanks for stopping by

Brigit

3D Backpack Assembly

Hi Everyone!  Corri here today sharing a quick assembly tutorial for Lori’s 3d Backpack (Silhouette, SVG).  This little backpack would make a great gift for a teacher or student for back to school!

When you get the pieces cut out this is what you will have.

First, apply the pattern paper pieces to the base layer.

Using small brads, attach the straps to the backpack.

Fold along all the score lines and apply glue to the long glue tab and glue into place.  Next, apply glue to 4 small triangle glue tabs and glue to form the slanted bottom portion.  Then, fold the tabs for the bottom and glue the rectangle shape to complete the backpack. Form the pocket shape by folding into a “box” and applying glue to the tabs and then glue to the front of the backpack.  To close the backpack, pinch in the score lines on the sides and pull the flap up and over the top and secure with the tab.

It turned out so cute! You could fill it with some candy and a gift card for a teacher or some candy and small school supplies for kids.   Thanks so much for stopping by today!

Sneak Peek: 3D Backpack with Kathy

Hi Everyone!  It’s Kathy today and I have a sneak peek at a new file that will be available tomorrow in the Lori Whitlock SVG Shop and the Silhouette Store.  This 3d Backpack is just so cute and would make a great back to school gift for the kids (and teachers!) in your life!

I put together a quick tutorial showing how to assemble this new file, so you’ll be all set once it hits the shop!  I started by cutting my pieces and folding along all of the score lines. ( I used Lori’s Celebrate Spring and Celebrate Easter Collections for Echo Park Paper) The sides of the backpack are folded inward similar to a milk carton.  I then added my decorative panels.

You are going to want to glue the backpack sides together before stringing the “straps.”

For demonstration purposes I’m showing you how I threaded the ribbon while it is still unglued.  I started with an 18″ piece of ribbon.  You won’t need this much but I like to leave myself some room for error… You want to use ribbon that is not too stiff or wide.  Thick twine would work as well.  Starting on the inside of the backpack, thread the ribbon through one of the bottom holes, to the outside.  Then following the guide below, thread the ribbon through the other holes to make the backpack straps and hanger.  Tie knots in the ribbon on the inside of the box and trim any excess.  When done, glue the bottom flaps of the backpack to seal.

Fold the front pocket piece into a box form and glue.  Add the decorative panel to the front and front flap.  I closed mine with a small glue dot and finished it off with an enamel dot.

Close the flap on the main part of the backpack with a glue dot as well, and then glue the “pocket” on the front, slightly below the flap.

The only thing left is to decorate your backpack!  Such a cute way to package up a little back to school gift!

That’s it for me today, thanks for stopping by to peek!