
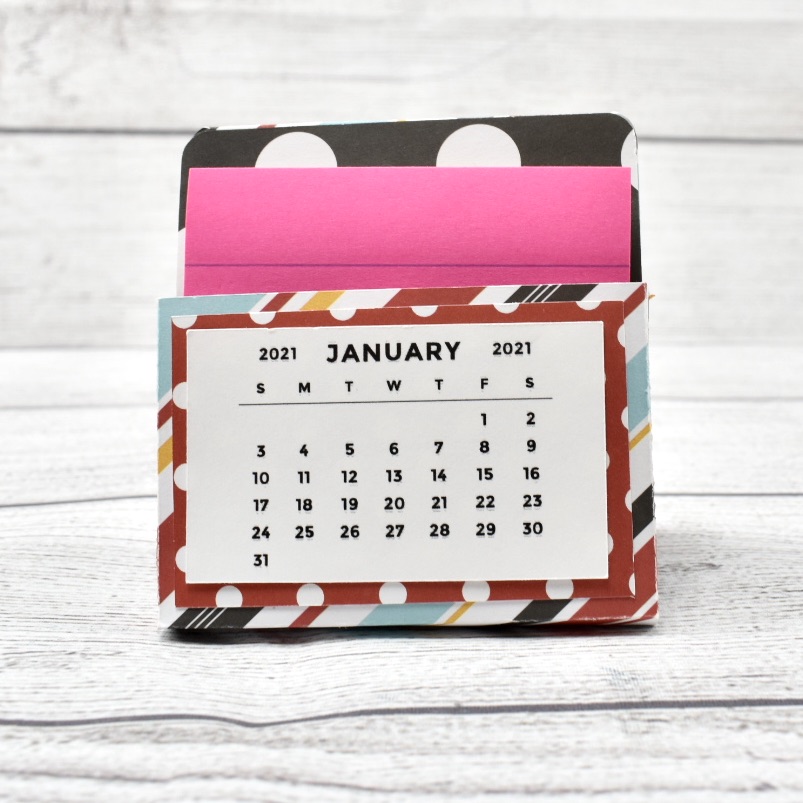
Hi there paper crafting friends! It’s Michelle Starcher, aka the Bookish Designer, popping in on the blog to walk you through the steps to create Lori’s Sticky Note Calendar 2021 (SVG, Silhouette- coming soon). In this photo tutorial, I will break down the steps to create this super cute project to keep you on track in 2021. I used papers from the Magical Adventure collection from Echo Park Paper Co. The calendar goes perfectly with the organizers I made a few weeks ago.

After uploading the SVG file to the Cricut Design Studio, I needed to make a few changes, so that it would cut correctly with my Cricut Maker. Below you will find the steps I took to prepare the file for cutting. I opened the “solid” version of the SVG in Cricut so I could use my score tool.
Ungroup the SVG file. Change the Linetype of the fold lines on the calendar base and sticky note holder to score marks. Attach the score lines to calendar base and sticky note holder pieces. For help on this process, see this video on Lori’s YouTube Channel.
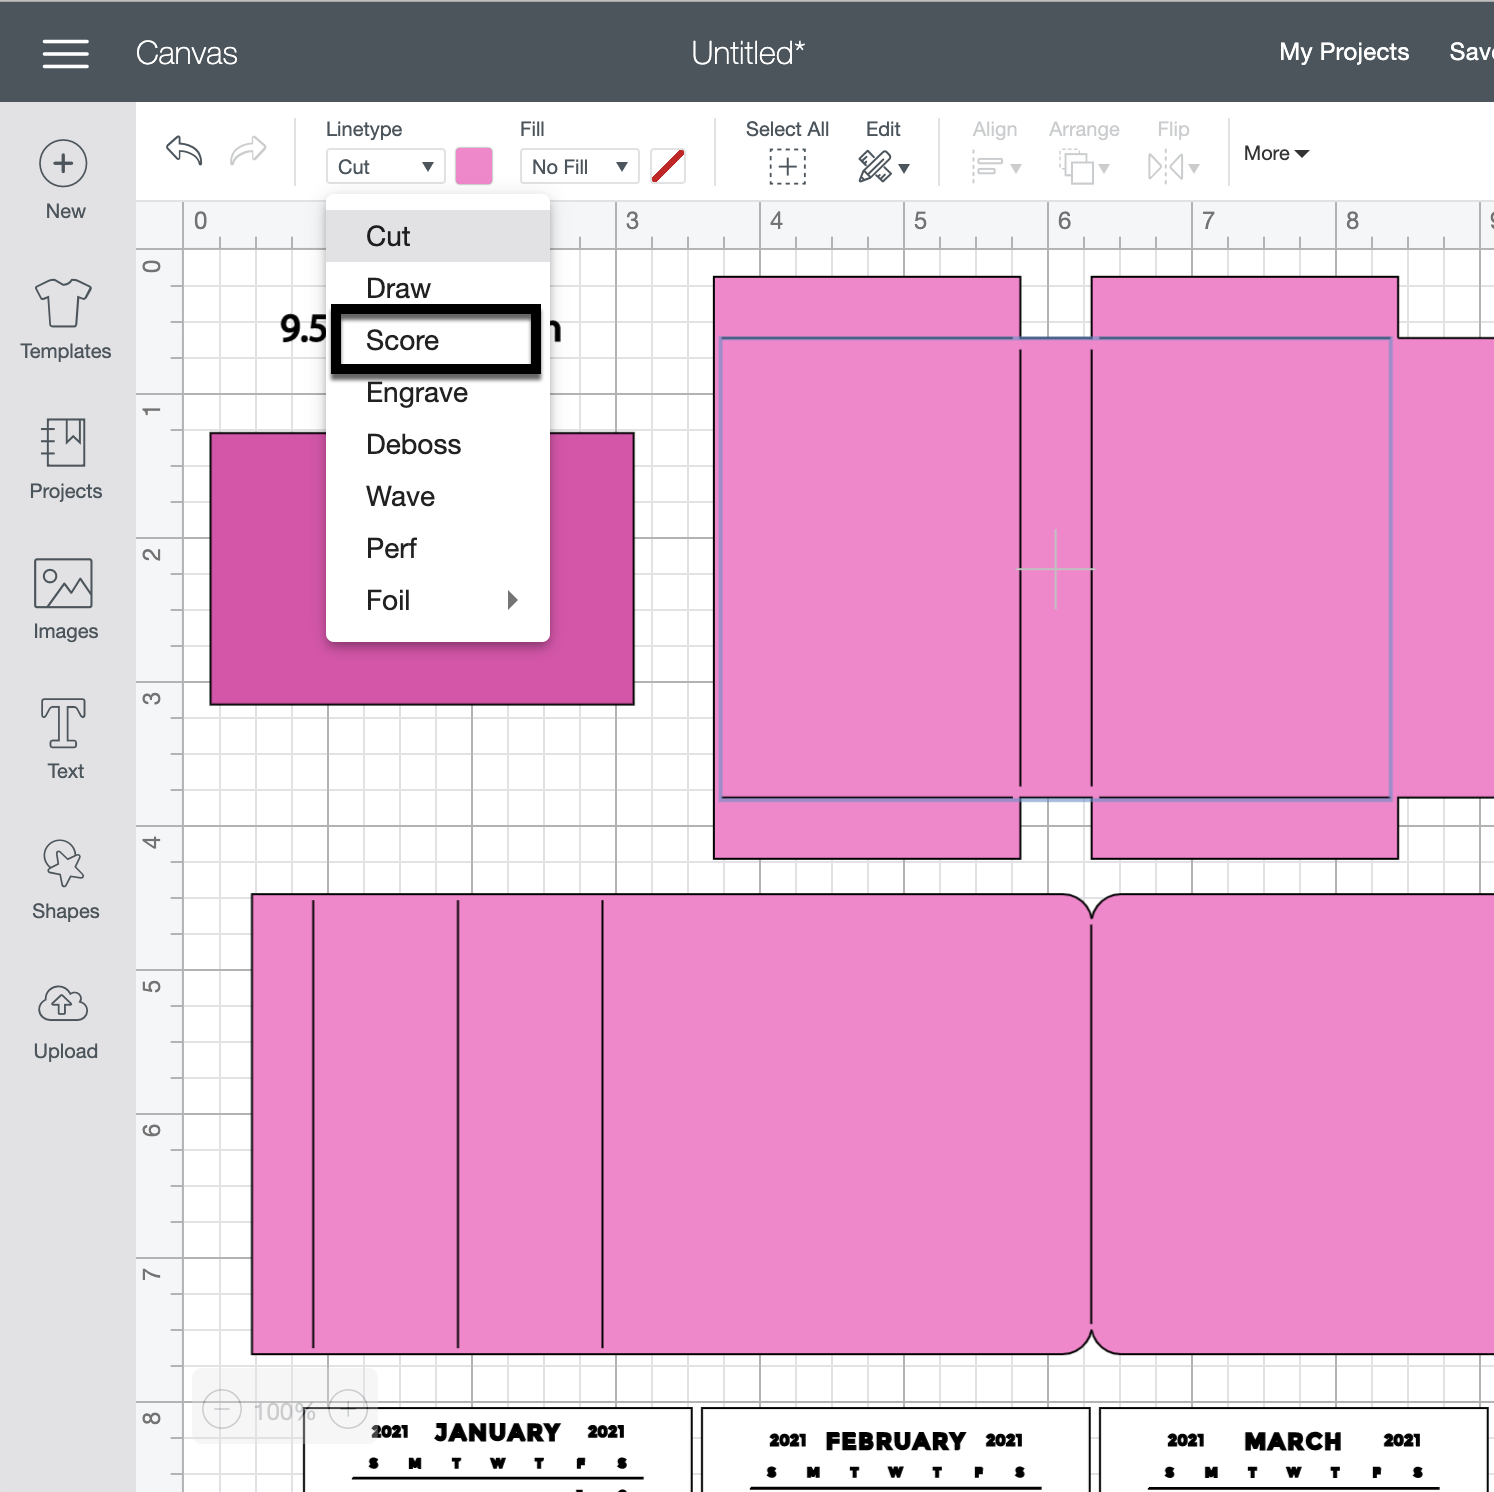
Next, change the Fill calendar pieces to Print. You can save yourself some time by holding the control (PC) or command (Mac) key and clicking each month’s calendar. Then change the Fill to Print for all 12 months at the same time.

The final step is to Flatten each calendar piece to the white rectangle below. Unfortunately, you will need to do this 12 times. Don’t forget to hide or delete the size note (9.5343 in =width).

You are ready to print and cut your project pieces. Toggle off the Add Bleed option in the print window. It will be grayed out when in the off position. When I sent mine to the printer, it printed both pages. After printing, it was time to cut all the pieces using my Cricut Maker.

After cutting all of the project pieces, I folded all the pieces with score marks and added adhesive to the joining tabs.

Then I adhered the calendar back (the red polka dot piece) to the front of the sticky note holder and added adhesive tape to the back of the sticky note holder. Next, I assembled the stand and attached the sticky note holder to the stand.

I chose to attach the January 2021 calendar piece to the front of the sticky not holder and tucked the rest of the pieces behind my sticky notes. I will add the new months to the front of the sticky note holder as the year progresses. You can also staple the months together in a stack and add as a group to the front.
I hope you enjoyed making the Sticky Note Calendar 2021 (SVG, Silhouette) as much as I did! Looking forward to 2021 and using my sticky note calendar.
Until next time,
Michelle
Are instructions for Silhouette Cameo. This tutorial is for the Cricut. Thanks. Vicki
Hi Vicki,
The process is basically the same. In Silhouette you don’t need to attach lines or change them. You would use the print and cut feature of Silhouette to do the Calendar portions. If you need a tutorial for print and cut I have one here: http://www.loriwhitlock.com/blog/print-and-cut-christmas-tags-tutorial-with-kathy/
Michelle, where did you get the 2021 calendar? When I downloaded the design from Silhouette, it downloaded the 2020 calendar and I want to make these for Christmas gifts.
thanks, Lynda
I love this. Is it currently available on Silhouette with the current calendar for next year?
It has been sent to Silhouette, just waiting for them to upload.
It has been sent to Silhouette, we are just waiting for them to upload.
I wanted to get these done so I downloaded one of Lori’s designs for a 2021 calendar and re-sized it to fit which worked ok but – September was missing from the calendar! I’ve contacted her to see what to do. So, don’t get in a hurry like I did. The instructions on the email with the design were a big help.
Lynda,
The file has been fixed in Silhouette. If you go into your library and find the file you downloaded, right mouse click on it (in the library) and select retry download you will get the updated version.
Thank you so much! I’m making several for gifts. Great project!
Hmmm Tried that and it still comes up 2020 and shows 2020 in the Silhouette store
It has been sent to Silhouette. Unfortunately they have not uploaded as of yet.
https://www.silhouettedesignstore.com/new-designs/334195