
Hi Everyone!! A couple of people have asked me this question so I have a quick but helpful tip today, filling different size shapes with the same size pattern. I chose this no glue rectangle box from Lori’s shop, it’s perfect because the side layer pieces are smaller than the top.

The flower is from the 3D flower Set 8 and digital paper is Lori’s Maggie collection.
Stamp sentiment is from Jaded Blossom Stamps.

The first thing I do is ungroup the pieces, the score lines of the box are separate but I want to keep that all together so I select around the box and then choose Make under the Modify window or you can right click and Make a Compound Path.
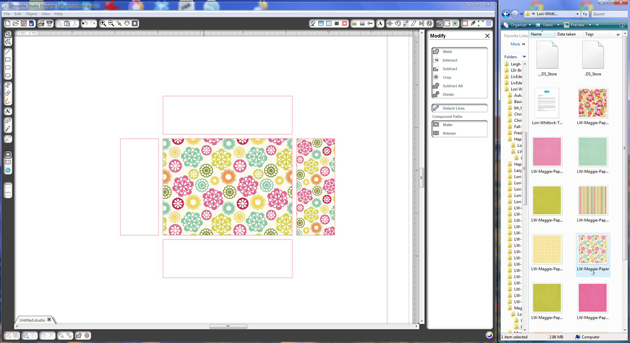
Now onto the layer pieces, they are still grouped together, if you select your pattern paper it will fill all the shapes at once but the 4 layer sides will be smaller and I want them all the same size.
(I don’t import my paper into SSDE, as you can see in the right-hand side I have it sorted on my computer in folders and keep it opened next to my program for easy access and drag and drop it into my shapes. This way it only fills one shape at a time when it’s grouped.)

So what I do is select all my shapes and Make a Compound Path, then when I fill with pattern paper it fills all the pieces at once and the pattern size is all the same also. That’s it, simple!!

Then you can resize it all at once in the advance settings under the Fill Pattern Window if you’d like.
Thanks for stopping by, I hope you find this tip helpful! You can visit me at http://www.brigitsscraps.com.
Darling box and such a great, easy tip! Thanks for sharing. 🙂
Darling box and such a great, easy tip! Thanks for sharing. 🙂
Great project, Brigit!! Thanks for this awesome tutorial!!
Awesome tutorial, Brigit!