
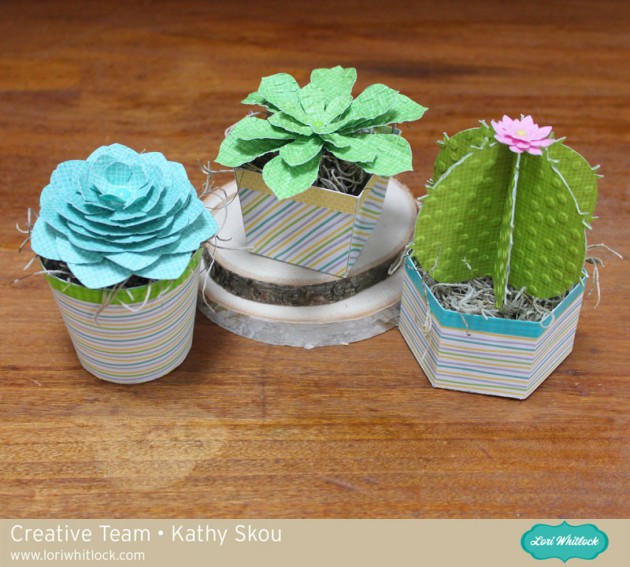
Hi Everyone! It’s Kathy today with a tutorial showing how to assemble Lori’s new Cactus and Succulents! I was so excited to see these in the shop, finally plants even I can’t kill! I couldn’t decide which one I liked best, so I made a trio of them, and will show you how easy they are to assemble!
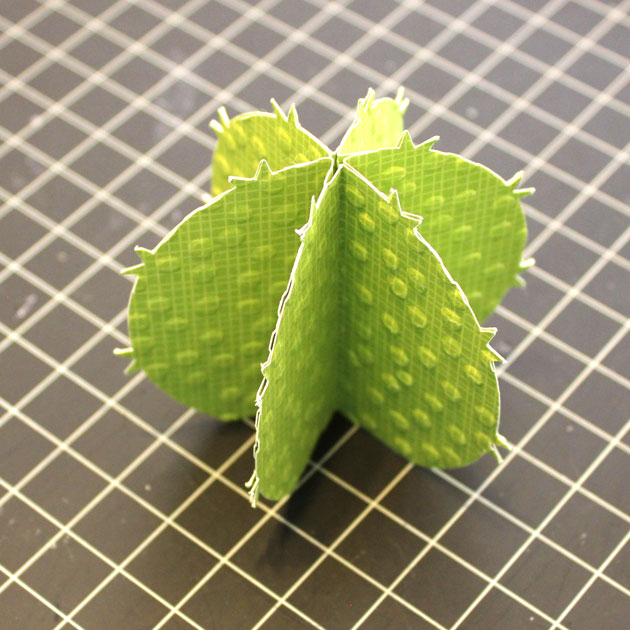
I started with the 3D Cactus (here in the Silhouette Store). I cut the pieces, then embossed the “leaves” to give them a bit more texture.

To assemble the pot, fold the sides up and around the base, glue the sides to the tabs on the base, tabs inside.
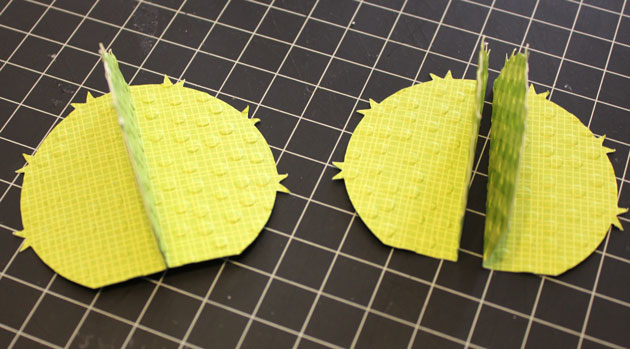
For the cactus, start by folding each piece in half along the score line. I found it easiest to glue the pieces together in pairs, then glue all of the pairs together to form the plant.
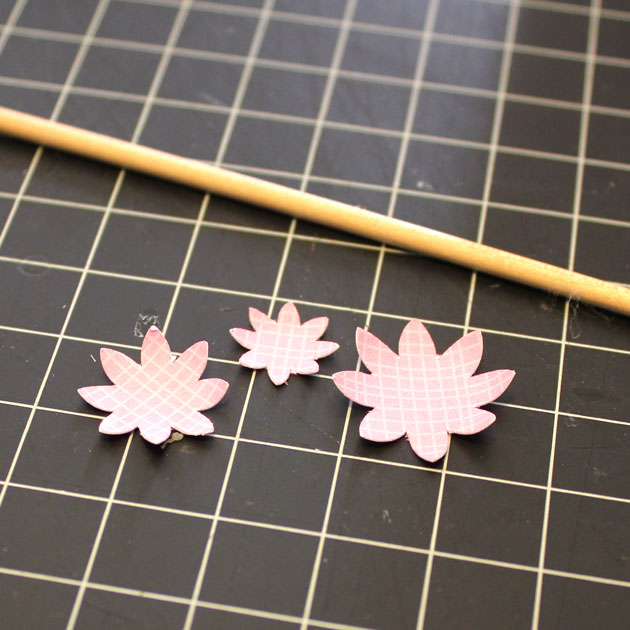
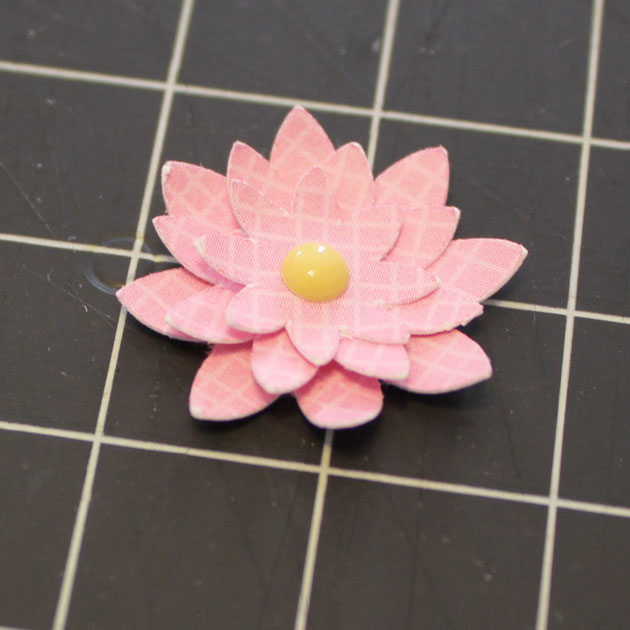
The last part is the flower. I started by curling the petals of each flower layer around a thin wood stick to give them some dimension. Stack the flowers, with glue dots between the layers. I finished it off with an enamel dot. Using a glue dot, add to the top of the finished cactus.
To put it all together, I added some washi tape trim to the pot, and then filled the pot with some Spanish moss. I added the cactus on top, securing with glue dots where necessary.

Next I decided to make the Succulent 2 file (here in the Silhouette Store). Again, I cut the pieces and then embossed the leaves. I also curled the leaves around the handle to my Silhouette Spatula for a more natural look.

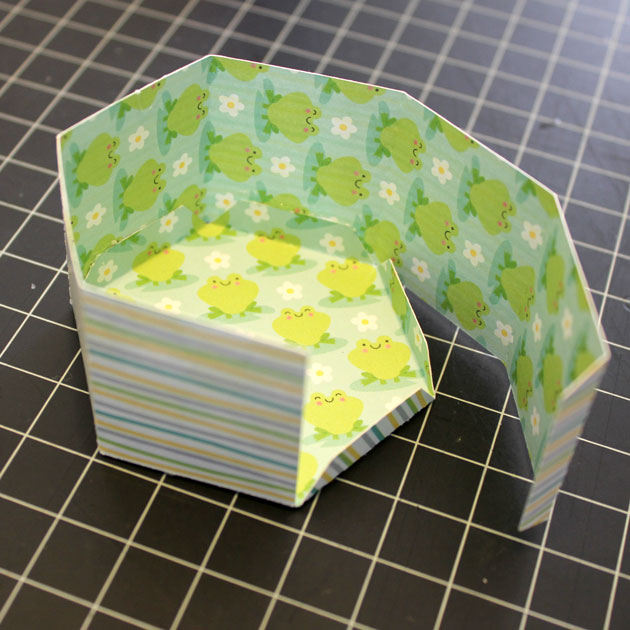
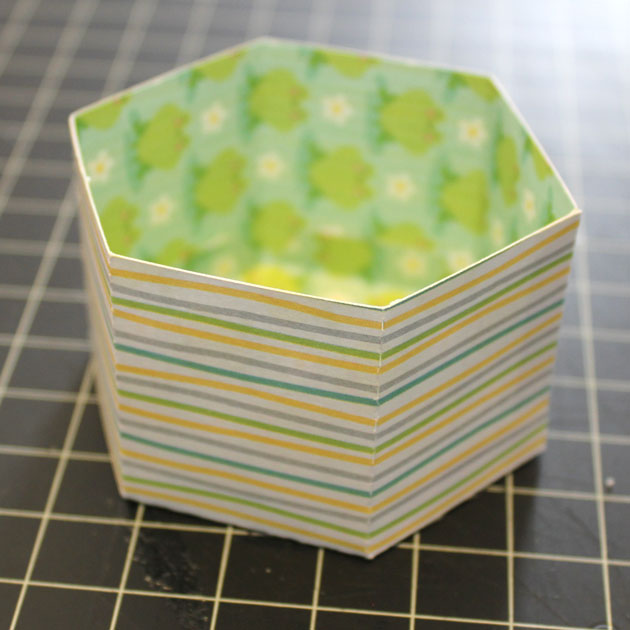
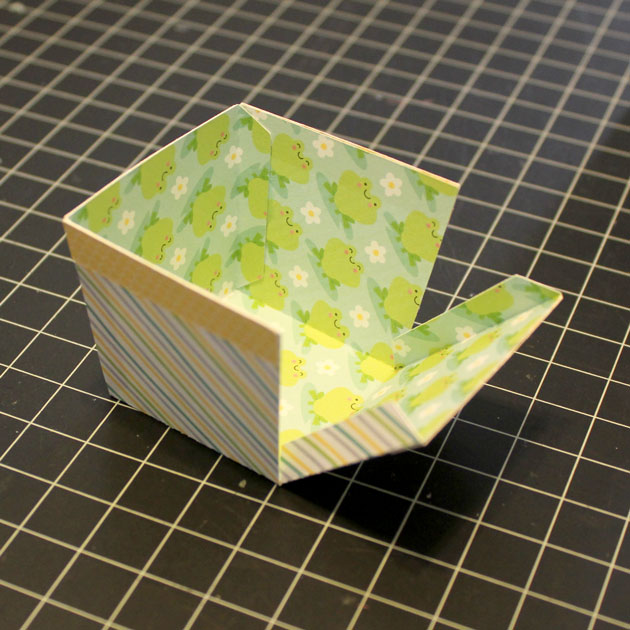
The square pot is pretty simple to assemble. I started by gluing the decorative edges to the pot base. Next, fold the sides up and glue in place using the tabs. Tabs are glued on the inside of the pot.

For the succulent, layer the leaves, using glue dots in between, smallest on top to largest on bottom, staggering the leaves to fill in the empty spaces.

The assembly of the whole project is the same as above, fill the pot with Moss, and add the succulent to the top, securing with glue dots where necessary. Using your fingers, arrange and bend the leaves to make them look more natural.

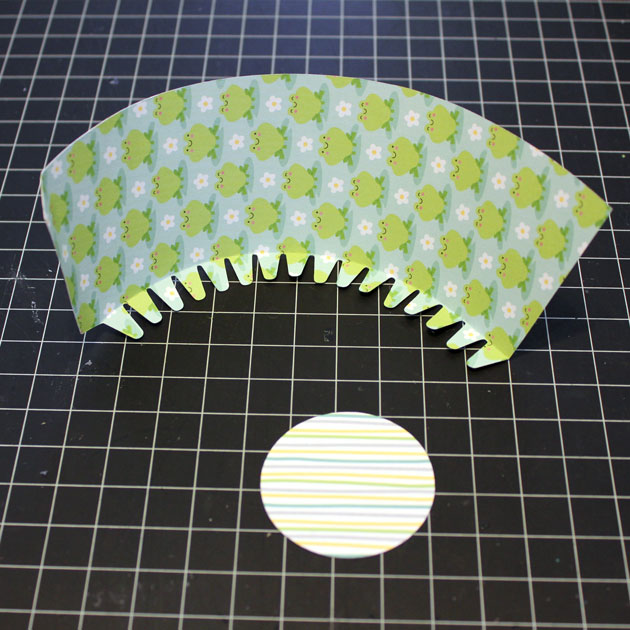
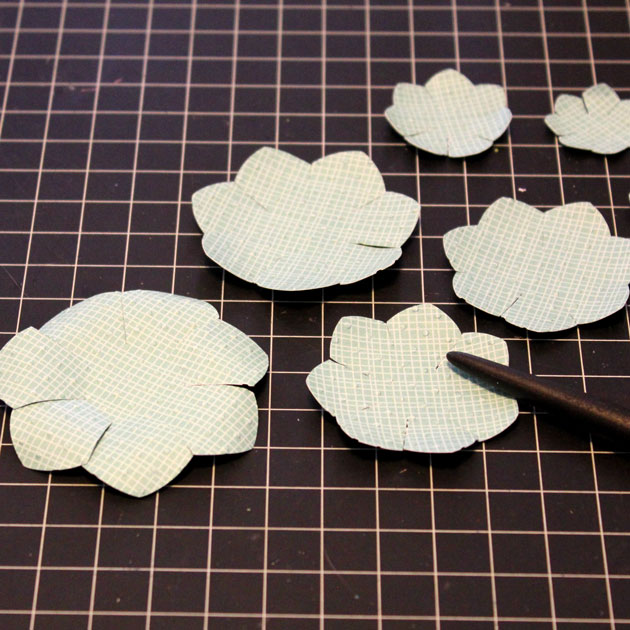
The last succulent is called Succulent 5 in Lori’s Shop (here in the Silhouette Store). I cut the pieces and embossed the leaves.

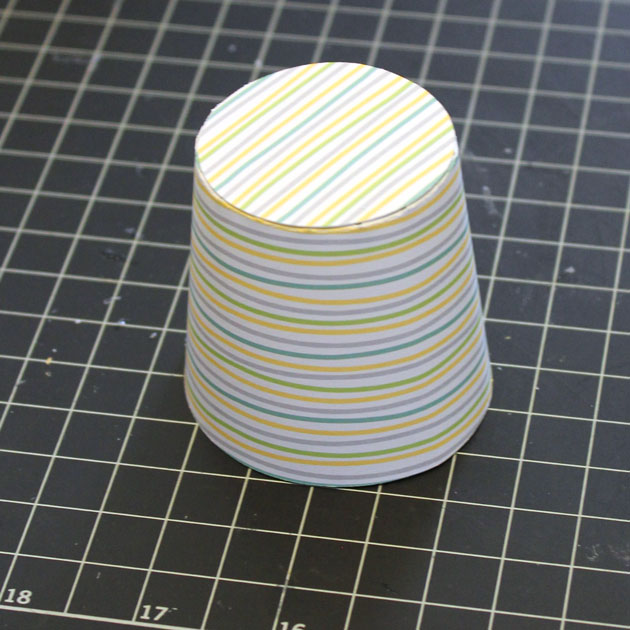
When creating any 3D project which is round, I find it easier to run the rounded piece along the edge of my desk to make it curve. This makes it easier to shape it. I did this with the sides piece of the pot. I formed a circle with the sides piece and glued into place, tab inside. I let it set a bit using a clothes pin to hold it in place. I then glued the circle bottom in place.

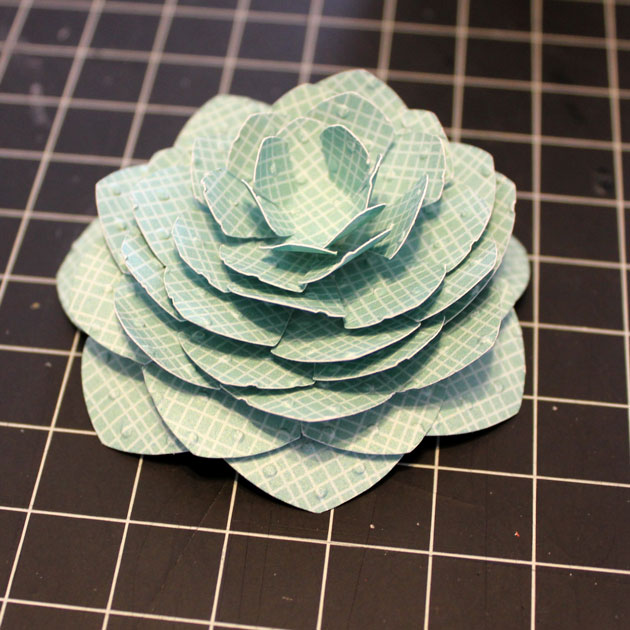
For this succulent, I curled the petals of each layer using the handle of my Silhouette Spatula. I then layered them smallest on top to largest, using pop dots between the layers to give it more height. To finish, I used my fingers to fold up the petals to make it look more real.

Again, I added some washi tape and moss to the pot, and held the succulent in place using some glue dots.

I now have a cute trio of succulents to decorate my craft room! That’s it for me today, thanks for stopping by to peek.
