A2 Easel Card Easter 2 Bunnies

Hi! I’m dreaming of spring, planting season, and sunshine so I made an Easter card with bunnies because they make me happy! Originally this is a card (SVG, Silhouette) but I wanted to add to my decor so I trimmed down the base and instead of creating the print and cut, I used some stickers to create the stopper. I used cardstock and Lori’s All About A Girl Echo Park collection.

So here’s to spring and happy sunny weather!

Teri

This $5 Bundle Ends at Midnight!

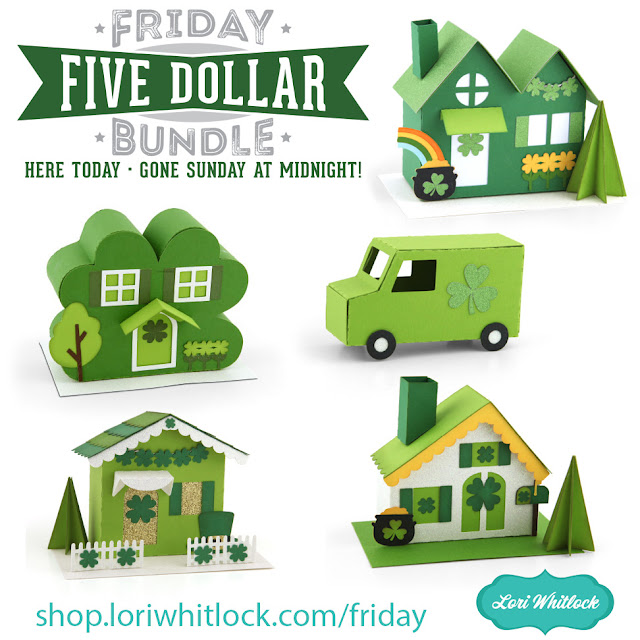
This is the last day to grab this new Friday $5 Bundle which includes 5 pieces to a St. Patrick’s village. Check my YouTube channel for assembly tutorial for each piece. This deal is only available until midnight, so don’t wait! Take a peek…

Be sure to go grab these SVG files while you can. 

** Because Friday $5 Bundles are already heavily discounted they are not eligible for further discounts including monthly, seasonal and flash sales.

Shop Friday $5 Bundle HERE

Thank you for joining us today! Have fun crafting this weekend!!!

~Lori


NEW SVGs + NEW Freebie!

Hello friends! I hope you’re having a fantastic Tuesday! This week I have been on vacation so I didn’t design anything new, but we have some new files from Pebbles, Dresden, and Quietfire. All new releases are ON SALE 25% OFF through Sunday at midnight in the Lori Whitlock SVG Shop. Take a peek at a FEW of the new releases (be sure to visit the link below to see them ALL)…


These downloads include SVG files that may be used with Cricut Explore, Silhouette (Designer Edition upgrade required), Eclips, Brother Scan and Cut, and any other software that will open SVG files. Be sure to go get them while they are on SALE this week.

ALL WEEK, this SVG file is FREE with any $1.99 purchase!

Hi Everyone! We have a new FREE file with purchase this week! To get it, simply place an order of $1.99+ in the Lori Whiltock SVG Shop and this Birthday Balloons will automatically be added to your cart for FREE!  No coupon code necessary! This offer is good through next Monday.

(Your cart must reach $1.99+ before the FREE file will automatically be added. The files will be available for immediate download after you pay for your order by visiting ORDERS > ORDER # > RED DOWNLOAD ARROW)

Another deal we have going until the end of the month is the FREE 2024 February Kit of the Month with any $20+ purchase (purchase must be in one transaction). Simply place your qualifying order in the Lori Whitlock SVG Shop and this file will be automatically added to your cart for FREE. No coupon code necessary. This offer is good through February 29, 2024. Grab this one while you can.

(Your cart must reach $20+ before the FREE file will automatically be added. The files will be available for immediate download after you pay for your order by visiting ORDERS > ORDER # > RED DOWNLOAD ARROW)

Thanks for checking out the NEW FILES and be sure to go grab the freebies of the week/month with your purchase.

Have a great day!

Lori

5X7 Insert Card Bunny 4

Today I’m sharing a new Bunny insert card.  There are several new designs to choose from in the shop. Insert Bunny Card (SVG, Silhouette-coming soon). Insert Card Bundle (SVG).

Some of these cards take only 2 pieces of paper, and they are very quick to put together.


Hope you enjoy these new cards.

Ashley

3D Leprechaun Hat Box Tutorial

Hi there friends! Today I am sharing an assembly tutorial for the 3D Leprechaun Hat (SVGSilhouette). As soon as this paper collection came out, I knew I wanted to craft with it. It is the Happy St. Patrick’s Day collection by Echo Park Paper Co. This little hat is the perfect size for a tiered tray or to hold a little treat for someone special.

This cut file has five circles, two long strips with tabs, and two buckle pieces. The tabs are all mountain folds.


I started with the narrow strip first. This will be the hats brim. I added glue to the end tab and attached to the other end creating a circle. I then folded over all the tabs and added glue to each tab on the inside of the cup. Then I put one of the same-colored circles inside the cup and pressed down on each tab against my work surface making sure to shape and secure each one. I flipped the cup over and glued the second same colored circle on the top covering the tabs. With the wide strip and the two smaller remaining circles I repeated the steps making a taller cup.

To help give a little dimension and to hide the white core paper I inked all of the remaining pieces and the two cups.
I glued the two buckle pieces together. Then glued the shorter cup to the center of the largest circle. The taller cup is turned over and fits inside the smaller cup creating the hat. I glued the buckle into place only adding glue to the bottom half of the back of the buckle so that the hat can still open.
I added a few stickers from the collection to glam my hat up a little as well as a jewel brad from my stash.

I really like how it turned out and will be adding it to my tiered tray decor next month. Thanks for stopping by today!


Brandie