Tuck Lid Gift Box Reindeer Tutorial

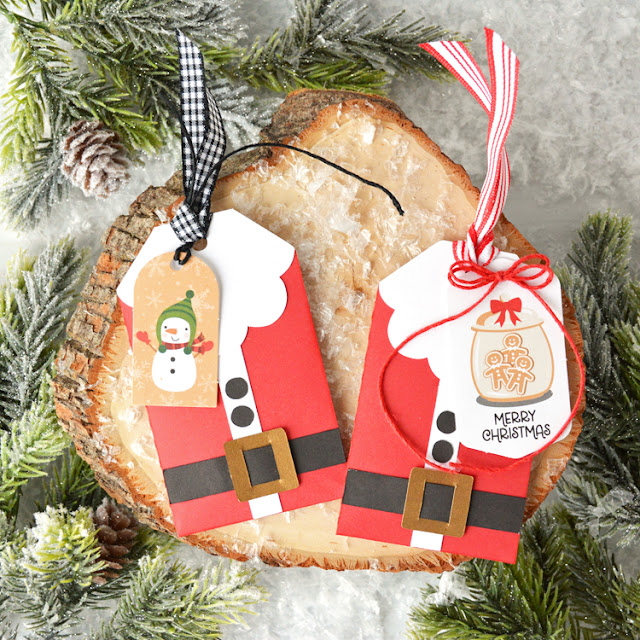
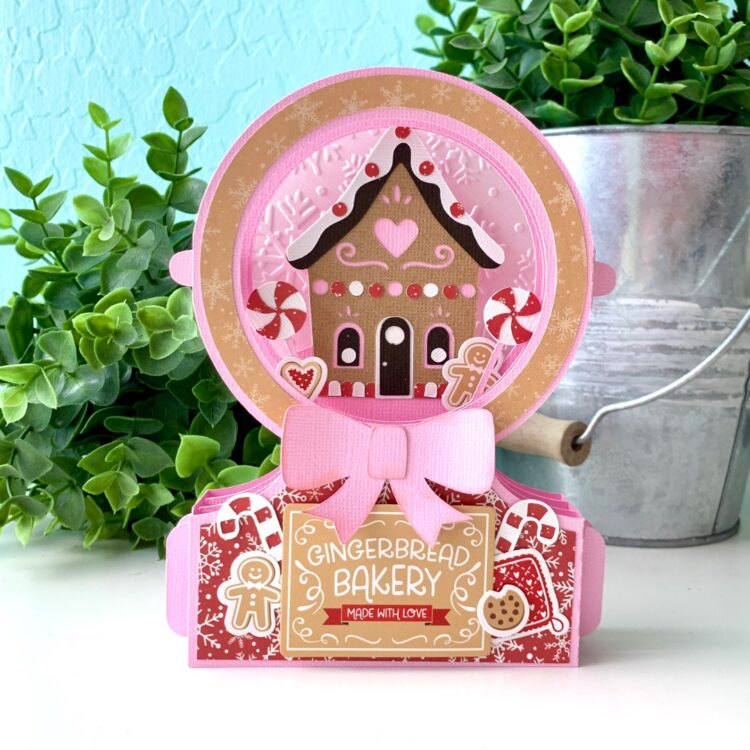
Today I’m sharing a quick tutorial featuring Lori’s new tuck lid gift boxes.  You can find the SVG bundle here. I’m making the reindeer box today (SVG, Silhouette).

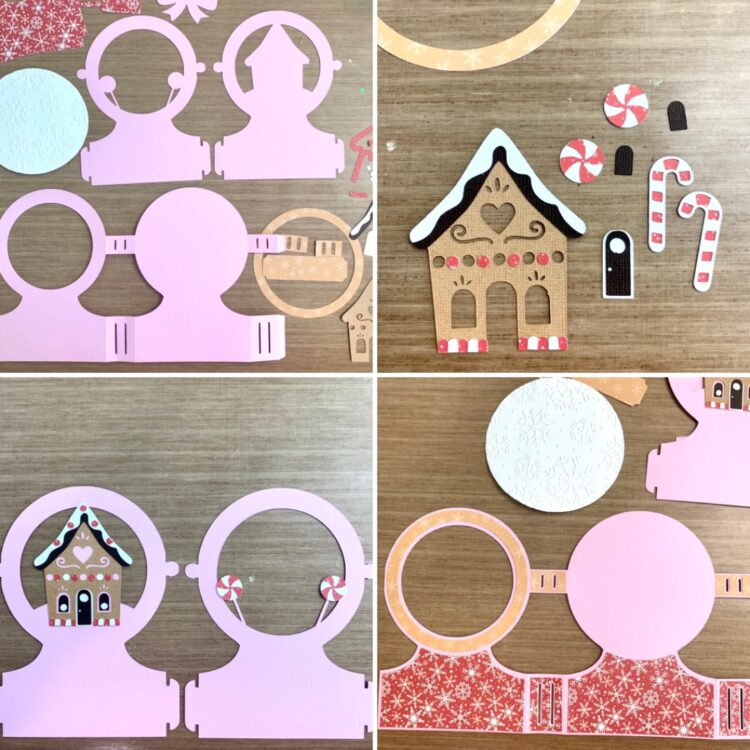
First cut out your pieces.  There is one box piece and the rest are reindeer pieces.

First build the reindeer.

Place the face pieces as shown and adhere the pieces to the reindeer backing.
Adhere the hat pieces.

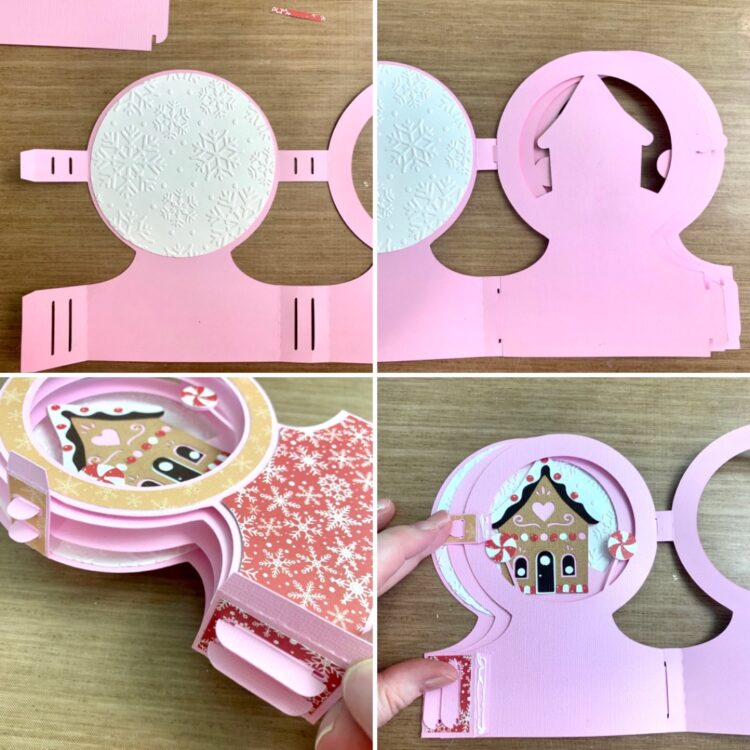
Next fold the box piece on all the score lines, then unfold. Adhere the reindeer piece to the box piece.

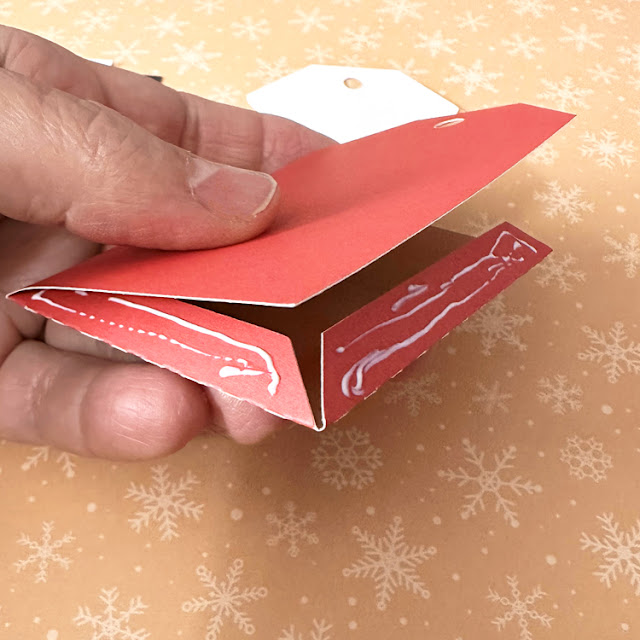
Next fold the sides of the box and adhere the glue tab on the inside.

Next adhere the bottom of the box piece.  Save the largest flap to adhere last.

Leave the top of the box with no adhesive.  So you can add a gift or treat.

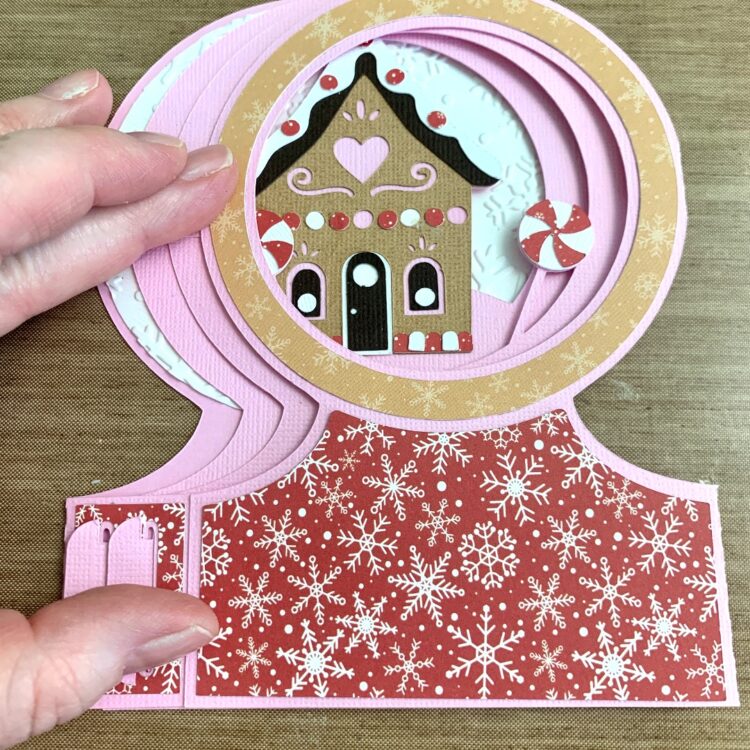
And that’s how you put together the tuck lid gift box.

These boxes are new and on sale this week, so grab a few to create.
Thanks for stopping by!
Ashley

Gift Card Tag Santa Tutorial

Hello everyone, Marcia here.  Christmas is creeping up. I am a big fan of giving gift cards so my recipients can pick out their own gift but I like to make gift card holders to put them in. I selected the Gift Card Tag Santa (SVGSilhouette) to make for my gift cards this year.  There is a pocket on the back side of this tag that holds the gift card. I used Lori’s Have a Holly Jolly Christmas collection to create my tags.

These are really easy to assemble. Let me show you how.

1. Cut out the pieces from the desired pattern paper or cardstock.

2. Fold the tag along the score lines folding the flaps up. Apply glue to the flaps and adhere to the back of the tag to form the pocket.

3. Adhere the white beard and Santa suit trim to the top of the tag.

4. Slip the black belt through the belt buckle and adhere to the bottom of the tag. Add the two black buttons above the belt on the white trim.

5. Add ribbon or other embellishments as you wish.


Check out Lori’s other gift card holder designs in the store and make some of your own. Thanks so much for stopping by.
~Marcia

Snow Globe Shadow Box Gingerbread Card Tutorial

Hi friends! I know I know it’s a little early for some of you, but I have moved on to Christmas crafting. I was inspired by the Have a Holly Jolly Christmas Collection by Lori Whitlock and Echo Park. I loved all the gingerbread houses and baking elements. So cute. I saw this Snow Globe Shadow Box Card Gingerbread (SVG, Silhouette) and thought it would be perfect with this collection.

This card comes together fairly easy. If you have a hard time with traditional box card assembly, try this version. I thought this was much easier. The toughest part is the tiny pieces used to decorate the gingerbread house. There are two inserts, the snow globe frame, and the decorative elements. All of the folds are mountain folds. I assembled the tiny pieces first. I used a fine tip glue bottle to get everything assembled then glued everything down on the inserts. The front insert has the round peppermint candies, and the back insert has the house. The door and the window are glued down after the house is in place. The decorative panels all glued to the outside of the snow globe frame.

Once all of the outside panels were secure I flipped the card over and glued down the decorative background of the snow globe. I embossed mine with a snowflake embossing folder. The two inserts have tabs that will slide into the slots. I then gently folded the inserts over and slid the other tabs into the slots. I added glue the tabs on the snow globe base and folded the front of the card over and made sure everything was lined up and held for a few seconds while the glue took hold.

I love how this card turned out, so festive and sweet. Thanks for stopping by today and I hope you have a lovely holiday!
Brandie


Flexi Place Card

Happy Thursday everyone!! Only 14 days until Thanksgiving. We have a few newbies joining our table for Thanksgiving this year so I thought it would help everyone remember names with these adorable place cards. They were so easy to make! Follow along below to make your own.

I didn’t need many supplies to complete these. I used a glue pen, a pointy pair of tweezers and a file for any rough edges. I cut all my pices and laid them out in piles. I also used my Cricut to write the names on the white pieces.

The pumpkin was by far the easiest (SVG, Silhouette). The little green stem goes over the orange pumpkin piece and added to the base card. I also added the white name to the 2nd piece of the base.

The ends just slip into the slits on either side.

How cute and easy is that?

I did a few of these, and by far the hardest was the turkey (SVG, Silhouette) because there were so many small pieces. Below is a photo of how to assemble most of these small little pices. Again. the pointy tweezers were a huge help on this one.

How cute will these be at everyones place setting at your Thanksgiving dinner?!

Pilgrim hat: SVG, Silhouette

Cooked Turkey: SVG, Silhouette

Pie: SVG, Silhouette

Happy Crafting!

Chelsea

Self Closing Box 2 Tutorial

With Halloween just a few days away I made these little boxes (SVG, Silhouette) for my grandbabies. I will be walking you though how to assemble them.

 
I did increase the size on these as large as I could and still have it fit on my mat. Then I scored all the score marks.
 
 Then I added score tape to all the little flaps.
I wrapped the long side around 1st and stuck each side as I went. I found that laying it on the table like it is below and using my finger as a guide to line it up was easiest.


Contine to adhere all the sides.


I did find that directional paper might not be the best to use as it will be right side up on the lid, but the wrong way on the base.

After you have attached the flaps to the lid you have a cute little finished box to fill with goodies. I also added some embelishments to the inside as well and wrapped it with bakers twine.


Happy Haunting!

Chelsea