Fishing Vest Birthday Card with Courtney

Hello every one!!! Courtney Lee from Court’s Crafts here. Sadly, this will be my last post for Lori Whitlock’s team! I decided to step down and have loved my teammates, my awesome DT leader, and definitely Lori Whitlock’s cut files! I hope you will welcome the new and incredibly talented design team as they showcase their first projects!

I made this card for my father-in-law whose birthday it is today!

We are planning on going fishing in the next couple of days with the girls so this is a great way to kick it off! See the little fish in his pocket? 🙂

Grab this awesome Father’s Day/man card/birthday card here:
In Lori Whitlock’s Store
In the Silhouette Store

Thank you SO much for letting me be a part of your lives and inspiration. Thank you so much to Lori Whitlock for having me on this awesome team!


Giraffe Baby Card with Courtney


Hello everyone! I needed a quick and easy baby card for my newest baby cousin and this little giraffe was just too cute! I love that this is perfect for a boy or a girl depending on the papers you choose.

My daughters actually picked the paper and chose the ombre glitter effect. This is a stencil from Echo Park Paper by Lori Whitlock that I just love. Aren’t the little bows darling? The detailing looks fabulous in person.

The paper is Perfect Princess by Lori Whitlock for Echo Park Paper.

Baby Card Giraffe in Lori’s Store

Baby Card Giraffe in the Silhouette Store

Birthday Candle Card Tutorial with Courtney

Hello everyone! This is Courtney Lee from Court’s Crafts here with a tutorial on this super cute Birthday Candle Card that I made for my mom!

Here are the pieces all cut out. I went ahead and had the Cricut write the sentiment on my white layer to save time.


I glued all of the pieces together and popped the flames onto the candle tops.


I popped all of the candles so that they would have some depth.


I decided to use the background stamp that is part of the Perfect Princess collection by Lori Whitlock for Echo Park.


Isn’t it fun? It may be my new favorite background stamp.


I stitched around the edge for some extra character.


I finished it off by adding stickles to the hearts and Glossy Accents to the candles.

I hope you enjoyed my tutorial for today!

Birthday Candle Card in the Lori Whitlock Shop

Birthday Candle Card in the Silhouette Shop

Violets Card with Courtney

Hello!! This is Courtney Lee from Court’s Crafts here and while I am well aware that this says Happy Mother’s Day and that the day is past – you can EASILY make this card to say “happy birthday”, “thank you”, “with sympathy”, “just sayin’ hi” or “hello friend” etc. I decided to cut this file “as is” so that you could see the beautiful font!

Isn’t this lovely?! The depth of flowers is gorgeous!


I decided to use rhinestones for the center of the flowers and used papers from the Go, See, Explore line (green) and the Let’s Be Mermaid’s line (yellow and purple) – both are collections by Lori Whitlock for Echo Park Paper.

I hope you enjoyed my project for today and that you grab this box for so much more than just  Mother’s Day! This one can be brought out again and again!

Box Card Mother’s Day Violets in Lori’s Shop

Box Card Mother’s Day Violets in Silhouette Shop


3D Daffodil Tutorial with Courtney

Hi everyone! Courtney Lee from Court’s Crafts with a daffodil tutorial! Don’t you just love it when you see daffodil’s pop up all over?! I made this little bouquet with my tiny humans for my mom for Mother’s Day. She’ll just love it.

After importing I colored the parts of the flower as I desired to match a real daffodil.

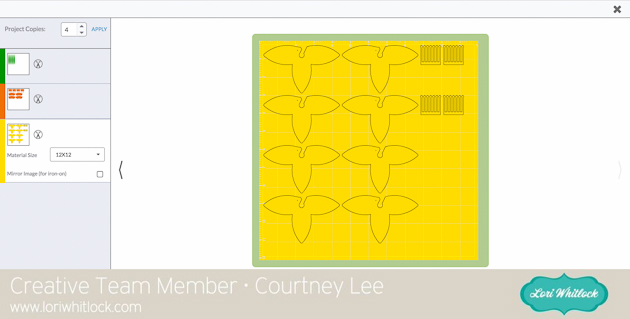
Next I hit “GO” and then changed the project copies to “4”. As there are double the amount of orange inserts (they make two different sized centers for the daffodil) I had double. Then I just cut the yellow layer twice out of two different patterned papers to get everything I needed for 8 flowers.

Here they are all cut out.

I put Glossy Accents on the ends of the stamen so that I could pour glitter on them for the “pollen”.

Now you get to overlap the flowers. I used a hot glue gun to make this go really quickly. There is a little dot that is cut on the flower and it shows you how to overlap the edges and by doing so the flower “cups” itself.

Here two of them are done. This will make one flower.

Overlap the two cups and glue together trying to align a hole in the middle for the cup of the daffodil.

Roll the cup around a small pen or pencil and then let it go. There is no right way to do this. You can roll it up tight and make it small or overlap just one scallop and make it big. It will work either way. It is really just personal preference.

Roll the stamen as well and hot glue them both shut.

This is how what you have. Time to put it together!

For the small cup you insert the points THROUGH the flower. They are actually designed to then grip onto your stem (however you decide to do that.) I pulled them through and glued them to the underside of the flower (see next picture). If you are using the wider cup then it folds under itself and sits on top of the yellow part.

Glued to the bottom, but again you can use them to attach to the stem of your choice (floral wire or in my case sticks from the yard).

Then I simply put a lot of hot glue on the bottom of the stamen roll and stuck it down the center of the cup.

Next I took a big glob of hot glue and stuck my stick into it and attached one of the leaves.

Here is what the larger cup looks like and you can see the bottom folded in here and the stamen glued on top.

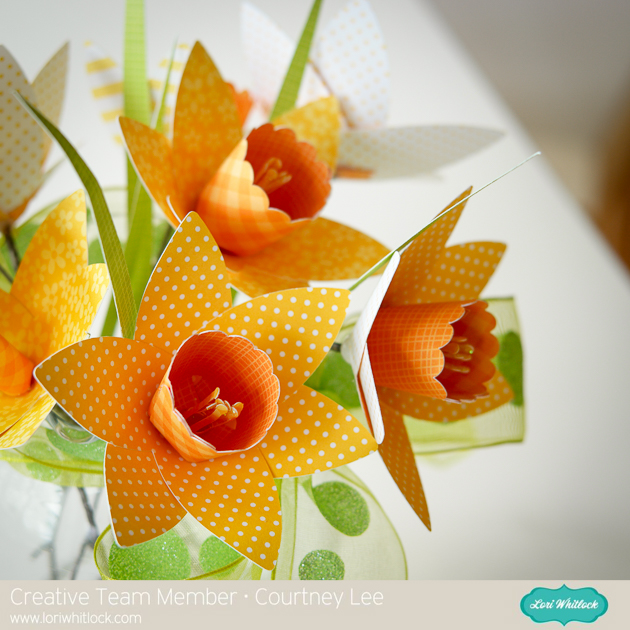
Here is my vase of daffodils! Aren’t they lovely and bright!?

This is actually going to be really hard to give away! I need to make another set for my craft room. I just love them. It can be spring all year!

Here you can really see the difference in the large and small cups. I think having the mixture is really nice though!

Ahhh. Spring.


3D Daffodil in Lori’s shop

3D Daffodil in Silhouette shop