A VW Bus Mini Album

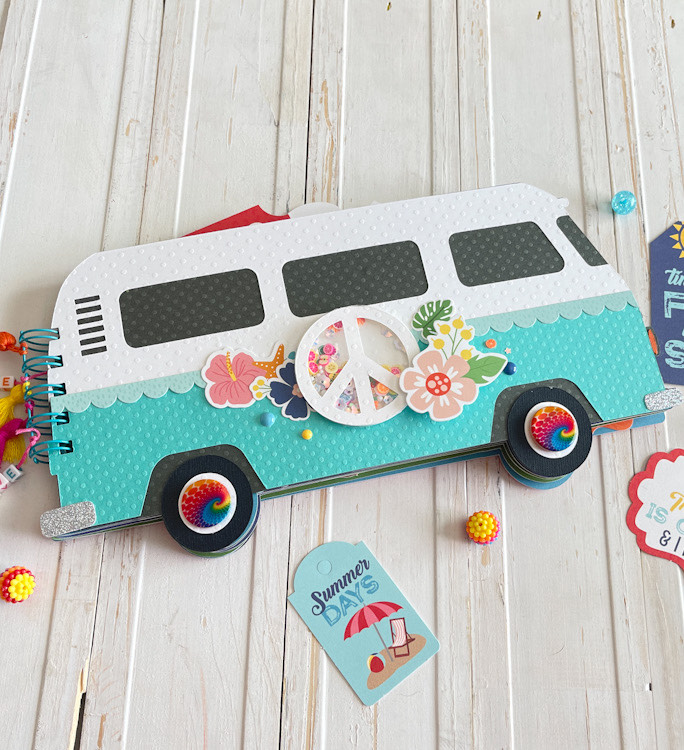
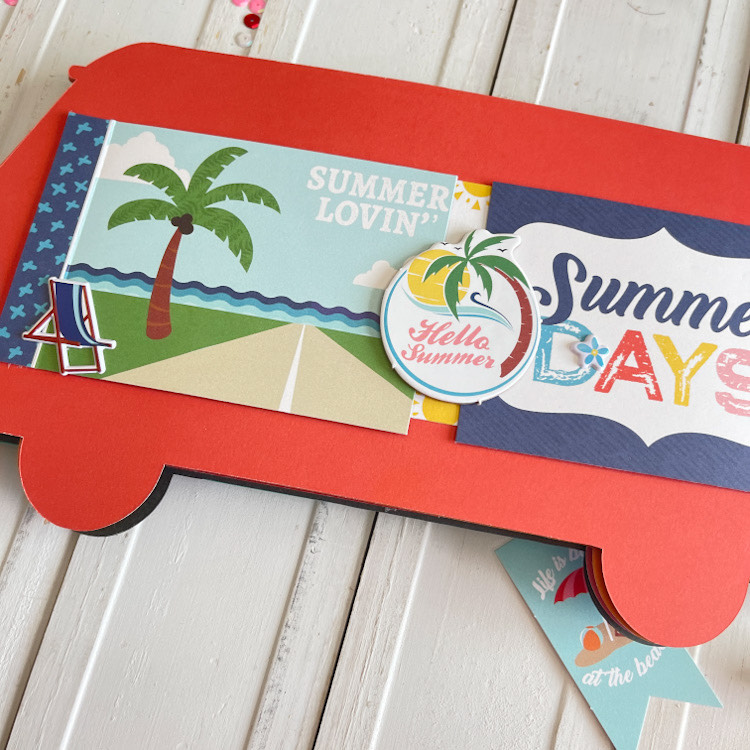
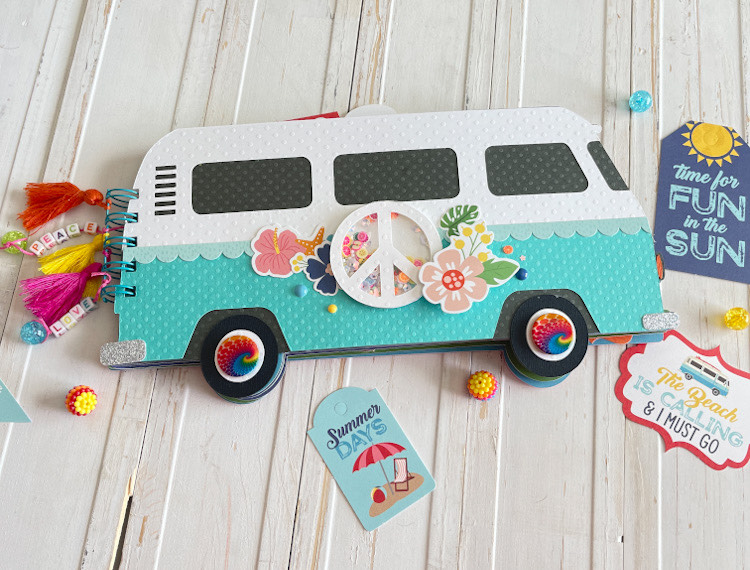
Summer is almost here and Lori has the perfect collection with Echo Park to keep all your summer memories, Endless Summer.  There are so many beautiful papers and just the cutest embellishments with this collection.  Swoon worthy.  I fell in love with the VW bus in this collection and wanted to try to create something special with it.  I decided on a little mini VW bus album.

I chose Lori’s Box Card Van Easter Egg (SVG, Silhouette) and just took out the Easter eggs and kept the van or bus.  I Enlarged the remaining pieces to create a book cover, and then just kept the van shape to create the pages.  I love to get inspiration from Lori’s files and find other ways to use them.  The possibilities are endless when you re-imagine what you could create.


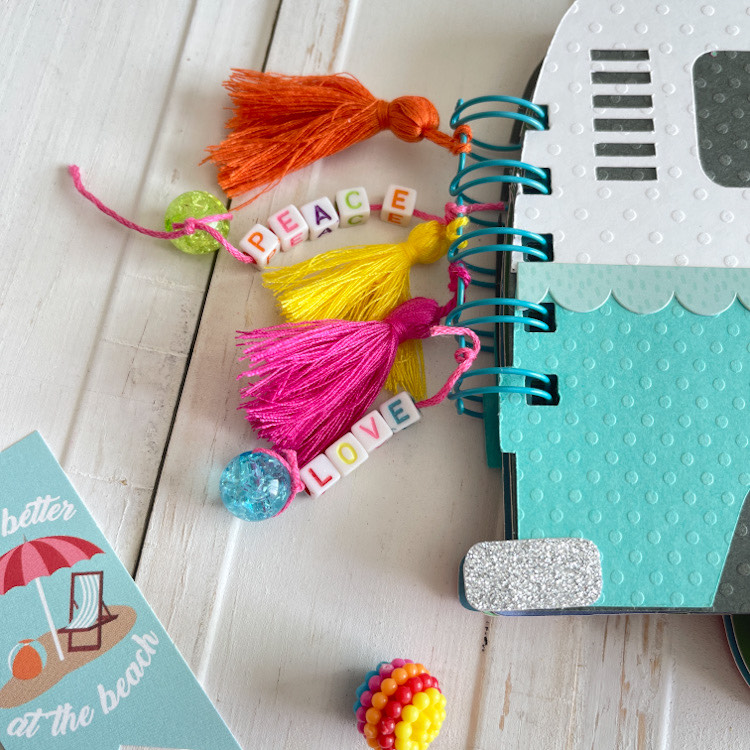
So many fun details to add to the binding!

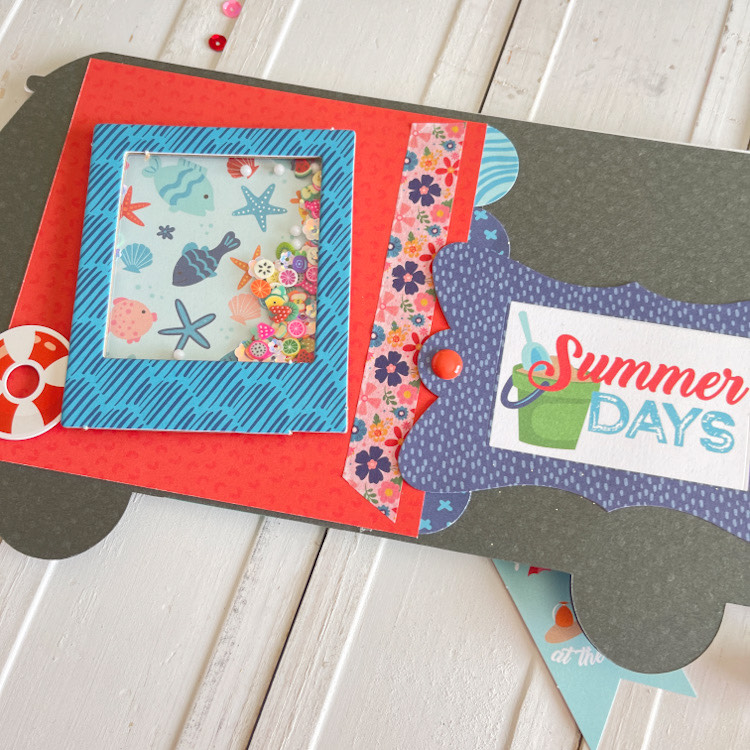
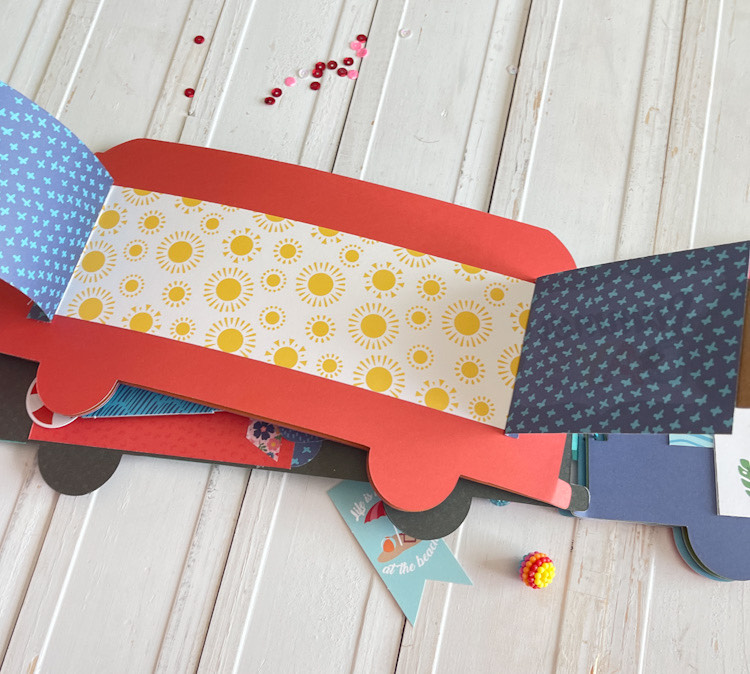
Sharing just a couple of the inside pages of my project.  I’ll share the whole thing on my blog this week!  These chipboard frames are perfect for making fun shakers!


I really had too much fun to with this little mini album.  Endless Summer is the perfect collection for all your summer memories!  I’ll share the rest on my blog this week!  Thanks for stopping by and enjoy your week.

~Cathy

A Birthday Box for a special someone

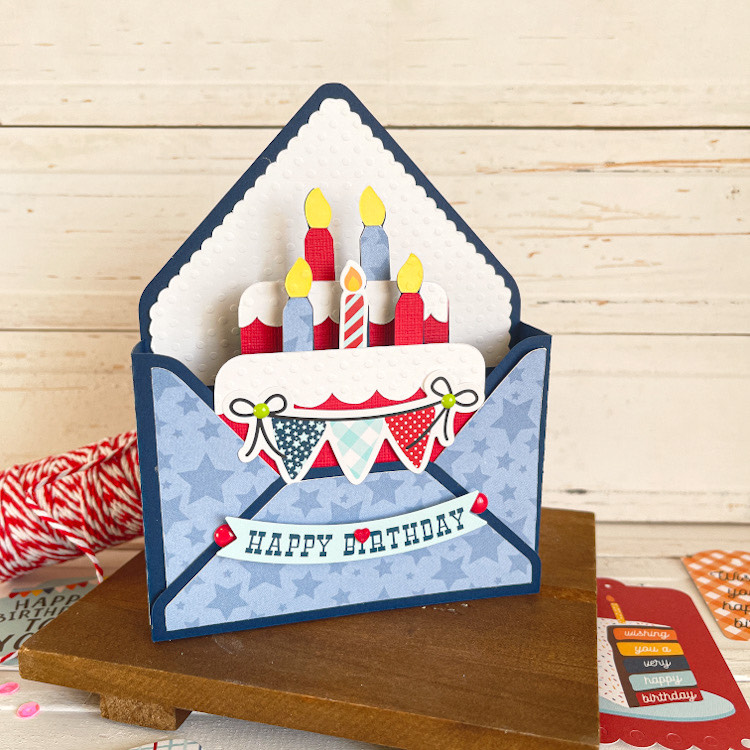
Happy Wednesday!  I have a fun card to share with you that I created for a special someone.  These are my absolute favorite cards to make, as many of you know.  They are quick and have just a great Wow! factor.  This is Lori’s Box Card Envelope Birthday Boy (SVG, Silhouette) created with her Echo Park Paper Birthday Boy collection.

Recently, a friend asked for a card shower for her Grandpa who was turning 95!  I was happy to participate and wanted  to make sure he had an extra special day.  What a blessing he is to my friend!  For my card, I replaced the stars in the file with a cute banner from the Birthday Boy collection.

Make sure to stop by the shop, there are so many cute files and tons of these box envelope cards….you can become addicted to them like me!

Have a great day!

Dream Big Layout with Princess Dingbats Font + 30% Off SVGs!

I kept seeing all of these amazing dingbat fonts from Lori….so cute, but how in the world to you use these?!   I really had no clue, but I had just received Lori’s new Our Little Princess collection and really wanted to try something new on a layout.  I just started playing and trying to understand how these adorable little dingbats work.  One really great thing is that you get 26 different designs for one price.  That’s one heck of a deal, one design for each letter of the alphabet.  You can use these for anything… vinyl, paper, sketch pens, the possibilities are endless.

I created this layout using Princess Dingbats in Lori’s Shop or here in the Silhouette Design Store.  There is also a brand new Princess 2 Dingbat font that matches the Our Little Princess collection perfectly.  You can find it here in the Silhouette Design Store too.

First pick a regular font and type out the alphabet.   I used one of Lori’s fonts and started with the size of 72 point.  I typed my alphabet in sections as seen below.  You want to be able to see all the adorable dingbats, so that is why you use a large point size.

Next, group your alphabet as shown…then the magic happens.
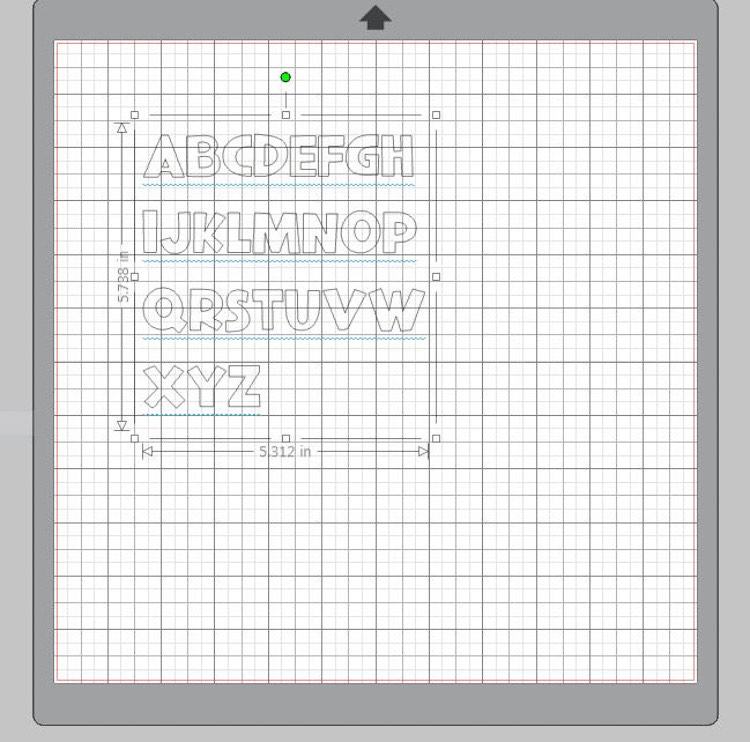
Now go over to your fonts and click on your Princess dingbat and abracadabra!, you now have 26 adorable princess themed designs.
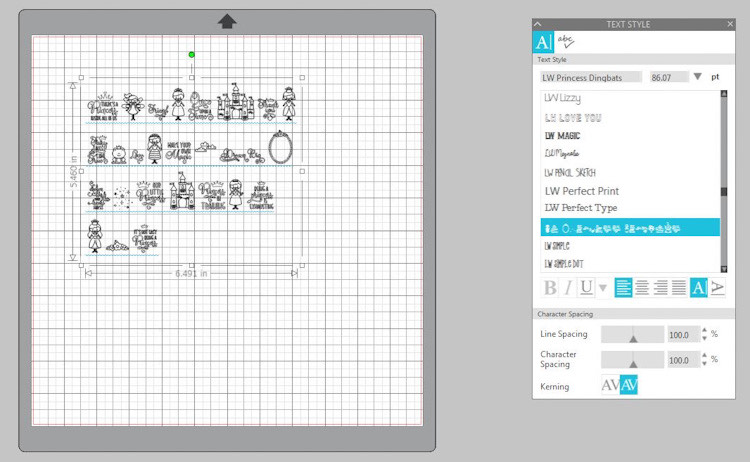
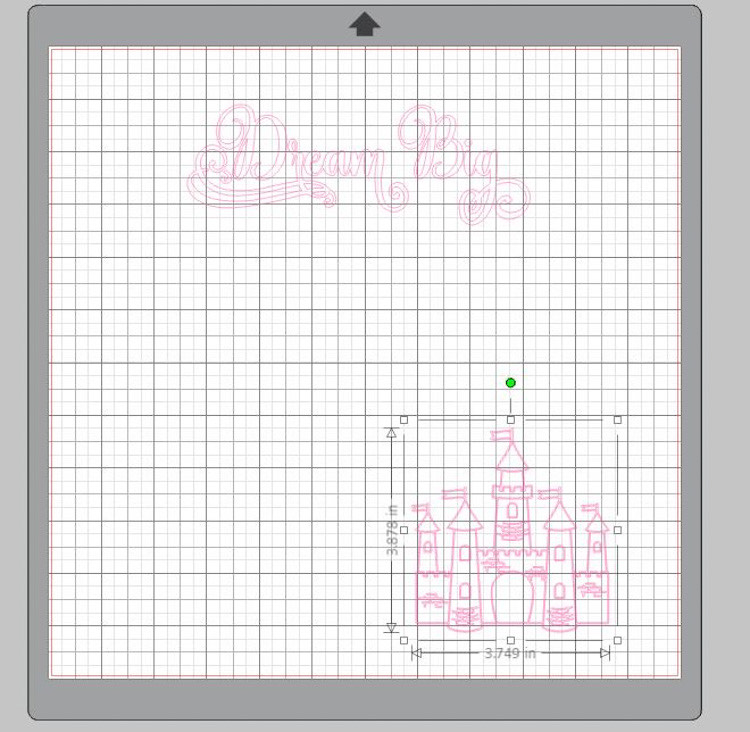
Now ungroup your dingbats just like you would for any other file.  Now that they are ungrouped, you can manipulate them as usual.  I picked the two dingbats I wanted to use, the castle and Dream Big, and deleted the rest.  Here,  you can see where I ungrouped the castle and start to change it’s size and move it where I wanted it to be on my 12×12 page.
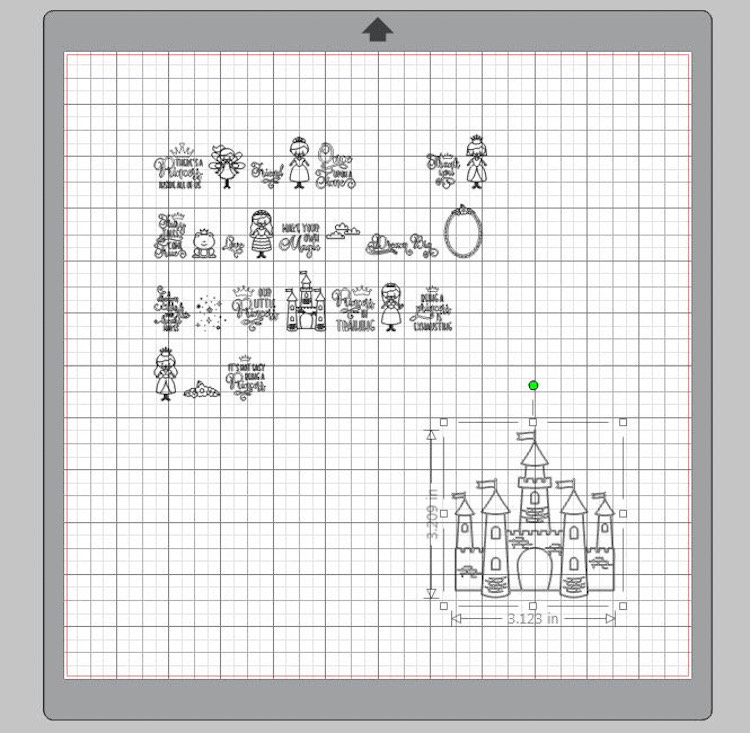
Here,  I have deleted all but the two dingbats that I am going to use.
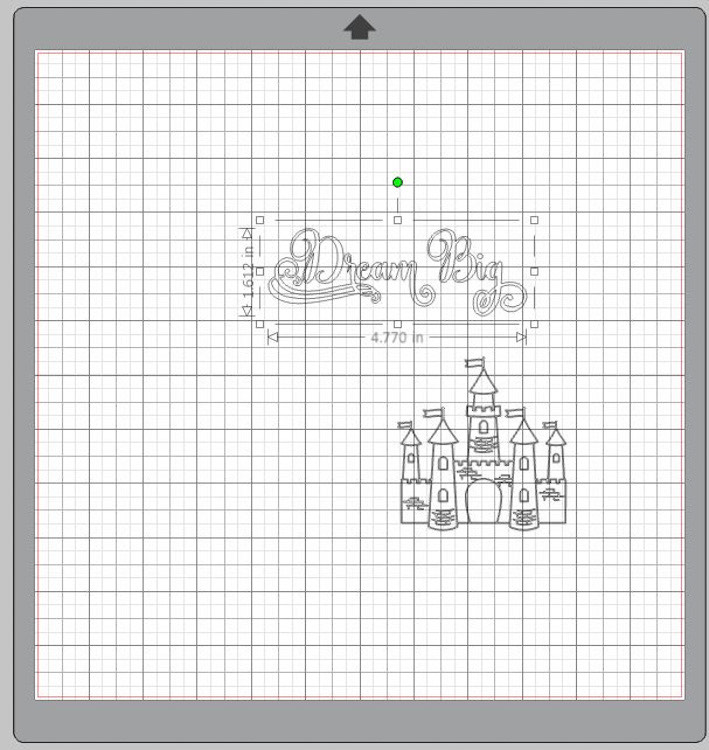
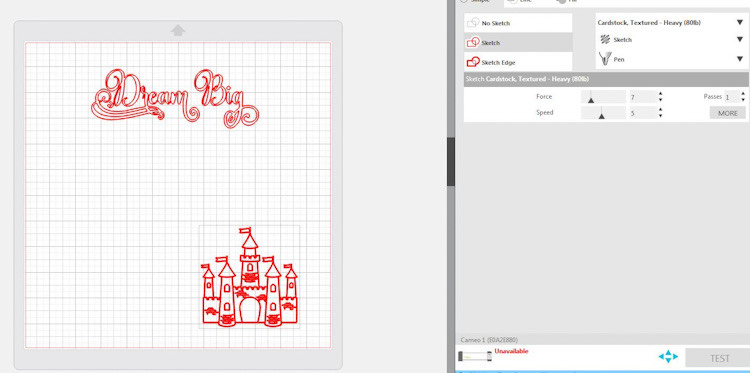
I put my Dream Big title and the castle just where I wanted them to be for my layout.  Next, I added a hot pink sketch pen and let my machine do the rest.  Such a fun way to create.  I will be getting more of these wonderful little dingbat fonts.  The are just way too cute and easy to use.
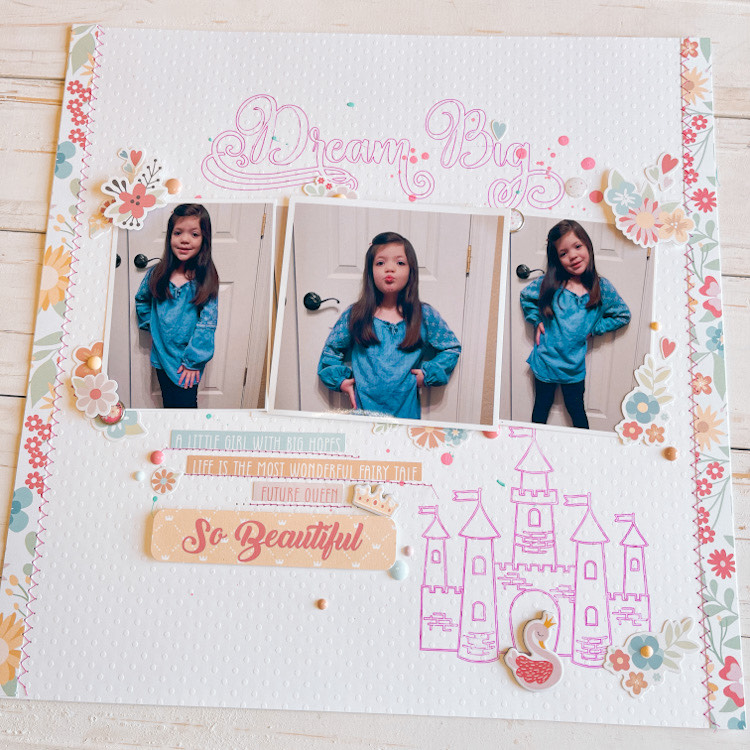
And ABRACADABRA! you have to cutest layout for your little princess!  These girl was born a princess….just look at those poses!
 

And don’t forget, there’s a sale happening now in Lori’s SVG Shop!  Get 30% off all SVGs, Fonts, Pattern Fills & Commercial Licenses when you use code APR2022 at checkout.  Don’t miss out, sale ends Saturday!
 

Have a great day!

Cathy
A Card for a Princess

Every gal wants to be a Princess!  Isn’t that the truth?!  I still wake up in morning wishing someone would bring me my morning coffee in bed.  I can’t complain though as I am greeted by French Bulldog kisses….so in my own way that’s almost as good as being a princess.

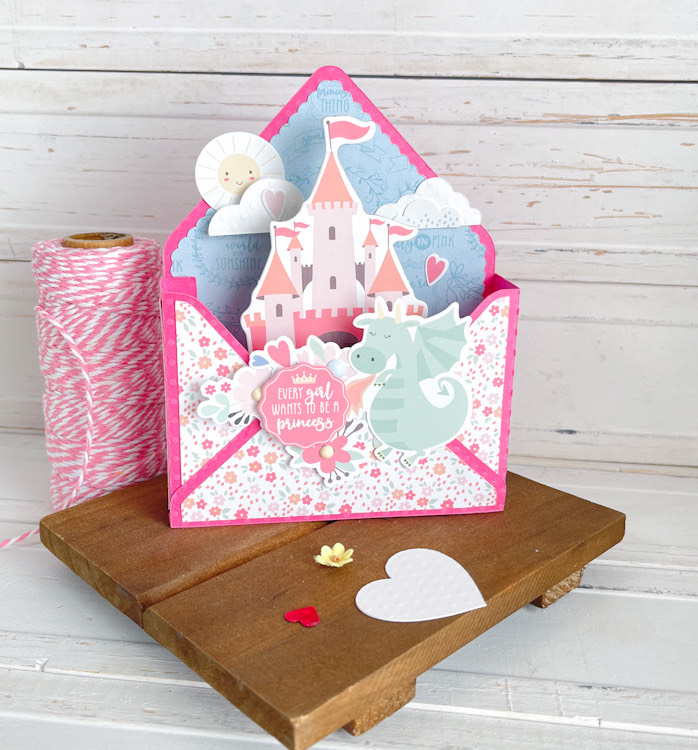
I created today’s card with a brand new collection from Lori for Echo Park.  Our Little Princess is just the sweetest collection.  The colors are so soft and all the amazing little details to the paper.  The embellishments are swoon worthy.  So for this card, I went heavy on embellishments.  I just couldn’t resist them.  One of my favorite parts of designing, is really being able to showcase the amazing products that Lori designs.  So 100% of the time, I look at one of her SVG files and then at one of her collections….and just start creating!   I absolutely love being to design this way.  The sweet dragon in the Our Little Princess collection is my favorite and I know my little grand daughter will adore this card, even though she is already a Princess.

I used this card for the base of my design:  Box Card Envelope Castle (SVG, Silhouette). You can see how that file sparked my idea for this card.

Thank you for stopping by today!

Have a great day!

Cathy

A Shaker Tutorial

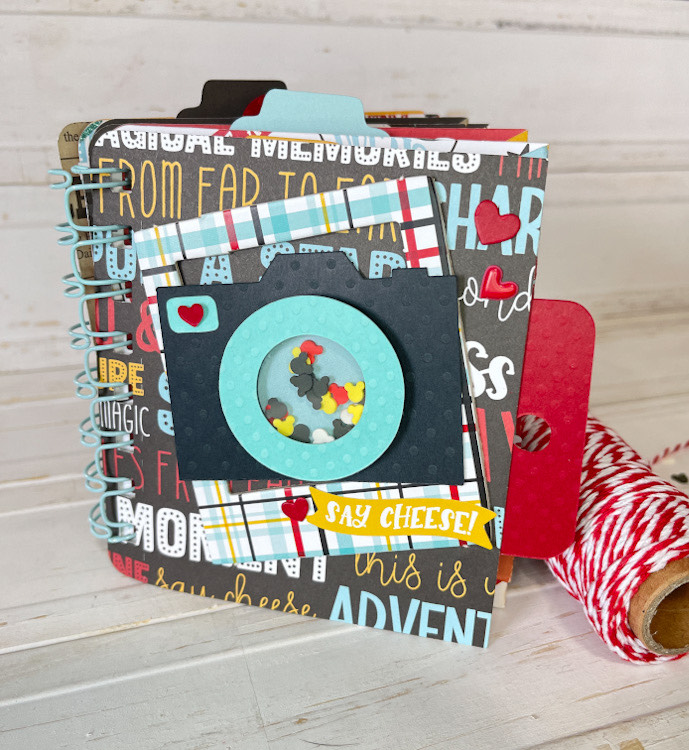
It’s no secret that I love to make shakers for my projects.  They are a go to in my Lori Whitlock library.  You can change up the sizes and customize your shaker for any project.  I thought I would share a quick tutorial with you.  I wanted to use Lori’s new Pocket Page Mini Album (SVG, Silhouette) using her Echo Park A Magical Place collection,  I just need the perfect embellishment for the cover, so I chose Lori’s Shaker Camera (SVG Silhouette)

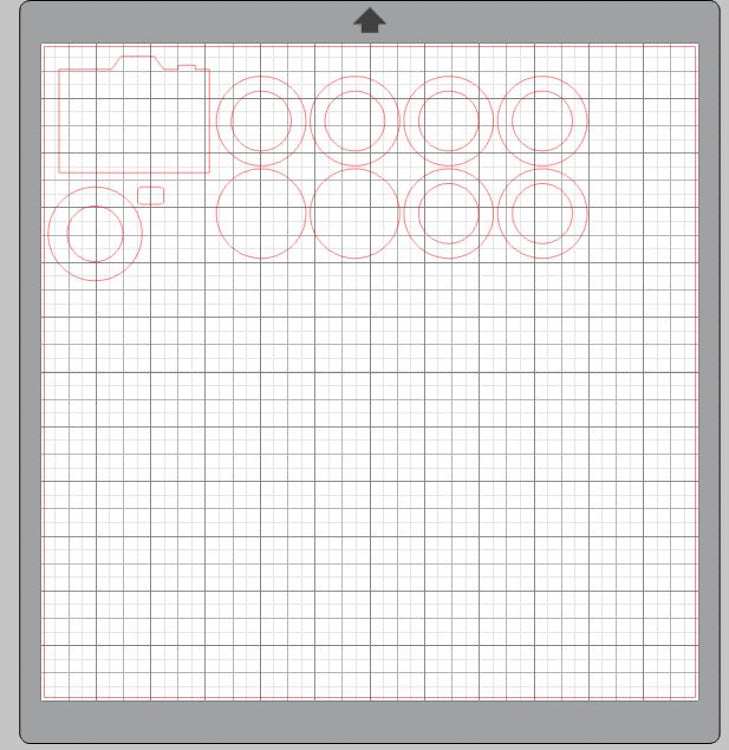
Here you can see how the file comes up on your screen.  I did not change this size at all, as I knew if would be a perfect fit for the cover of my mini!  You will just need to choose your colors, I did a black camera with a teal lens and button.  You will also need a piece of this acetate for your lens window.  I’m always amazed at how easily my machine cuts acetate.

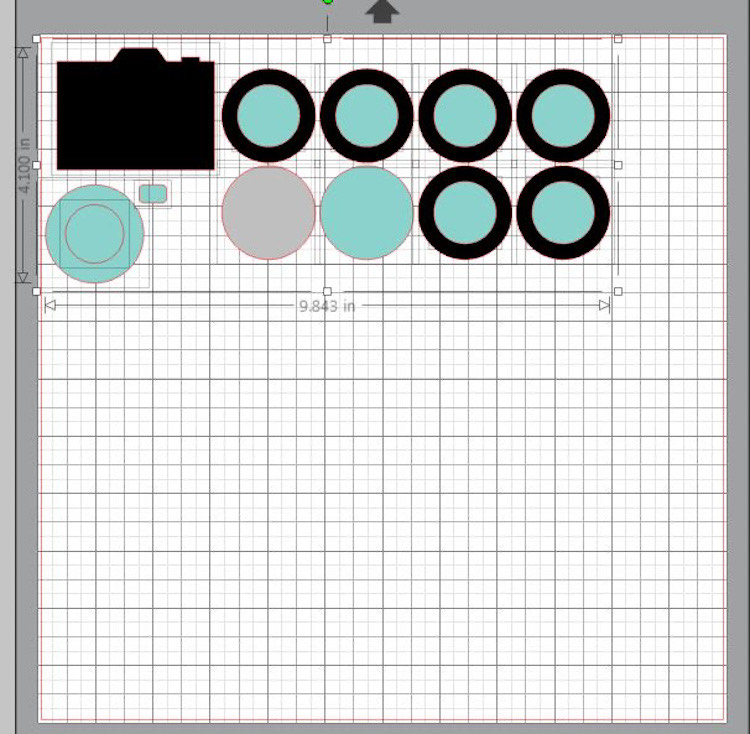
You can see the colors I chose.  Keep in mind that the inside of the black circles, where I highlighted them blue, will not be used in your shaker, nor will the inside teal circle,  The two complete circle’s are the back of your shaker leans, and the grey piece represents your acetate circle.

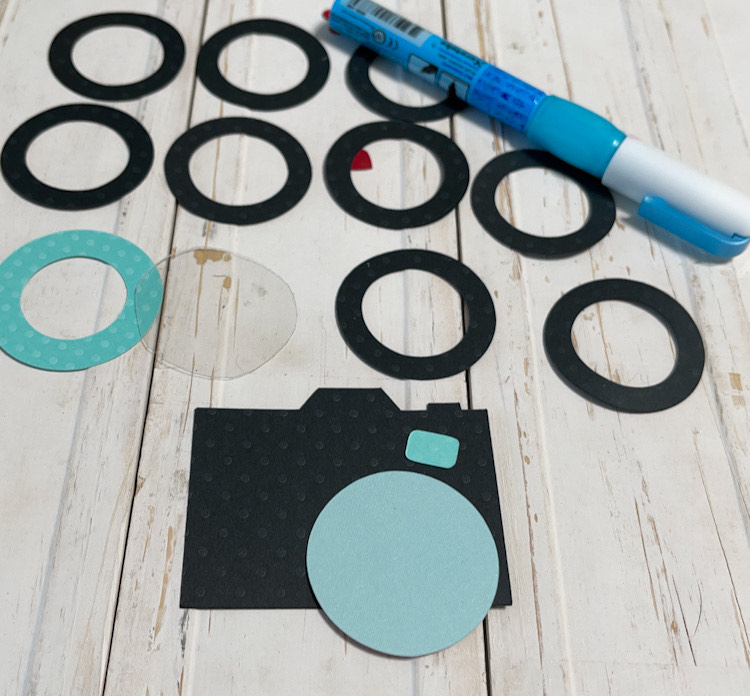
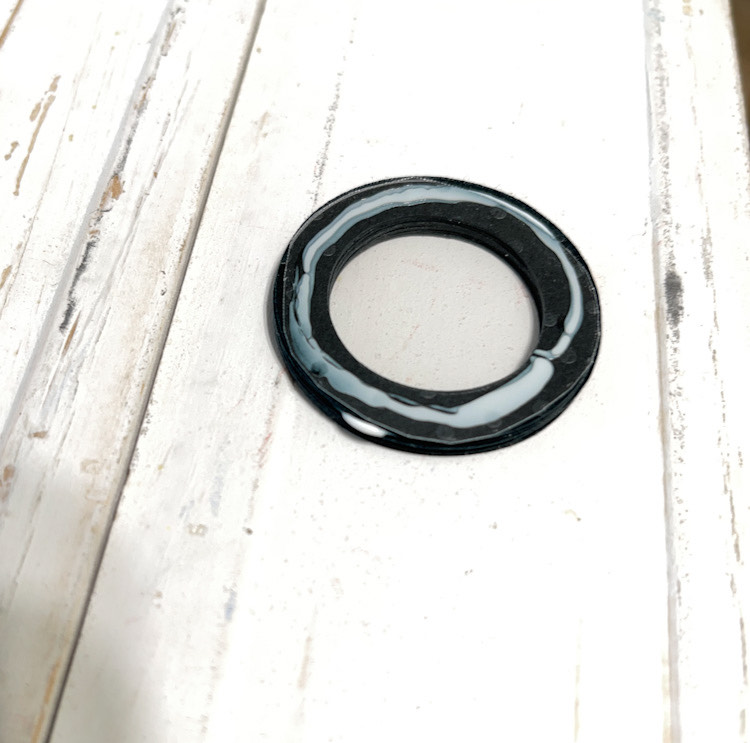
Here you can see all the circle’s that I cut.  Grab a glue pen and get to gluing a stack of circles together.

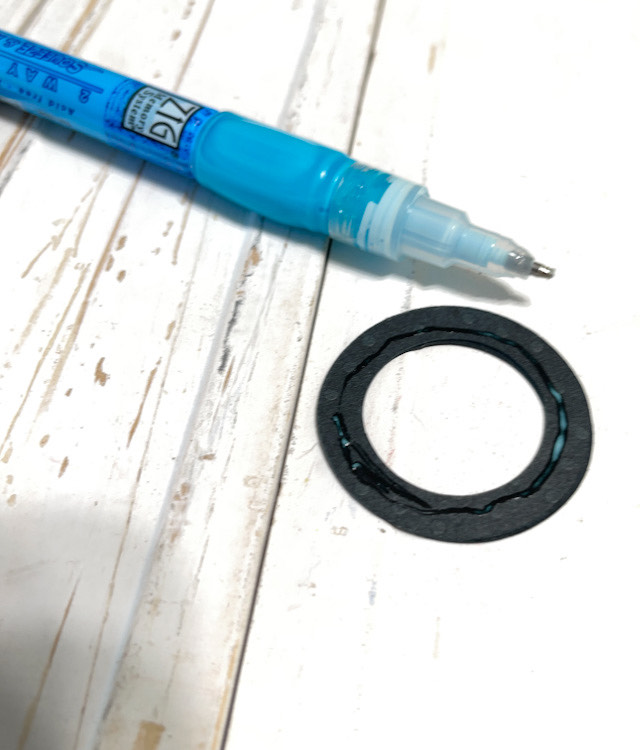
Layer or stack all your black circles up.

Keep stacking them up, you want to add quite a bit of depth so that your embellishments move freely in the shaker.

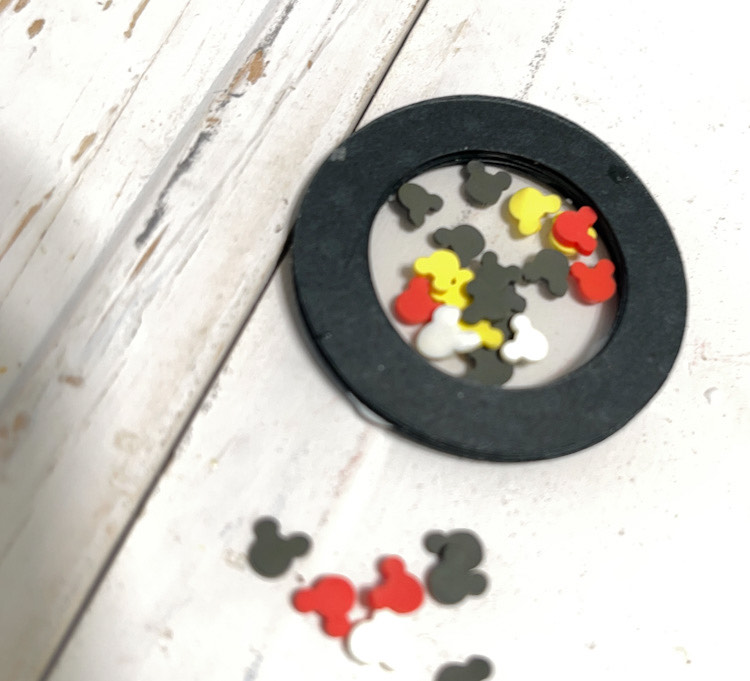
Add your acetate circle to the front of you stack of circles, fill with your embellishments and the glue on the back circle of the lens.  Center your little shaker lens on your camera piece and you’ve got the perfect embellishment.

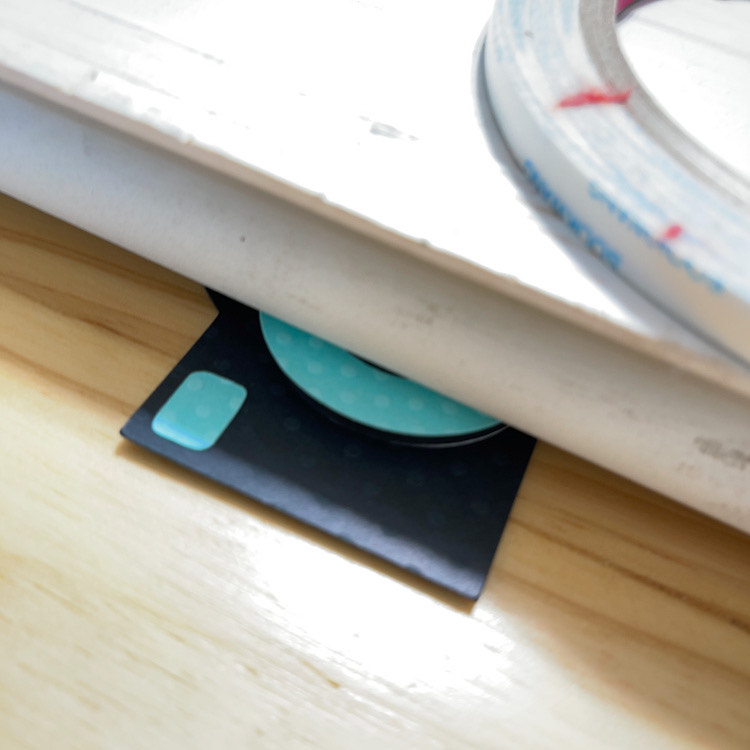
I always set mine under something heavy to make sure I get a good seal on everything so no little bits and pieces escape when someone shakes it up.  I let it dry for an hour or sol

How cute is this?!!!  I love it.  The shakers are just so much fun, they make everybody smile.  This is the cutest little book too.

I’ll share the book on my Facebook and Blog soon….here’s a sneak peek of the inside that features lots more of Lori’s files.

Have a great day!

Cathy