

Hi Everyone, it’s Kathy today with a tutorial showing how to customize the Perfectly Square Box (here in Silhouette) using the Fall Leaf Dingbats Font (here in the Silhouette Store). This little box is perfect for so many things, favors, place cards, treat holder. I thought it would be cute to cut a leaf shaped window in one side for fall to make little place markers for Thanksgiving.

I started by opening the Fall Leaf Dingbats Font in Silhouette. If you’re not familiar with the Dingbats Fonts, they have little pictures in place of letters. For instance the above leaves were added to my mat by typing the letters A, D, K, T, W, Z in the Fall Leaf Dingbats. (for a more comprehensive explanation of Lori’s Dingbat Fonts, see her YouTube video here.) These are the leaves I added to the above boxes.

Next, I added the Perfectly Square box to my mat.

The next step is to create the window. I started by creating 2 boxes using the shape tool. The first measured 2.4″ square (the size of one side of the box) and the second was 1.75″ square. I centered them together, made sure both were selected and using the Modify Panel selected Make Compound path. This not only groups the items, it makes them a single shape.
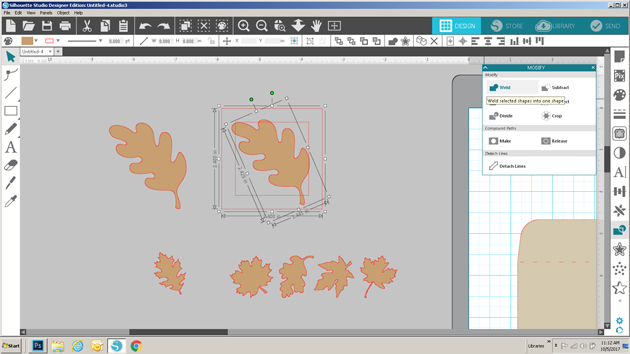
Next, I sized one of the leaves to fit into the inside of the frame I made. When doing this, you want to make sure that some of the leaf overlaps at least 2 sides of the frame. After it was placed where I wanted, I selected both the frame and the leaf, navigated to the modify window and selected weld. (if you want to add a leaf in a coordinating paper as I did, make sure to make a copy of the leaf shape before you weld)

The above picture shows the result of the weld. The next step is to add this window to the side of the box.

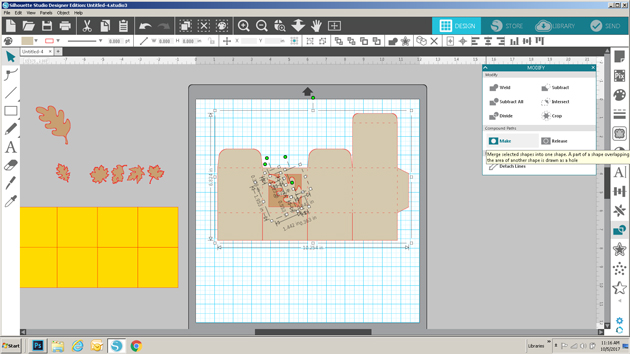
I started by moving the window to the front panel of the box file.

Once the window was in place, I selected the window only, navigated to the modify pane and selected release compound path. This breaks up the window into multiple pieces.

Being careful not to move any of the pieces, I selected only the outside square edge of the window, right mouse clicked, and selected delete. (You want to delete the outside edge so that it won’t be completely cut out of the box.)
Lastly, I selected the inside pieces of the window along with the box, opened the modify window and selected Make Compound Path. This makes the window a part of the box.

The box is now ready to be cut! I also cut a copy of the leaf in a coordinating paper and glued it to the outside.

The great thing about this technique is that you can do it to suit almost any holiday or occasion! That’s it for me today, thanks for stopping by to peek!
