
Hello Lori Whitlock fans!!! This is Courtney from Court’s Crafts here with a tutorial on Lori’s new Tulip Box Card! I made this card for upcoming Mother’s Day! I know, I know… I’m a little early but with three kiddos if I am not on top of it then it will never happen!
Step 1: Cut all pieces out with your Cricut Explore or Silhouette Cameo.

Step 2: Emboss green stems and leaves.

Step 3: Lori added the numbers on the tabs for you. This helps in two ways: ordering them from front to back on the card and also the numbers allow you to orient them so you can tell which is the front and which is the back of the piece.
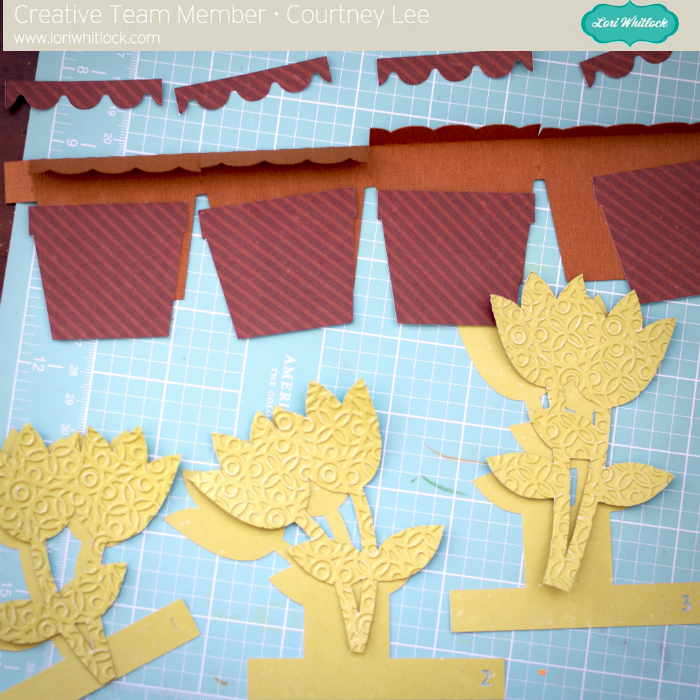
Step 4: Ink around the edges of the green stems and the tulip tops.

Step 5: Using foam adhesive tape, adhere the stems to the green backs.

Step 6: Add the first layer directly to the back of the front of the tulip box card.

Step 7: Using foam adhesive tape pick randomly which tulip tops you want popped and which ones you just glue down.
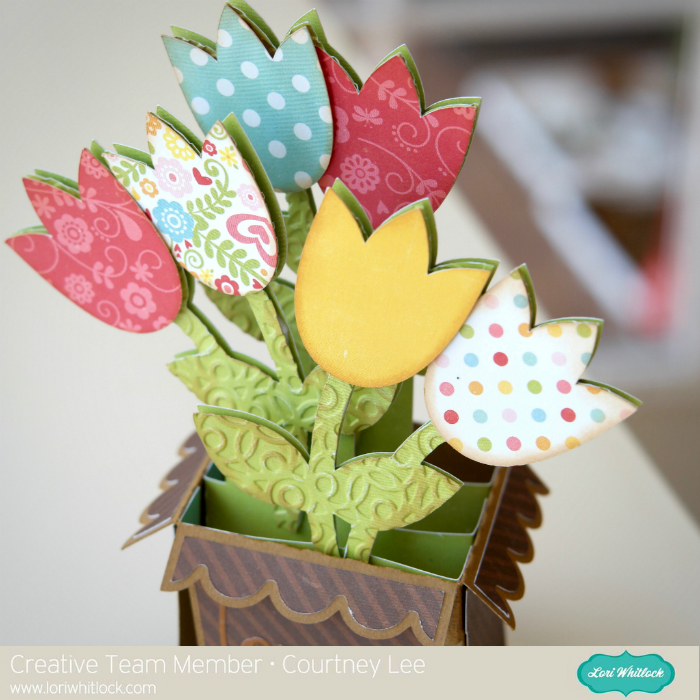
Step 8: Add your sentiment.

Enjoy your finished product!

Recipe:
Lori Whitlock for Echo Park: Happy Summer 6×6 Paper Pad (HS105023)
Lori Whitlock for Echo Park: Happy Summer Blue/Green (HS105018)
Lori Whitlock for Echo Park: Happy Summer Yellow/Teal (HS105019)
Lori Whitlock for Echo Park: Little Man: Cars (LM99004)
Cricut Explore
Lori Whitlock’s Tulip Cut File
Silhouette Store Tulip Cut File
What embossing folder was used?
What a beautiful Mother’s Day card. I think I will make one to go along with the flower pot I decorated for my mil