Pop-Up Cards with Cathy

Hi everyone!  Cathy here with you today and I am sharing a couple of quick cards that are super fun for the recipient.  Lori has several new A2 pop up cards in her shop and in the online Silhouette Design Store.  They are super fun and easy to put together, and I love that Lori color codes her files…it just makes creating so much easier.

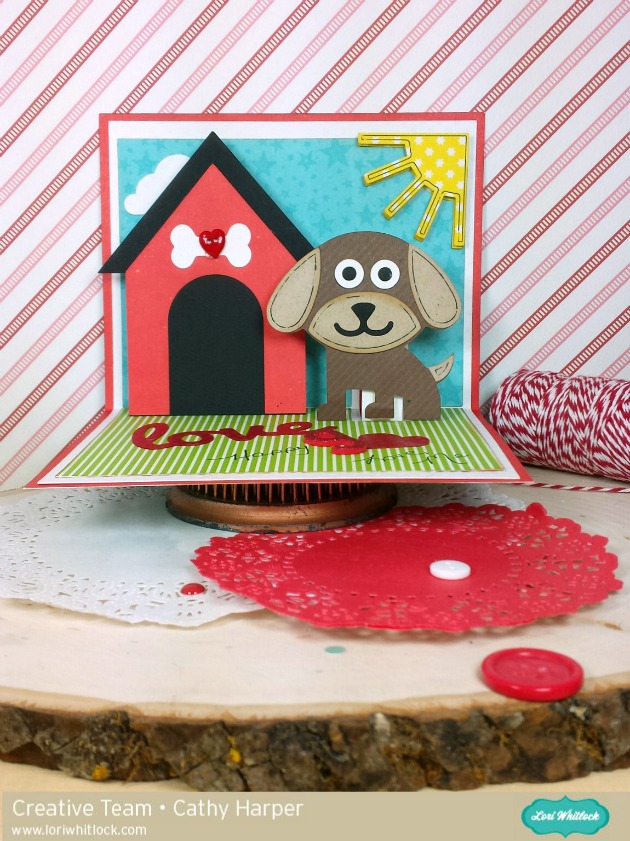
First up, I chose the A2 Pop-Up Dog/Dog House Card.  I used Lori’s Echo Park Little Man 6×6 paper pad for this adorable little card.  I used the Silhouette Sketch Pens on parts of the dog and the sun.  Just added that perfect finishing touch.  These cards fold flat for mailing and pop right back up as soon as your recipient opens them.

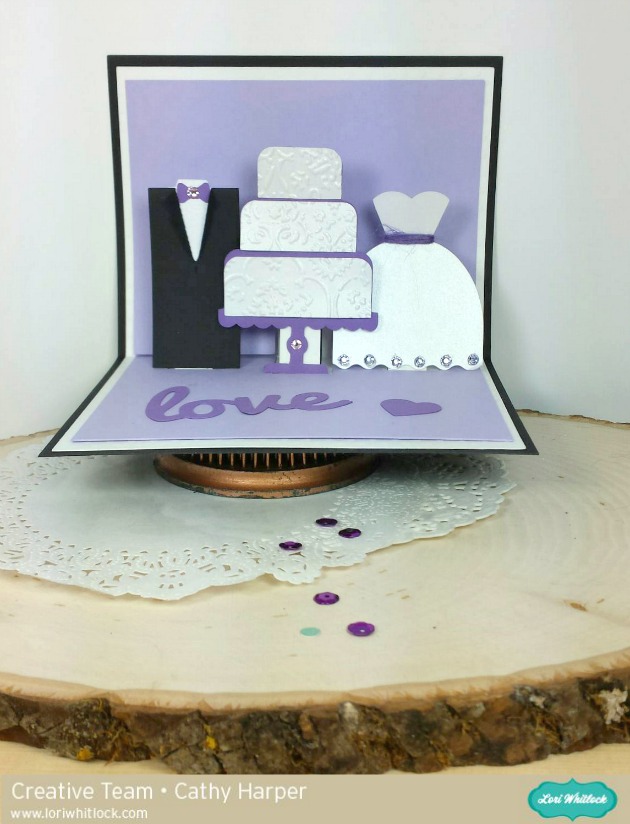
Next up, the A2 pop up Wedding Card.  So easy and amazing little details that Lori created with the little lapels that fold back on the tux. Way too cute!  I added a few lavender rhinestones, a bit of purple twine and embossed the cake.  Simple and elegant.

Thanks for joining us today, hoping you take time to create one of these fun pop up cards soon!

~Cathy 

Birthday Easel Card with Courtney

HELLO out there in bloggy world! This is Courtney Lee from Court’s Crafts with another super fun Lori Whitlock cut file example! Lori just came out with these easel cards a few weeks ago. My grandma’s 86th birthday just happened and I made this for her.

I grabbed the A2 Easel Birthday Cake file and Lori’s Jack and Jill – Jill Collection for Echo Park and went to work! 🙂 The colors of this collection are so bright and happy! The neutrals in the collection  meant that I didn’t even have to pull out other cardstock. 🙂 Love it. The first thing I did was to stitch around the outside of my frame on top. I loved the old fashioned nature of these prints and wanted to add to that feel.

I stamped my sentiment second. You don’t have to. The cut file comes with the Happy Birthday sentiment that can be cut out letter by letter. 🙂 Lori has you covered! I popped the sentiment piece up on the pennant base and then popped that whole thing up.

I LOVE dimension. I think it just adds so much to have that depth to a card. I popped the flame and you can see the layers popped here as well. This card comes together so easily!

I also added twine to the balloons to “anchor” them to the bottom of the card. I popped the balloons as well.

We always see easel cards when they are open but I wanted to show you the card closed as well to show you how pretty it is. I feel like not all cards are designed where they are attractive when they are closed as well as open. Here you can see that right when it is taken out of the envelope your recipient will be impressed!

As you can see this is a gorgeous card that can be made with masculine prints just as easily as girly ones. I’ll be pulling out this cut file again and again!

Link to the file in Lori’s Store

Link to the Silhouette Store

Do Something Every Day that Makes You Happy

Hi everyone! It’s Karin and today I’m going to show you how to place permanent vinyl on a travel mug using this cutting file by Lori Whitlock below.

LW-Enjoy-Life-Happy-Make-Sense

I made the decal for this travel mug using Cricut’s brand new Premium Outdoor Glossy Vinyl.

20160222-_MG_5107-Edit

After downloading the file from Lori Whitlock’s store, I uploaded the image into Design Space.

20160223-2016-02-22_19-23-58

I resized the image to 5 inches tall to fit my travel mug.

20160223-2016-02-22_19-26-18 (1)

After resizing, I ungrouped the elements so that I could change the colour of the banner.

20160223-Screenshot 2016-02-22 19.28.19

I selected the banner, clicked the scissors icon in the Layers panel and then changed the colour of the banner to white.

20160223-2016-02-22_19-31-29

I pulled the white banner away from the text so that I could attach the text.

20160223-2016-02-22_19-34-02 (1)

I selected all of the text, right clicked and selected Attach. You must do this if you want everything to be cut as displayed on the screen.

20160223-Screenshot 2016-02-22 19.35.26

When all of this was done, I clicked Go and Design Space arranged my cut files onto mats by colour.

20160223-2016-02-22_19-36-31

20160223-2016-02-22_19-37-02

I placed the two colours of vinyl on mats and cut them with my Gold Cricut Explore Air one after another.

20160222-_MG_5106

This was a really fun project. Lori’s inspirational quote is a great reminder to find time to do fun things (not that I need reminders to craft). Also, Cricut’s new vinyl was great to work with.

See you again in two weeks!

One Buck Wednesday at Snap Click Supply

Today at Snap Click Supply I have two items featured for $1 on Wednesday!. That means you can pick up 2 of my digital scrapbooking products at a steal. TODAY ONLY!

Easter Friends Paper

Easter Friends Elements

Be sure to go grab these great deals while you can. These offers will end at midnight!

And don’t forget about the This week’s FREEBIE with purchase that I announced yesterday, THIS SVG file is FREE with a $1.99 purchase! Simply add the Bunny Tote to your shopping cart along with any $1.99 purchase from my SVG Shop and use code BUNNY. Your cart must reach at least $4.98 before the coupon will be applied and then $2.99 will be subtracted from your total at checkout. The files will be available for immediate download after you pay for your order by visiting the “downloads” section inside of your account. This offer is good through Sunday at midnight! In addition, all new files in my SVG Shop are also 25% off through the weekend!

Have a great day!